Copernicus IS2 User Manual
Page 12
IS2 - Version A - Released 02 August 2013 - Copernicus Educational Products Inc.
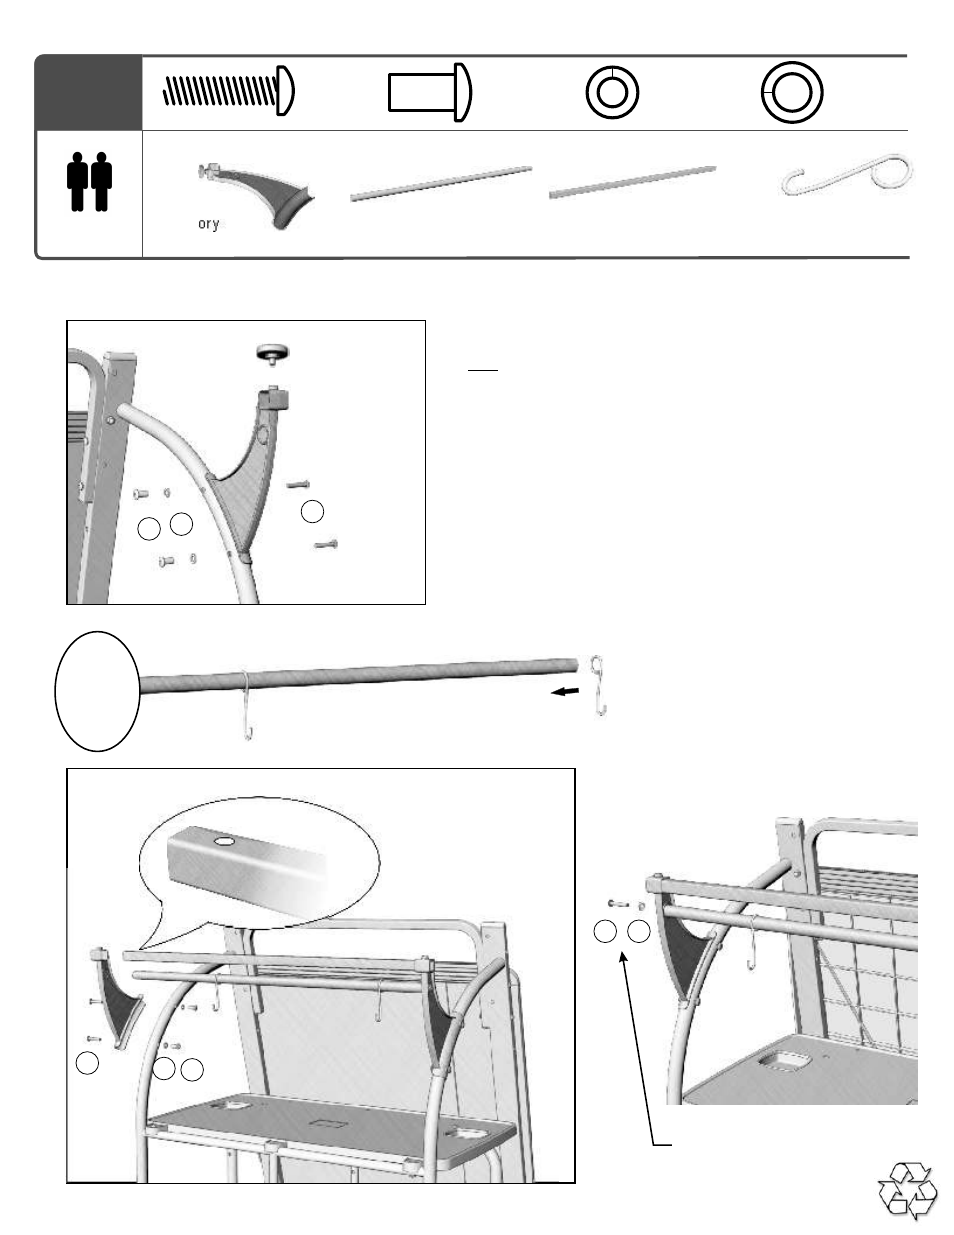
1. Unfasten the Knob from the bracket and put aside. Align
one Accessory Rod Bracket with the holes in the Upper
Rear Frame. Fasten.
2. Slide the Rear Whiteboard Hooks onto the Round
Accessory Rod
(Detail ‘A’)
3. Slide the Square Accessory Rod and the Round
Accessory Rod into their locations, ensuring hole on
square rod is turned upwards and Rear Whiteboard
Hooks are facing away from the unit. Cap the other end
with the second Accessory Rod Bracket. Fasten.
4. Fasten the ends of the Round Accessory Rod to the
Accessory Brackets Fasten.
Detail ‘A’
!
12
Install Accessory Rods
2 Person Task
Accessory
Rod Brackets & Knobs x 2
Round Accessory Rod
x 1
Square Accessory Rod
x 1
Rear Whiteboard Hook
x 2
You will need:
(Not to Scale)
x 6
x 4
D
x 4
H
F
Actual Size:
!
!
Ensure hole is
turned upwards
Note Hook
orientation
!
Remove
Knob first
1
2
3
4
H
H
F
F
D
D
D
G
x 2
G
!
Repeat on other side.
12