B&M 70226 TRANSKIT FOR GM 4L80E TRANSMISSION User Manual
Page 7
7
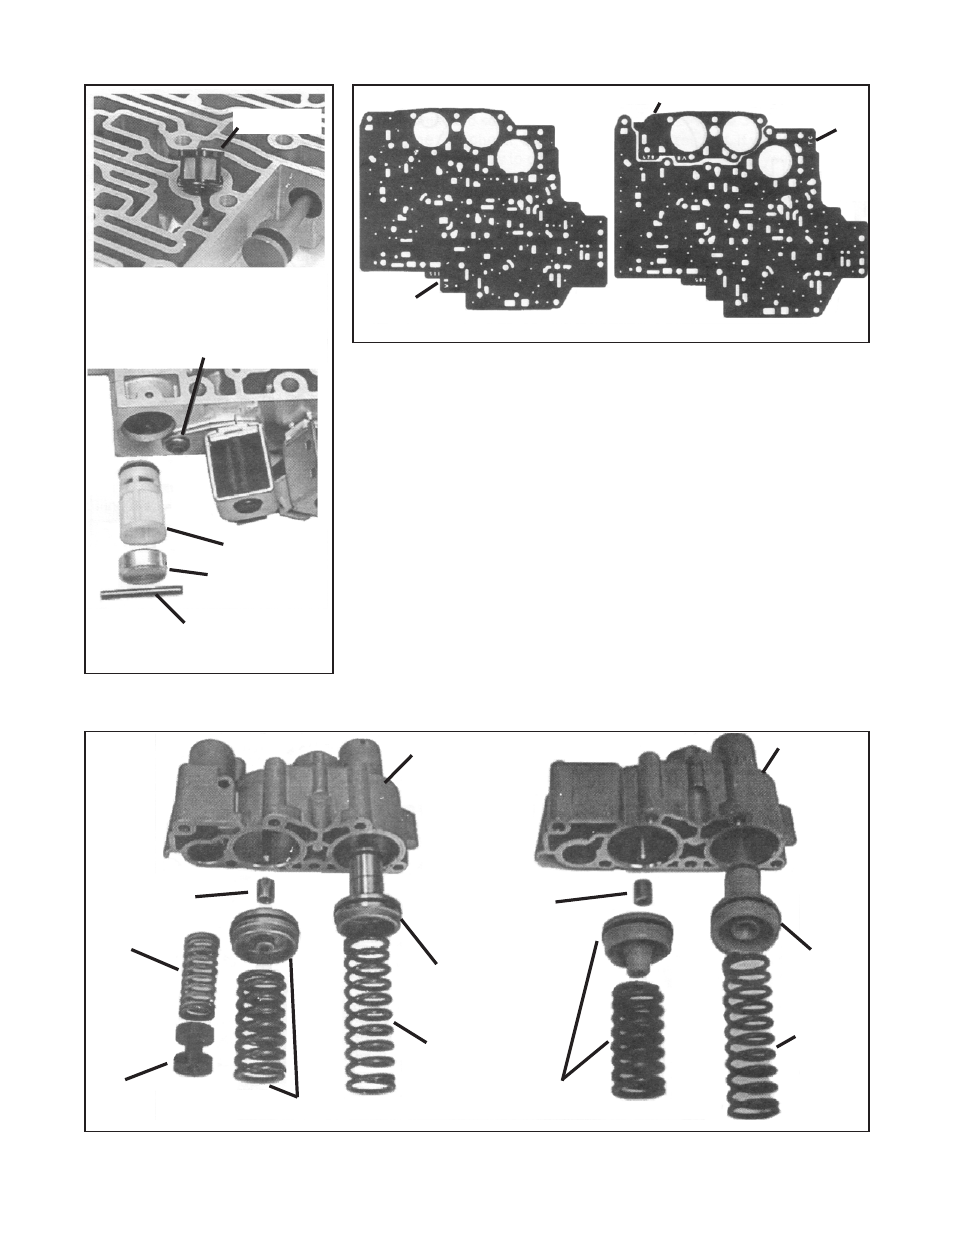
Valve Body To Spacer Plate Gasket
VB
Accumulator Housing Gasket
Spacer Plate To Case Gasket
TC
Figure 5: Spacer Plate Gaskets
PCS Filter
You may have to
loosen screw and
rotate the Shift
Solenoid to remove
the SSF Filter
SSF Filter
Filter Bore Plug
Plug Retaining Pin
Figure 4: PCS and SSF Filters
1991-1993
Accumulator
Housing
1994 & UP
Accumulator
Housing
4th Accumulator Spacer
HD 3/8” WHITE
HPS 1/2” ORANGE
4th Accumulator Spacer
HD 3/8” RED
HPS 1/2” GREEN
Figure 6. Accumulator Assembly
3rd Accumulator
Piston
3rd Accumulator
Piston
TS Compensator
Spring
TS Compensator
Piston
4th Accumulator
Spring & Piston
BLUE 3rd
Accumulator
Spring
4th Accumulator
Spring & Piston
BLUE 3rd
Accumulator
Spring
guiding the Detent Lever Pin into the
Manual Valve groove. Push the Valve
Body firmly against the Case and install
one (1) screw, finger tight, in the center
of the Valve Body to hold it in place. In-
stall the Pressure Switch Assembly with
six (6) M6 x 55mm x 8mm Hex head
screws. Install the Lube Tube, remain-
ing clips and Dip Stick Stop. When all of
the screws
have been installed, torque
them to 11 Nm (8 lb ft) starting in the
center and working circularly outward.
Attach wire loom electrical connec-
tors.
STEP 18. Install the new oil filter with
seal provided in kit (See Fig. 1) into
the case.
STEP 19. DOUBLE CHECK THE FOL-
LOWING:
1. Manual Valve Body is properly en-
gaged with pin on detent lever.
2. All bolts are installed and torqued.
3. Wiring harness connectors are en-
gaged to switch assembly and sole-
noids.
4. Pressure Regulator Retaining Ring
is fully seated in its groove.
STEP 20. Coat the Oil Filter pickup
tube with clean ATF then push the tube
into the filter seal in the case. Install
the Oil Pan and Gasket then torque
the seventeen (17) bolts to 24 Nm (18
lb ft). Fill transmission with ATF to
the full mark on dip stick. You will
need about 6 to 7 quarts. Dexron®III