B&M 20260 SHIFT IMPROVER KIT User Manual
Page 5
5
metal gasket supplied with kit. Install
the two (2) 1/4-20 bolts FINGER TIGHT.
Remove the pan bolt you used to hold
the plate and gasket in place.
Square can solenoid: Make sure the
rubber seal is in good condition and has
no nicks or cuts (See Fig. 13). If the
seal is damaged, you will have to re-
place the solenoid. If the seal leaks the
transmission will be in passing gear all
the time. Install the solenoid into posi-
tion, DO NOT use the metal gasket
supplied in the kit. Install the two (2) 1/
4-20 bolts FINGER TIGHT. Remove
the pan bolt you used to hold the plate
and gasket in place.
STEP 12. Insert the governor tubes into
the valve body (See Fig. 6). Lay the
lower valve body gasket (has “VB”
punched in it) into position on valve
body (use grease or petroleum jelly to
hold it in place). Make sure the manual
valve is in its bore. Install valve body
onto transmission guiding the governor
tubes into their holes at the rear of
case. Push up on valve body and tubes
and engage the manual valve on the
shift linkage. Install one bolt to hold
valve body in place.
STEP 13. Install all the valve body bolts
finger tight. Make sure the detent
spring is in position and riding on the
internal shift lever (See fig. 5). Make
sure the manual valve is engaged with
the pin on the internal shift lever. Tighten
all valve body and solenoid bolts to 8-10
lb.ft. (11-13.6 Nm). Route the white
spark control wire and connect to pres-
sure switch on valve body. Check op-
eration of manual valve by running range
selector through all gear positions.
STEP 14. Inspect your filter for damage
or clogging. If it has more than 20,000
miles on it we recommend it be re-
placed. For longer transmission life and
improved pump operation install B&M
Filter Service Kit No. 20287.
STEP 15. Install two filter O-rings on
filter pick-up tube (See Fig. 14). Lubri-
cate O-rings with clean ATF then push
pick-up tube and filter assembly up into
transmission. On 1968 and later mod-
els install filter spacer (if present) and
shoulder bolt then torque to 10 lb.ft
(13.6 Nm).
STEP 16. Clean oil pan and scrape off
any old gasket material from pan and
case. You may want to install a B&M
Drain Plug kit before installing the
Figure 13
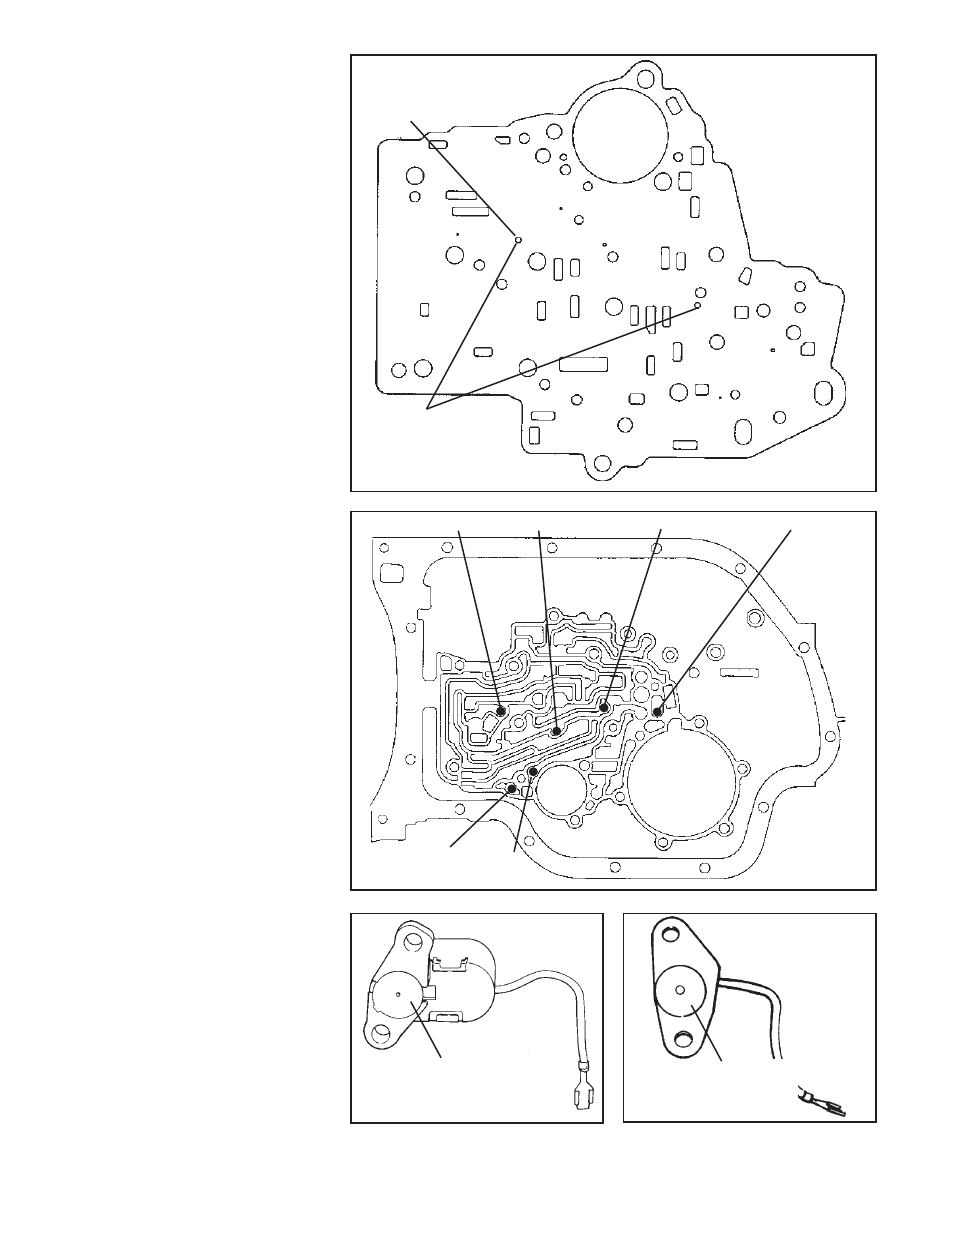
Figure12
Figure 10
Drill orifice to 3/16"
(.188") hole in these
positions for street level
only.
#1
#2
#5
#3
#6
#4
Oval can solenoids: Check to make
sure orifice disc is correctly seated
in detent solenoid housing.
Square can solenoids:
Check to make sure rubber
seal is in good condition.
Figure 11
Drill orifice to 5/32"
(.156") hole in this posi-
tions for heavy duty only.