AVer SF1031W User Manual
Page 61
53
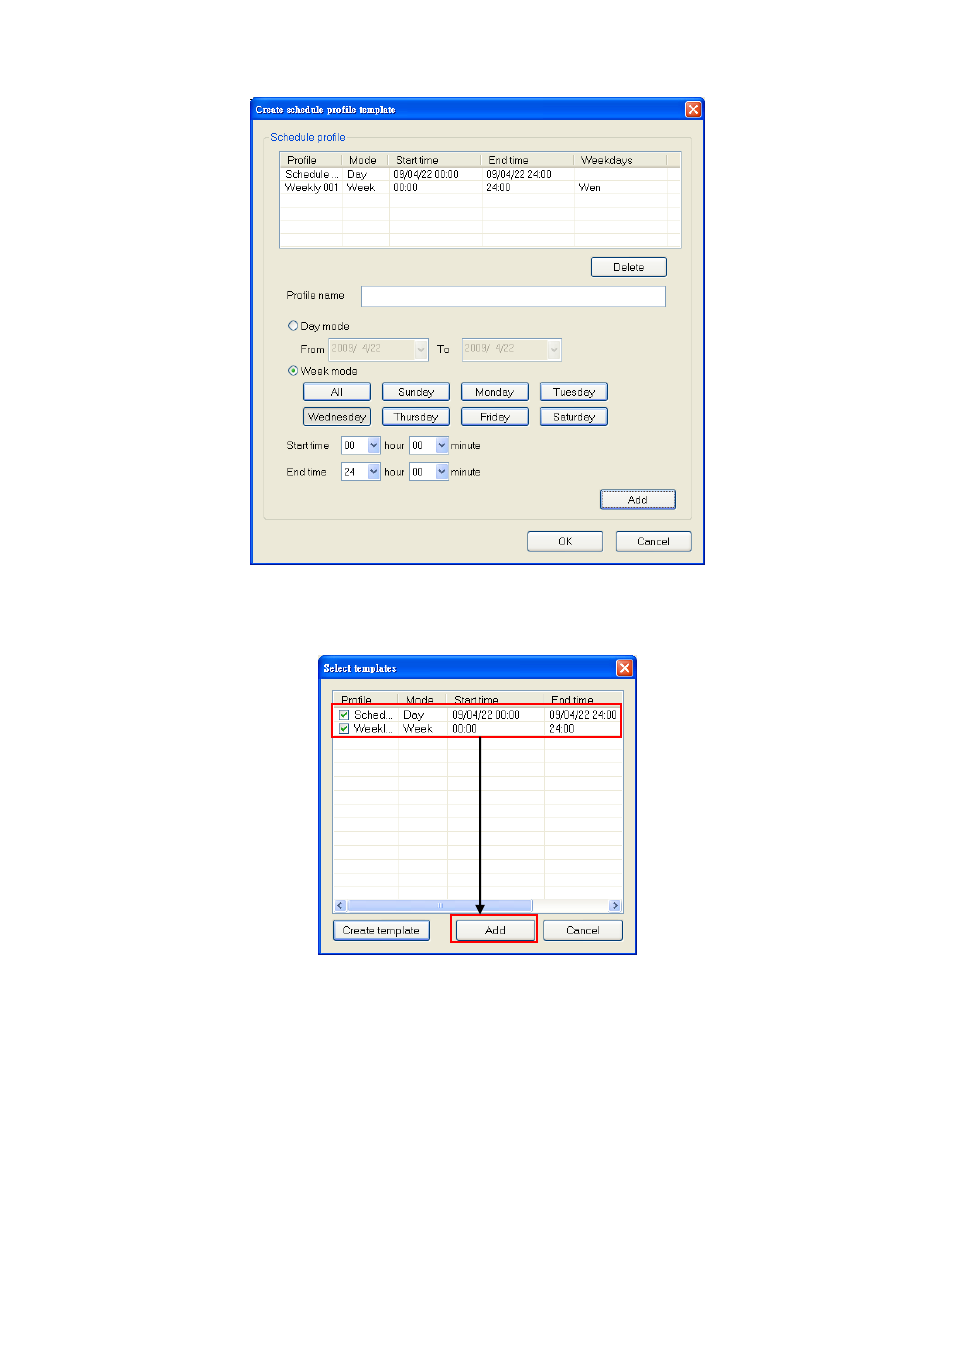
7. Click
OK to save the recording schedule settings.
8. To delete the schedule, select the schedule and click Delete.
9. After setup the recording schedule, user should see all setup schedules in Select template windows.
10. User must select the schedule in order to activate the schedule. Click the Add to add the select schedule.
11. In Camera setup windows, click Apply to complete the schedule record setting. If user wants to use the
selected schedule to all cameras, click Apply to all cameras.
C. Setup a motion detection area
1. Click
Configure motion detection area to set an area for motion detected.
2. Mark
Activate MD to enable the motion detection.
3. To
adjust
Sensitivity, enter the value( 1 ~ 100%). The higher the value, the finer the sensitivity is detected.
4. Select
Drawing area and drag to select the area of motion detection. The selected area will appear a red
box. To clear the selected area, select Erase area and drag on the selected area to clear. To clear all
selected motion detected area, click Clear button. Click Save setting to complete the setup.
5. Click
Exit to back to Motion detection interface.
6. In Camera setup windows, click Apply to complete the schedule record setting. If user wants to use the
selected schedule to all cameras, click Apply to all cameras.