AVer SF1031W User Manual
Page 24
16
3.2
Familiarizing the Function Buttons in Live Video Viewer
On the IPCamWizard interface, select the IP camera that has been found on the network and click
to
connect with IP camera. When authentication dialog show up, enter the ID(default is admin) and
Password(default is no password) to login the camera.
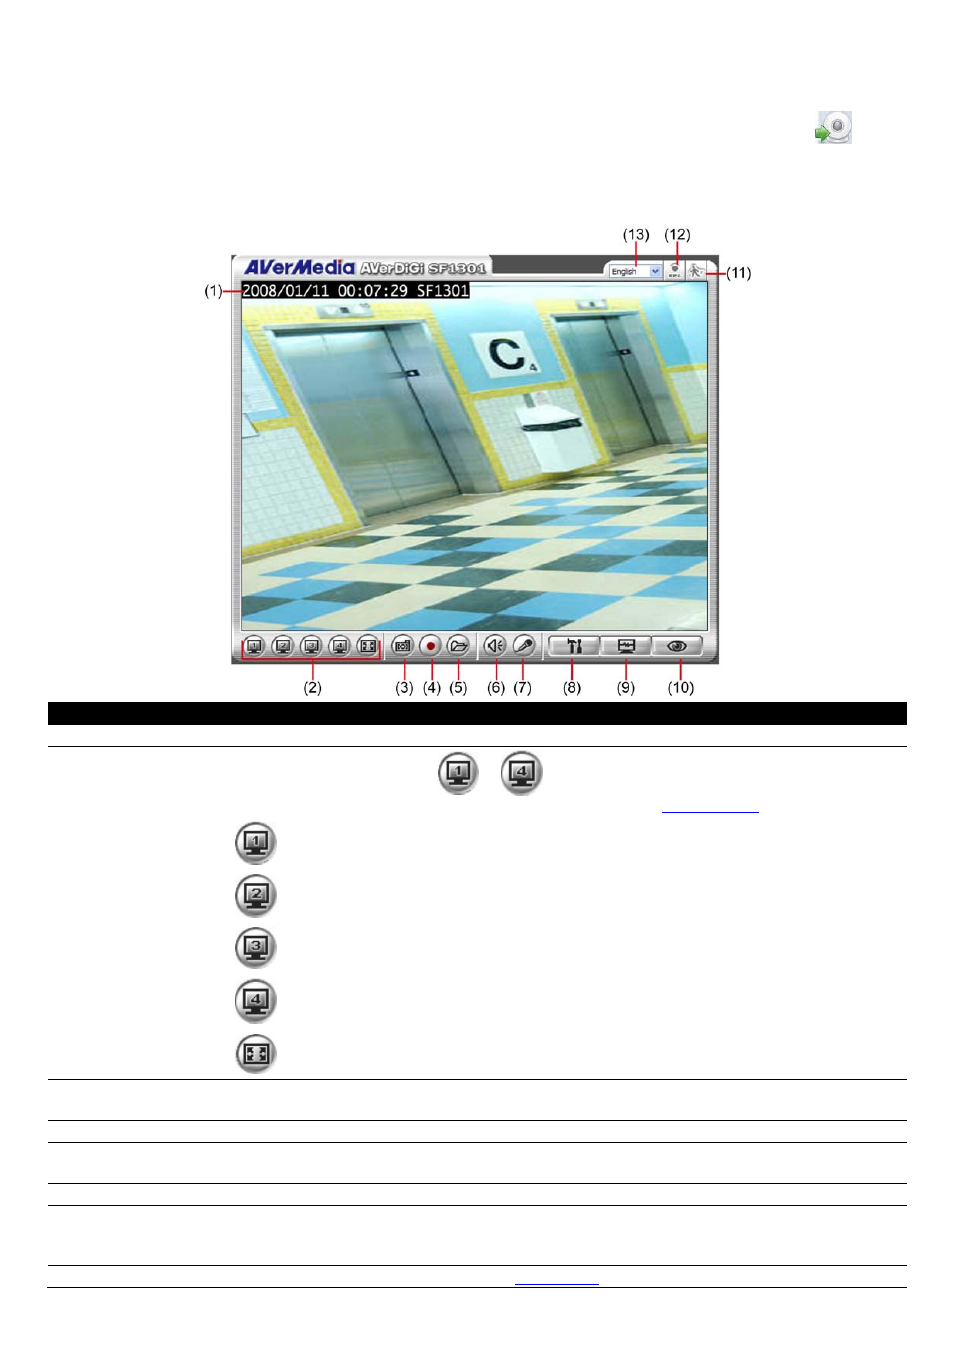
After connection has been made, the live video viewer will appear as following illustration shown.
Name
Function
(1) Camera Info
Display current date, time, and name of camera.
(2) resolution mode
Click the resolution buttons (
~
)to view. The buttons of resolution values may
change depends on the Video and Audio Setting(see also
Chapter 3.3.5
)
640 x 480, 30FPS, and MPGE4(default)
320 x 240, 30FPS, and MPGE4(default)
640 x480, 10FPS, and JPEG(default)
160 x 120, 5FPS, and MPGE4(default)
Full screen mode. Press ESC can switch back to the original display mode.
(3) Snapshot
Capture a video image. The image will pop up in new windows. User may save the image to
a local hard drive.
(4) Record
Recording the video
(5) Storage Path
Set a storage path for saving recorded file. The default storage path is created when the Live
Video Viewer is activated.
(6) Audio
Enable/disable sound.
(7) 2-Way Talk
Enable/disable 2-way audio function. This function allows the user site and camera site to
talk via internet using MIC. Make sure your microphone and speakers work before using this
function.
(8) Setup
Setup the IP camera settings (see also
Chapter 3.3
).