Familiarizing the webviewer buttons, Chapter 7.1 #6, Chapter 7.1 #6) – AVer SA series User Manual
Page 191: 1 familiarizing the webviewer buttons
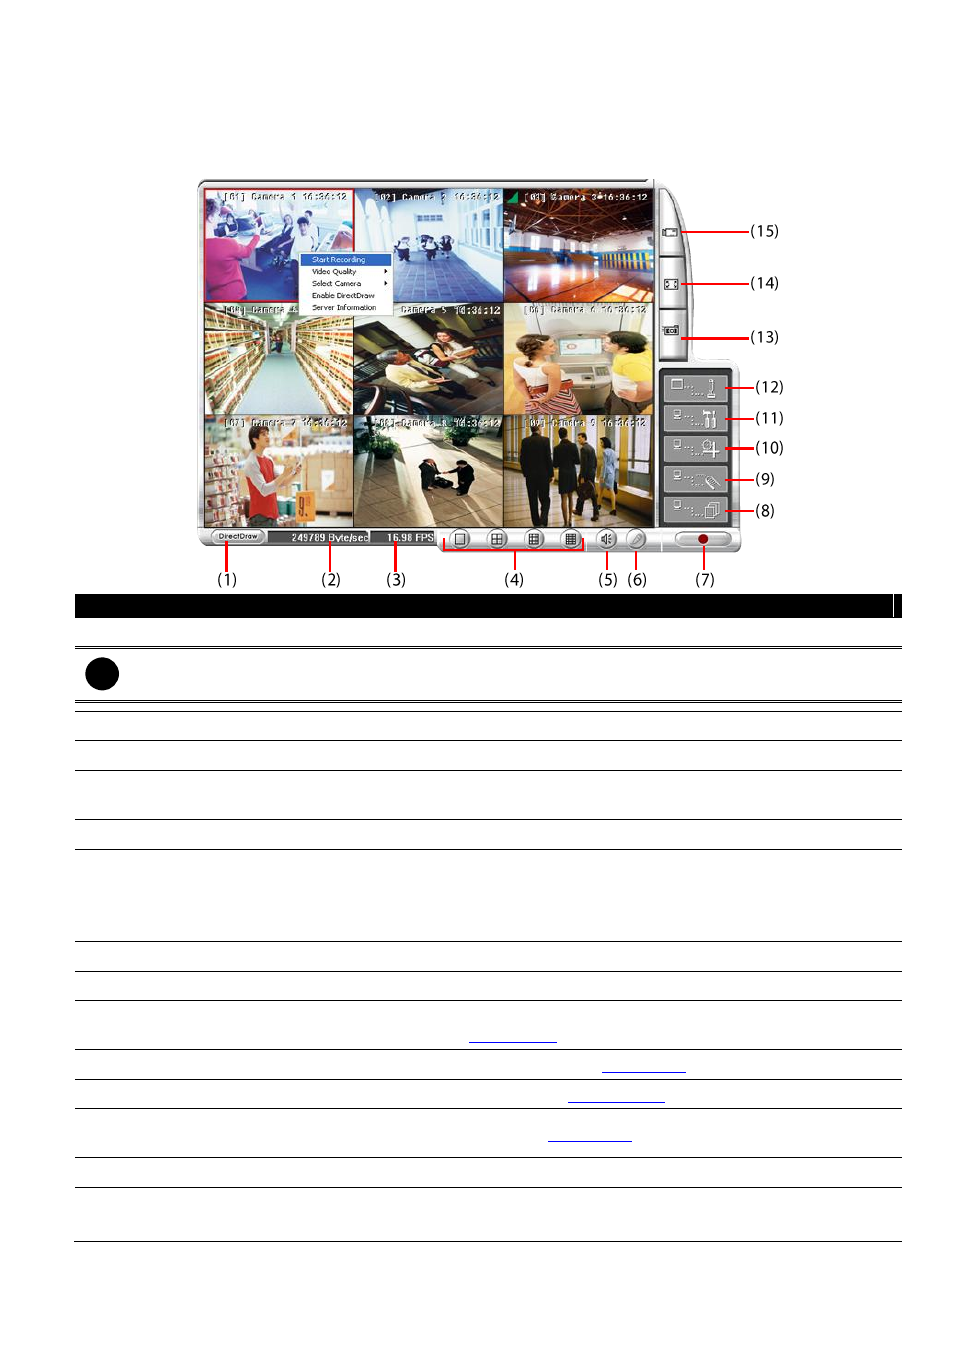
183
7.1
Familiarizing the WebViewer Buttons
Right-clicking on the webcam video screen, enables you to Start Recoding, Video Quality, Select Camera,
Enable DirectDraw, and view Server Information.
Name
Function
(1) DirectDraw
Enhance the video quality.
i
Not all graphic cards can support this function.
(2) Received file size
Indicate the size of the data being sent per second.
(3) Camera frames
Indicate the number of frames per second.
(4) Split display mode
Select from six (4) different split screen types to view all the cameras. It also allows you to
switch and view different camera number.
(5) Audio
Enable/disable remote sound.
(6) 2-Way Talk
Enable/disable 2-way audio function. This function allows the client and server to talk via
internet using MIC.
Make sure your microphone and speakers work before using this function. If the DVR
server Talk to web-
client setting is disabled, you won’t be able to hear from the other side.
(7) Record
Save the video of the selected camera in AVI format.
(8) Event Log Viewer
Display the Event logs, Operation logs, POS logs, System logs, and Network logs.
(9) Remote Console
Initiate Remote Console. The interface is the same as DVR application and allows you to
control DVR server (see also
Chapter 7.2
).
(10) Remote EMAP
Display the DVR server EMAP screen (see also
(11) Remote setup
Change the DVR server settings (see also
).
(12) Select a PTZ
camera
Initiate PTZ camera controller (see also
Chapter 7.2
)
(13) Snapshot
Capture and save the screen shot in *.bmp format.
(14) Full screen
Use the entire area of the screen to only display the video.
To return, Right click the mouse or press ESC on the keyboard.