AVer EVC900 User Manual
Page 10
7
Zoom
Layout
Vol
Presentation
(1)
(3)
(4)
(7)
(5)
(10)
(12)
(14)
(16)
(20)
(22)
(23)
(2)
(6)
(9)
(8)
(11)
(15)
(18)
(17)
(21)
(25)
(24)
(13)
(19)
Name
Function
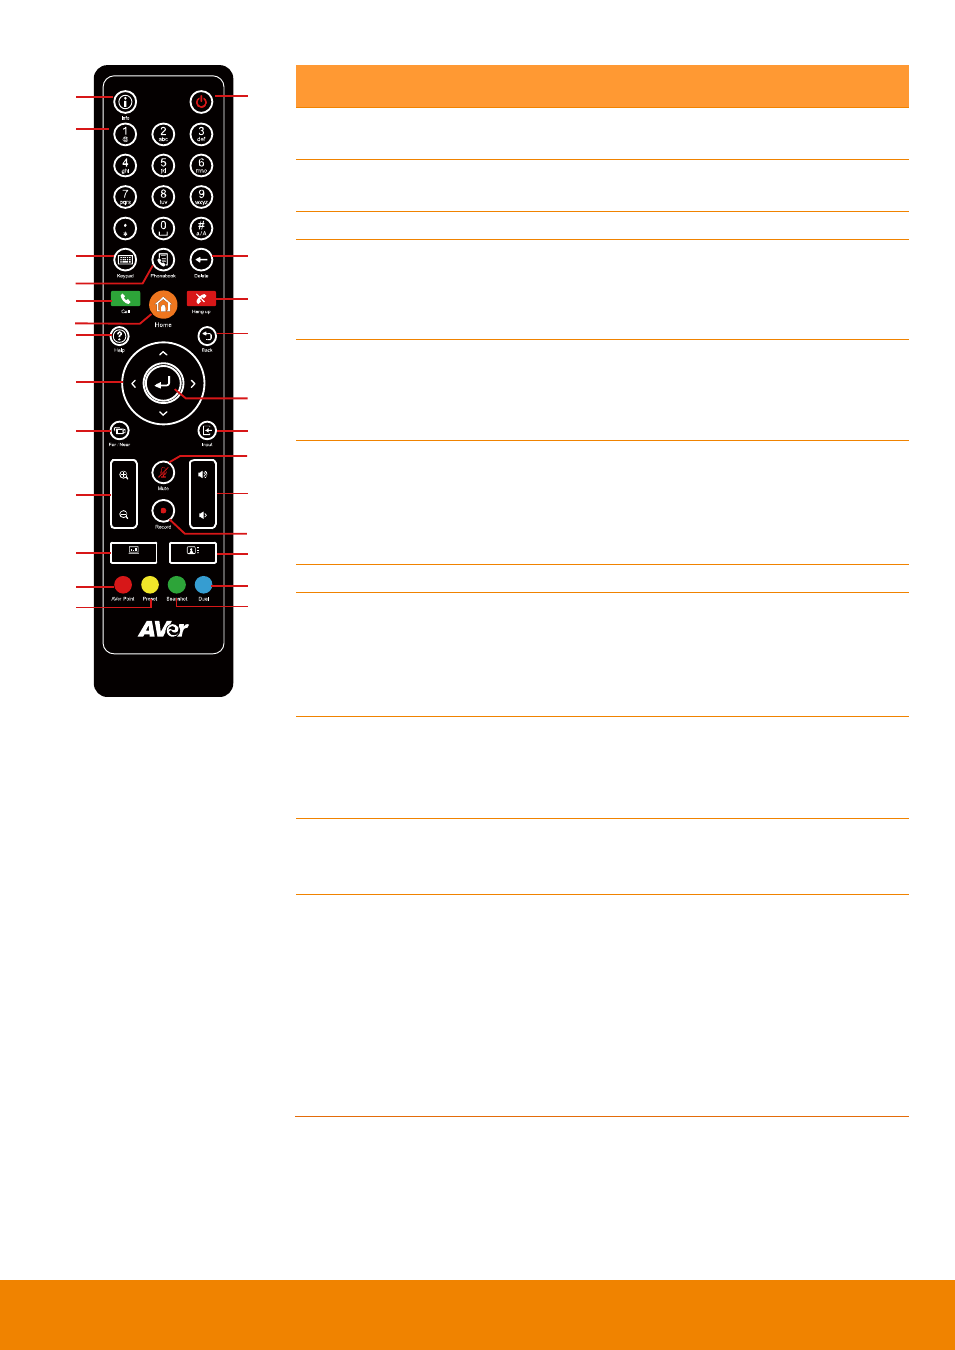
(15) Input
Switch screen display between camera
screen and input source screen.
(16) Zoom +/-
Increase/decrease the camera zoom or the
captured image magnifications.
(17) Vol +/-
Increase/decrease the speaker volume.
(18) Mute
Mute/Unmute the MIC. The mute icon will
appear when the MIC is muted. The mute
icon will become translucent after enabling 5
sec.
(19) Record
Start/Stop video recording. The video
recording can only be saved to a USB flash
drive. You do not need to be on a video
conference to record.
(20) Presentation
Share the content that comes from either the
VGA input source or the DVI input source.
The present icon will appear on the screen
when the presentation function is enabled.
The icon will disappear after 5 sec.
(21) Layout
Change the screen layout.
(22) AVer Point
Specified for some special functions. For
example, on the Phonebook configuration
screen of EVC application, press this button
to create a new Group. (AVer Point To be
developed)
(23) Preset
Press and hold for 3 sec. to set the position of
the camera to a preset from 0~9.
Press to move the camera to a selected
preset point number.
(24) Snapshot
Capture the image from the camera. To view
the captured image, press Present button.
(To be developed)
(25) Dual
Switch to dual screen mode. This splits
the video conferencing screen and
present screen onto two separate
monitors
(two
monitors
must
be
connected to use the feature, one
through
HDMI
and
one
through
VGA/HDMI-2).
Press and hold can switch to OSD menu
between primary and secondary screen.