Alumax W1 User Manual
Page 8
4
10
1
2
3
10
INSTRUCTION MANUAL
8
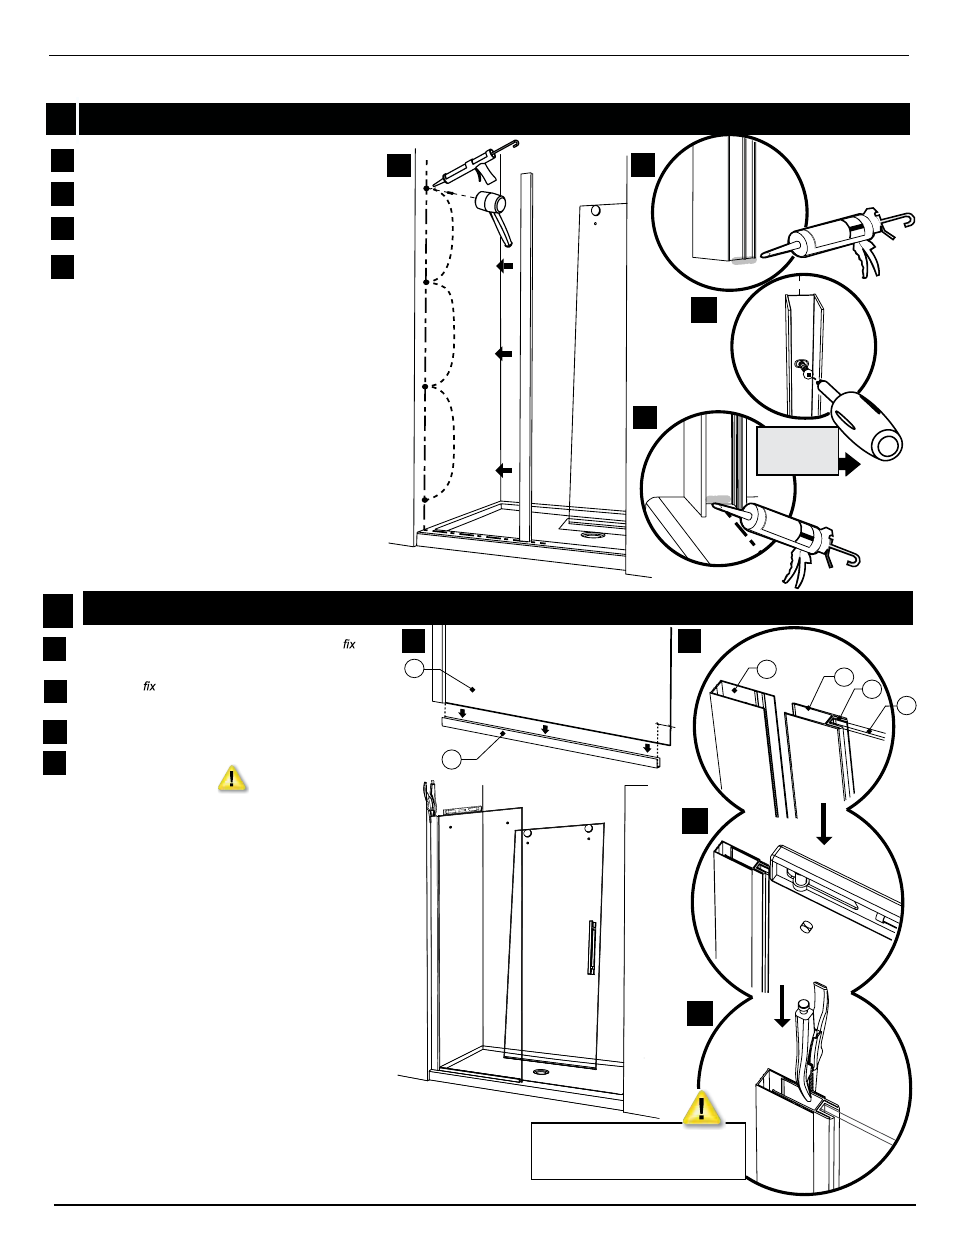
Place U-chanel (4) temporarily on bottom of panel
(10).
Slide the panel (10) pre-assembled with expander
(2) and gasket (3) into the wall jamb (1).
Level the glass panel assembly with the wall jamb.
Lock into position by clamping the wall jamb and
expander with pliers.
2 WALL JAMB INSTALATION
FIXED PANEL
COVER THE PLIER’S TEETH BEFOREHAND TO AVOID
SCRATCHING THE ALUMINUM PARTS.
Insert one drop of silicone in each hole in the wall
before inserting the supplied wall plugs (4x)
Add silicone to exterior bottom edge of wall jamb.
Fasten the wall jamb to the wall with 1-1/4” screws (22)
through the previously installed wall plugs. (x4)
Add silicone to interior bottom edge of wall jamb
2i
3a
3a
3b
3c
3d
2i
2j
3b
2j
2k
2l
2l
3c
3d
2k
3
INTERIOR
SHOWER SIDE
- 300c (9 pages)
- 300cv (8 pages)
- 300d (9 pages)
- 338 (9 pages)
- 340 (9 pages)
- 340 Deluxe (9 pages)
- 390c Supplement (5 pages)
- 390cv Supplement (4 pages)
- 391 (12 pages)
- 392 (11 pages)
- 393 (11 pages)
- 394 (11 pages)
- 640S (8 pages)
- 640 (8 pages)
- 640D (7 pages)
- 641 Side Panel (6 pages)
- 694 (6 pages)
- 700c (7 pages)
- 733 (8 pages)
- 738 (8 pages)
- 738 Towel Bar (1 page)
- 740D (8 pages)
- 790c Supplement (4 pages)
- 791 (11 pages)
- 792 (12 pages)
- 793 (12 pages)
- 793 Buttress Supplement (1 page)
- 794 (11 pages)
- 794s (9 pages)
- 795 (10 pages)
- 890 (9 pages)
- 890c (8 pages)
- 1040 (9 pages)
- Deluxe Towel Bar (1 page)
- Transportation Latch (1 page)
- DesignLine Hinge (5 pages)
- P-DR1W-48-60 (14 pages)
- P-DR1W-72 (15 pages)
- P-DR1WT-60 (14 pages)
- P-DR2W-48-60-CRP (18 pages)
- P-DR2W-48-60-CW (19 pages)
- P-DR2W-72-CRP (19 pages)
- P-DR2W-72-CW (19 pages)
- P-DR3W-60 (32 pages)
- P-DRA1Y (16 pages)