Making a cross cut, Making a rip cut, Making a rip cut -38 – Craftsman 315.228390 User Manual
Page 37: Operation
Attention! The text in this document has been recognized automatically. To view the original document, you can use the "Original mode".
OPERATION
MAKING A CROSS CUT
See Figures 47 and 48.
It is recommended that you make test cuts on scrap
wood. Stand at the front of the saw and push the
wood to the blade with the miter gage.
WARNING: Make sure the blade guard is
lowered over blade and is working properly to
prevent possible injury.
■ Set the blade to the right depth for the workpiece by
turning the height handwheel.
■ Set the miter gage to 0°. Make sure miter gage
knob is securely tightened.
■ Place a support the same height as the top of the
saw table behind the saw for the cut work.
■ The miter gage may be used in either of the two
grooves in the table. When using left groove, hold
workpiece firmly against the miter gage base with
your left hand and grip the knob with your right
hand. When using the right groove, hold workpiece
firmly against the miter gage base with your right
hand and grip the knob with your left hand. See
Figure 47.
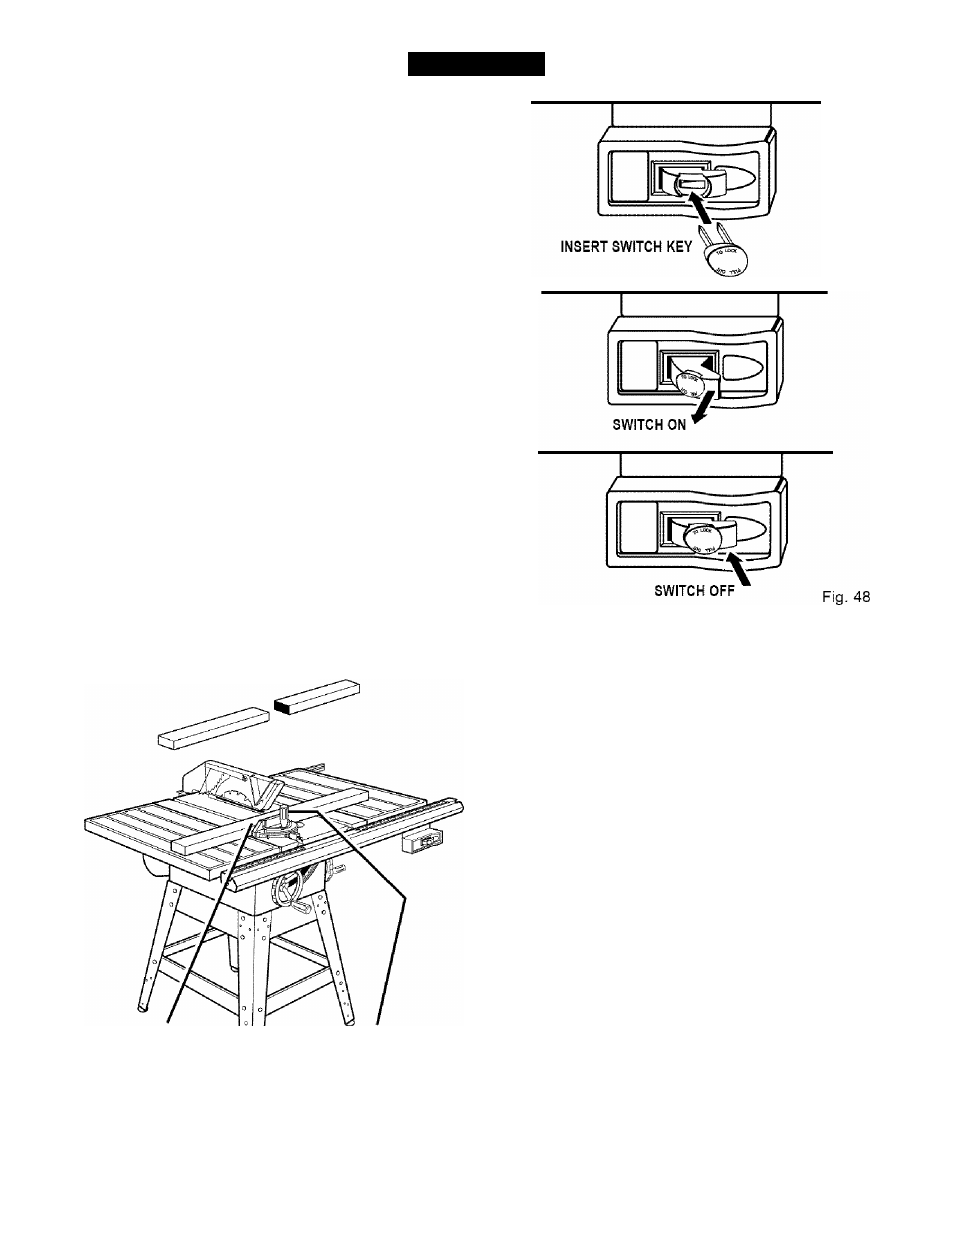
■ Check that the wood is not touching the blade.
Insert the key and lift the switch to the ON position,
■ Let the blade build up to full speed before feeding
the workpiece into the blade with the miter gage.
CROSS CUT
PLACE LEFT HAND ON
WORKPIECE AND
MITER GAGE HERE
WHEN MITER GAGE IS
ON LEFT SIDE OF BLADE
PLACE RIGHT HAND ON
MITER GAGE KNOB HERE
Fig. 47
■ Hold the work firmly against the miter gage and
push the miter gage to feed the work into the blade.
■ When the work is completed, press the switch off
and remove the key.
MAKING A RIP CUT
See Figure 49.
Making a test cut on scrap wood is highly recom
mended. From the front of the saw, position the wood
against the rip fence and push it to the blade with a
pushstick. Be sure the end of the wood is square.
WARNING: Never stand directly in the line of
cut. Stand to the side to reduce risk of injury,
WARNING: Never push a small piece of wood
into the blade with your hand,
WARNING: Make sure the blade guard is
lowered over blade and is working properly to
prevent possible injury.
■ Remove the miter gage and attach the rip fence
over the rails.
37
CRRFTSMRN' TABLE SAW 315.228390