Important service message, Caution, Customer responsibilities – Craftsman 987.799601 User Manual
Page 27: Maintenance schedule
Attention! The text in this document has been recognized automatically. To view the original document, you can use the "Original mode".
CUSTOMER RESPONSIBILITIES
IMPORTANT SERVICE MESSAGE
Iff VI1
II I r*\l » * fc«ii»iTt V IV#!««* IVI
«MW
Perform the Maintenance Schedule listed in the chart
below to ensure the proper performance and iong life of
your machine-
If you do not wish to service the machine yourself, you
can bring it to your local Sears Service Center for expert
service.
CAUTiOn
Before inspecting, cleaning or servicing the
maciiine, stop the engine and make sure that all
moving parts have come to a complete stop.
Disconnect the spark plug wire and secure it away
from the spark plug.
Failure to follow these instructions can result In
personal injury or property damage.
MAINTENANCE SCHEDULE
SERVICE
Before
Each Use
Every 5
Hours
Every 25
Hours
Every 100
Hours
As Noted
Check Engine Oil Level (Page 28)
•
e
Change Engine Oil (Page 28)
9
1,2
Replace Air Filter (Page 28)
4
Clean Cooling System (Page 28)
«
2
Inspect Spark Arrester (if equipped)
3
Inspect Spark Plug (Page 28)
»
Glean Machine
•
2
Check Bolts and Nuts (Page 29)
«
NOTE 1 ~ Change oil after first two hours of new operation,
NOTE 2 “ Service more frequently in extremely dusty or dirty condittons,
NOTE 3 - If engine is equipped with a spark arrester, clean and inspect for damage every 50 operating hours
NOTE 4 - Replace yearly or more often if used in extremely dusty or dirty conditions
C/HcC#i\ ANU UMANGc cNGINc ulL
□ Check oil level every five operating hours and before
each use of the machine,
□ Change oil after first two hours of new operation and
every 25 operating hours thereafter. IMPORTANT:
Change oil more frequently when operating in
extremely dusty or dirty conditions.
To Check Oil Level
1. Place the machine on level ground
Stop the engine
and make sure that all moving parts have come to a
complete stop. Disconnect the spark plug wire and
secure it away from the spark plug.
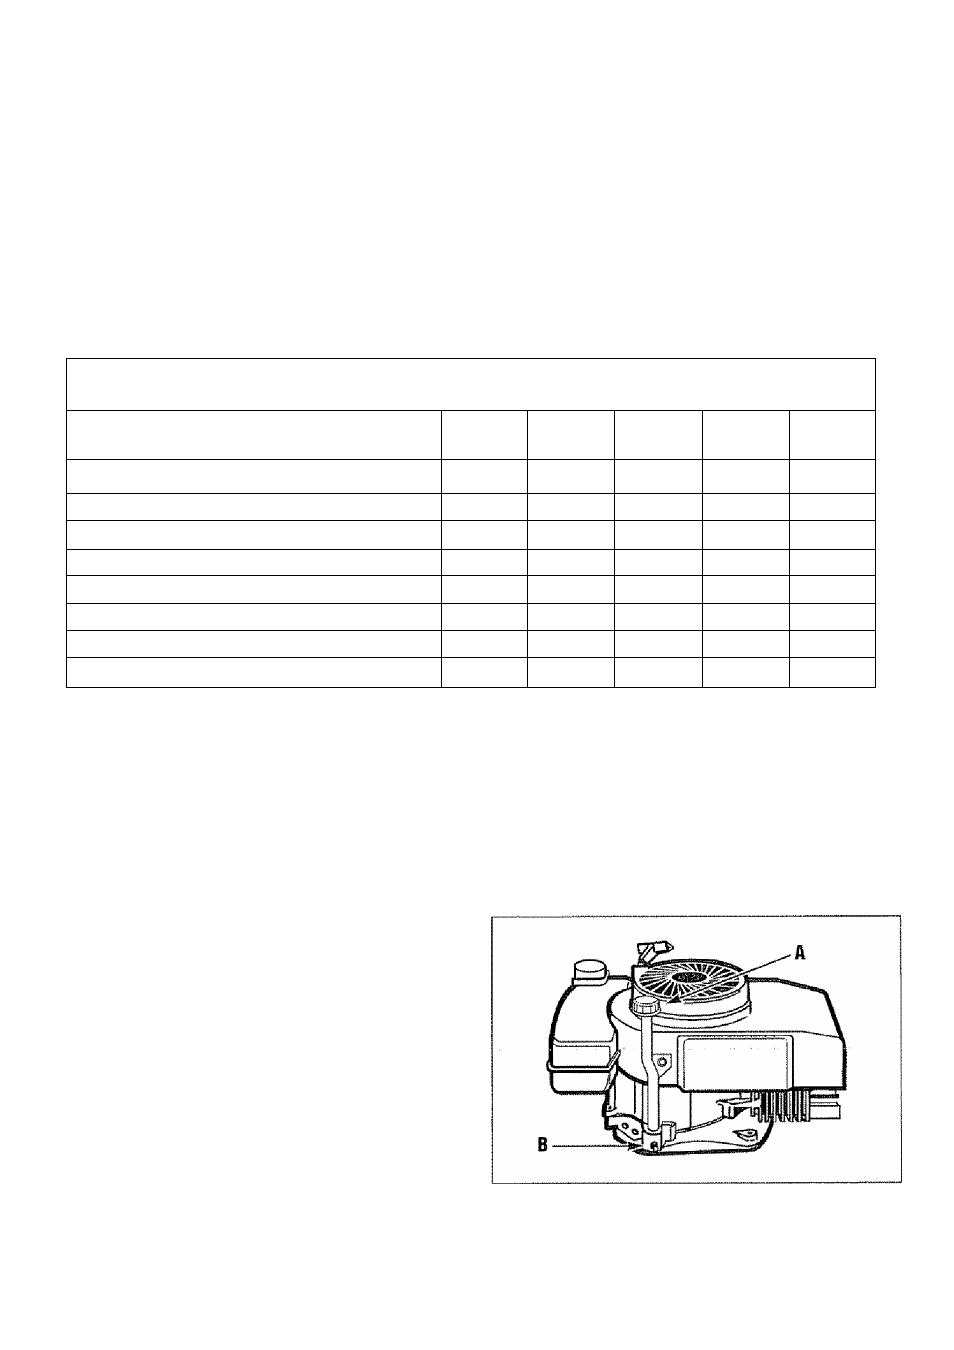
2. To avoid contaminating the engine oil with dirt, clean
the area around the dipstick (A, Figure 27). Remove the
dipstick and wipe it with a clean cloth. Screw the
dipstick fully inward and then remove it to check the oil
ievei.
3. The oil level should be at the “FULL" mark on the
dipstick. If the oil level is low, add recommended oil
After checking or adding oil, install the dipstick and
tighten securely.
Figure 27: Dipstick (A) and oil drain plug fB).
27