Assembly – Craftsman 987.799601 User Manual
Page 15
Attention! The text in this document has been recognized automatically. To view the original document, you can use the "Original mode".
ASSEMBLY
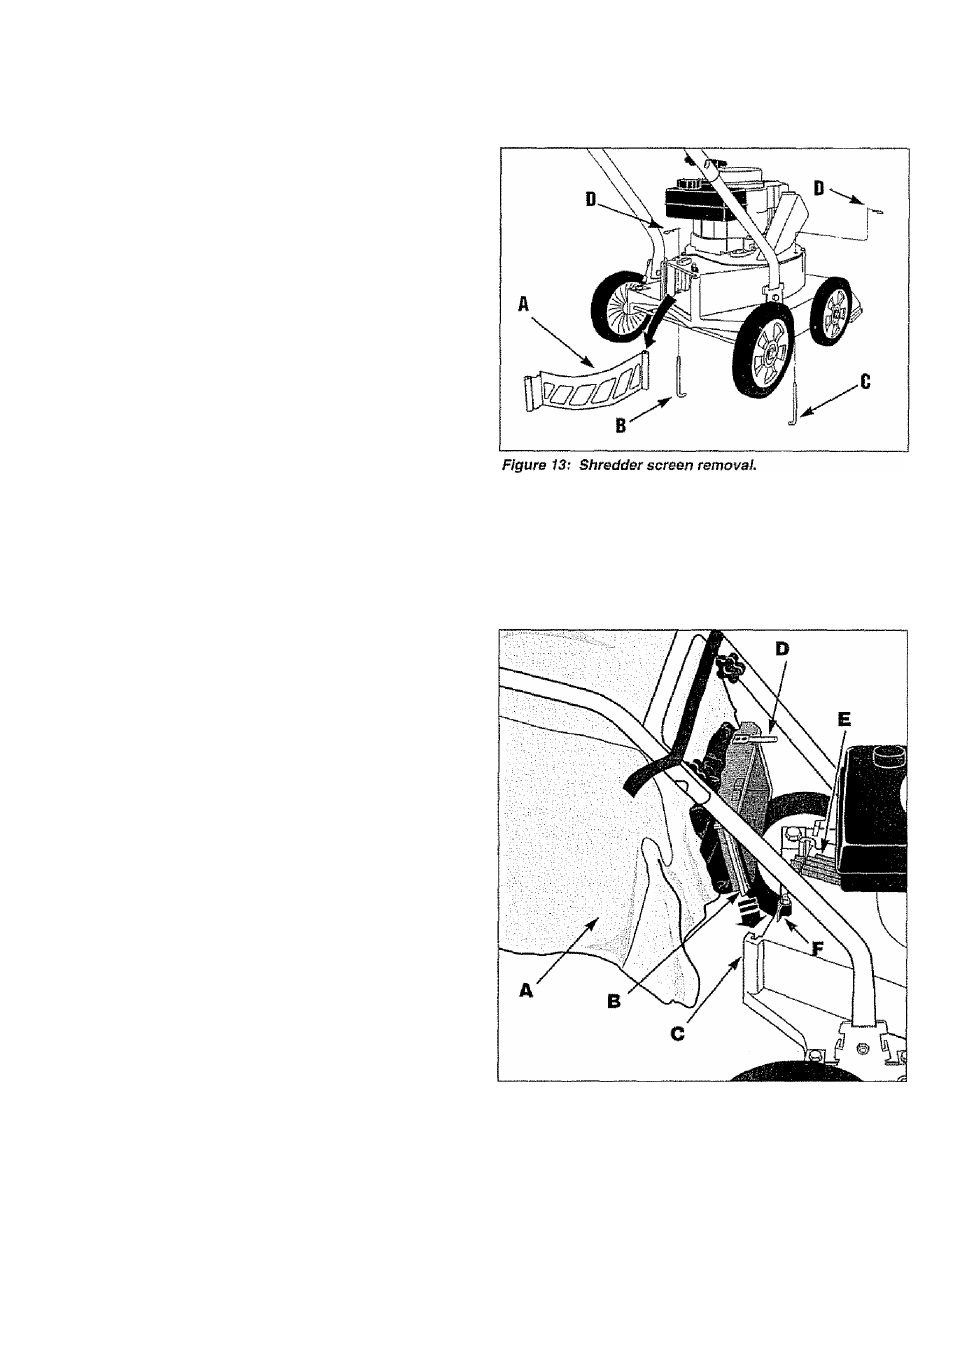
STEP 3: REMOVE THE SHREDDER SCREEN
For maximum air flow, remove the shredder screen
before installing the vacuum hose.
1.
The screen
(A)
is held in place
by
two long rods
{B
and
C)
and hair pin clips
(D)
(see Figure 13).
2.
To remove the rear rod
(B),
remove the collection
bag (if installed). Then, remove the hair pin clip and pull
the rod out through the bottom of the deck.
3.
Use sturdy supports to prop up the right side of the
machine a few inches Then, remove the hair pin clip
and puli the rod
(C)
out through the bottom of the deck
4. Pull the screen out of the discharge opening. Re
install the rods and hair pin clips on the screen for safe
keeping.
IMPORTANT:
THE HAIR PIN CUPS SUPPLIED WITH
THE SCREEN ARE THE ONLY STYLE FASTENERS
THAT SHOULD BE USED. DO NOT USE
SUBSTITUTES OR FAILURE OF EQUIPMENT OR
PERSONAL INJURY COULD RESULT,
5. Remove the supports from beneath the machine.
STEP 4; INSTALL COLLECTION BAG
CAUTION
« C h e c k t h e c o l l e c t i o j i b a g f r e q u e n t l y
deterioration and wear and replace worn bags.
for
For using the vacuum hose, install the collection bag as
described below.
1. Make sure the bag (A in Figure 14) is zipped,
2. Place the collection bag straps over the handlebars,
3. Line up the tabs on the bag inlet adapter (B) with the
slots in the discharge opening
(C)
and slide the bag inlet
adapter down all the way into the slots. Turn the
retaining knob (F) until the tab on the knob drops into the
slot on the top of the inlet adapter.
NOTE: The rod
(D)
on the inlet adapter is part of the
machine's safety interlock system, Make sure the rod
fits securely in the slot in the safety interlock switch (E).
BAG MAINTENANCE TIP: Keep the bag dean by
occasionally washing it (by hand) with mild soap and
water, A dean bag improves air flow and results in
better vacuuming performance Do not wash the bag in
an automatic washer. Do not use a cleaner which
contains bleach. Allow the bag to dry thoroughly before
storing.
Figure 14: Install colleetian bag.
15