Craftsman 113.2472T0 User Manual
Page 23
Attention! The text in this document has been recognized automatically. To view the original document, you can use the "Original mode".
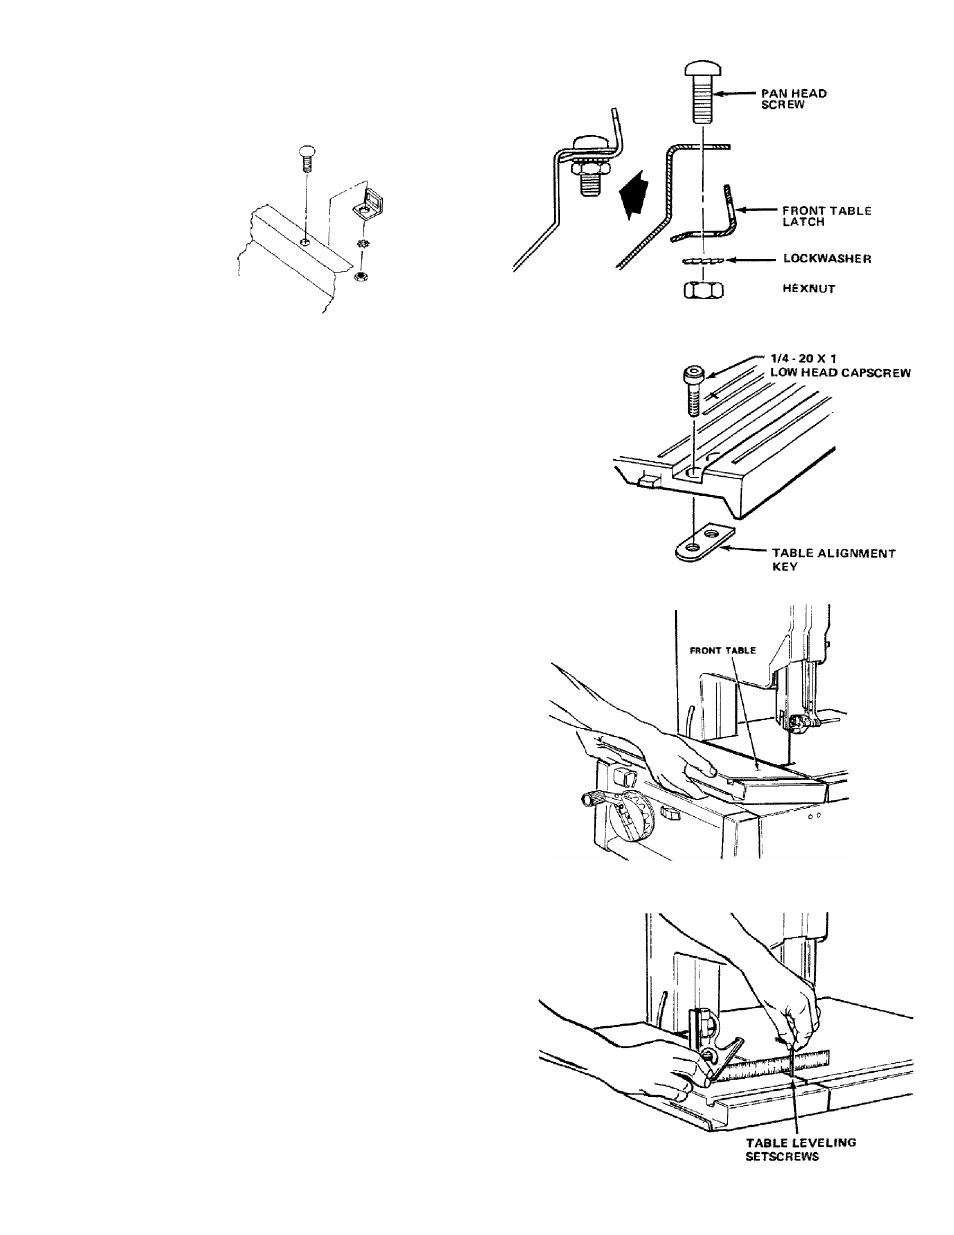
Locate the two (2) table latches, two (2) pan head
screws, lockwashers, and hex nuts. Install the
table latches to the front of the base in holes
provided.
Locate the table alignment key and the two (2)
1/4-20 X 1 low head capscrews. Install the key
under the rear table miter gage slot and install
the two screws but do not tighten at this time.
6. Mount the table to the base as follows:
a. Hold the front edge of the table. Position the
rear edge of the table so that the two fiat
springs slip under the two tabs on the rear
table.
b. Line up the miter gage slots in the front and
rear tables.
c. Push the front edge of the table backward and
downward until the table snaps into position.
7. Use a 1/8-inch hex “L" wrench to adjust the two
leveling setscrews to bring the rear edge of the
front table up to the same height as the front
edge of the rear table.
23