Connecting the motor – Craftsman 113.2472T0 User Manual
Page 15
Attention! The text in this document has been recognized automatically. To view the original document, you can use the "Original mode".
14. Belt tensioning is done by tightening the wing
nut which pulls the motor down. The motor
slides on the three (3) spacers and is locked in
place by the flanged lock nut at the threaded
stud.
Belt tension is important. Over tensioning may
cause vibration while too little tension may allow
the belt to slip under heavy loads.
TIGHTEN FLANGE
NUT AFTER TENSIONING
BELTWITH WING NUT
CONNECTING THE MOTOR
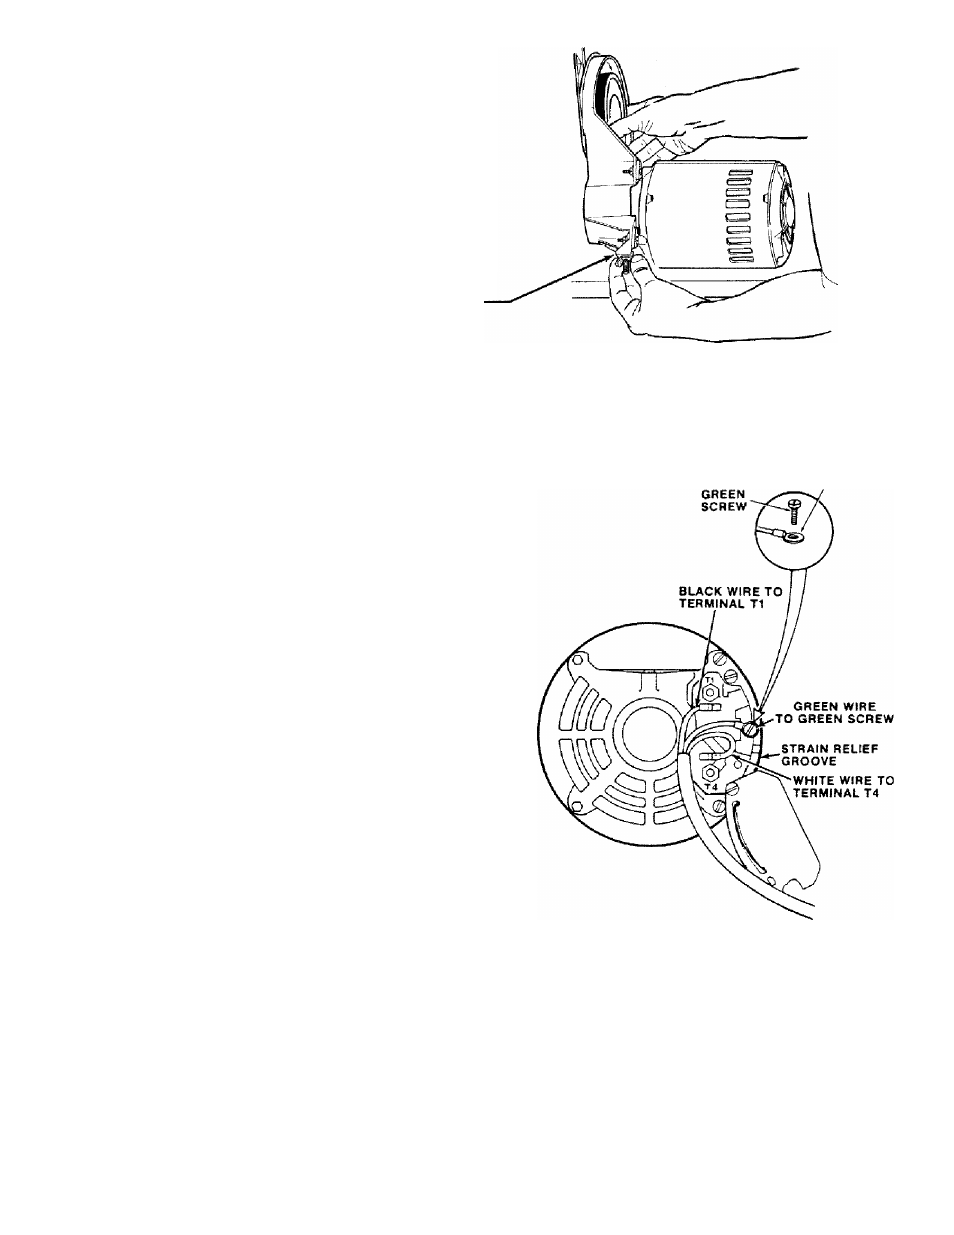
1. Next, the motor cord needs to be wired into the
motor. Coming from the underside of the table
will be a cord with a black, white and green wire.
This is the motor cord.
WARNING: FOR YOUR OWN SAFETY, NEVER
PLUG
THE
SAW
IN
UNTIL
ALL
ASSEMBLY
STEPS ARE COMPLETED.
2. Loosen the two screws holding the connector
box cover on the back side of the motor. Swing
the cover open.
3. Install the green ground wire by removing the
green grounding screw and inserting it through
the round metal terminal on the green ground
wire of the motor cord. Reinstall the green screw
into the hole from which it was removed and
tighten securely.
WARNING:
TO
AVOID
ELECTROCUTION,
NEVER
CONNECT
ANYTHING
BUT
THE
GROUND
WIRE
(COLORED
GREEN)
TO
THE
GREEN SCREW.
4. Insert terminal end of WHITE wire on spade
terminal marked T4 on the motor. Push terminal
firmly until seated.
5. Insert terminal end of BLACK wire on spade
terminal marked T1 on the motor. Push terminal
firmly until seated.
6. Close motor connector box being sure that
power cord is seated in the largest strain relief
groove and tighten box cover screws.
7. DO NOT plug in power cord.
TERMINAL
IS