Selection of audio/video source, To select with the remote control, About the video source to the monitor or tv – Sony AV-DV75 User Manual
Page 12: To select the video source, When the “over level” indicator lights up, To adjust the sound level of the connected source
Attention! The text in this document has been recognized automatically. To view the original document, you can use the "Original mode".
]
SELECTION OF AUDIO/VIDEO
SOURCE
FUNCTION
Function indicators
1 Select the program source.
Turn the FUNCTION selector or press the TAPE MONITOR
button. The selected function indicator iights in red.
To listen to or watch The indicator in red
Tape
TAPE MONITOR
Radio
TUNER
Record
PHONO
Compact disc
CD
Television, etc.
AUX
Video
VIDEO 1/DVD/MD,
VIDEO 2/LD/TV, VIDEO 3
LD or Cable TV
VIDEO 2/LD/TV
MD or DVD
VIDEO 1/DVD/MD
The function to be seiected (except PHONO) depends on the
equipment connected to the input terminals on the rear panel
of the unit.
To select with the remote control
Press the TAPE MONITOR button or the FUNCTION button
repeatedly.
When using a turntable with a built-in equalizer amplifier, set
the switch of the equalizer amplifier to off. See the instructions
of the turntable for further information.
2 Start the selected program source.
3 Adjust the sound.
About the video source to the monitor or TV
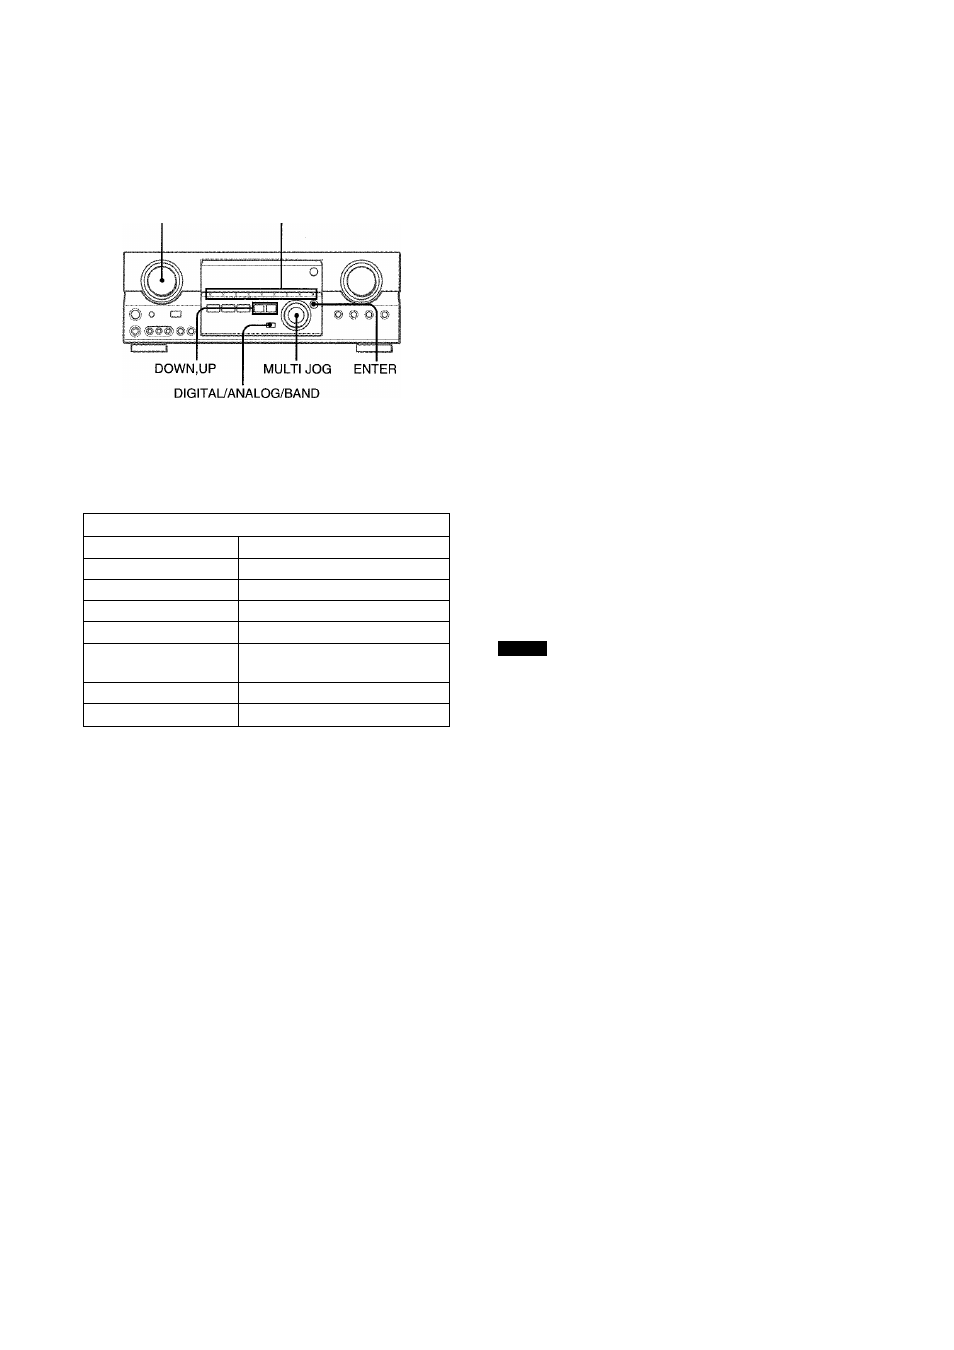
To select the video source
1
Turn the FUNCTION to select PHONO, CD or AUX.
2 Press the ENTER button to display VIDEO 1.
3 Turn the MULTI JOG to select VIDEO 2 or VIDEO 3.
To change a displayed name for the VIDEO 1
and VIDEO 2
When the VIDEO 1 function is selected, VIDEO 1 is displayed
initially. It can be changed to DVD or MD.
Press the DIGITAL/ANALOG/BAND button while pressing the
ENTER button.
The displayed name for the VIDEO 2 function can be changed
to VIDEO 2, LD or TV; while the VIDEO 2 function is selected,
press the DIGITAL/ANALOG/BAND button while pressing the
ENTER button.
To select the “ANALOG” or “DIGITAL” (Dolby
Digital Surround) mode of the VIDE01, VIDEO
2 or VIDEO 3 function
Press the DIGITAL/ANALOG/BAND button when the VIDEO 1,
VIDEO 2 or VIDEO 3 is selected. The selected mode “ANALOG”
or “DIGITAL” appears on the display.
In the DIGITAL mode:
Equipment connected to the OPTICAL
DIGITAL IN terminal is selected as a source for the VIDEO 1 or
VIDEO 3 function, and one connected to the COAXIAL DIGITAL
IN terminal for the VIDEO 2 function. The DIGITAL indicator
lights in red.
In the ANALOG mode:
Equipment connected to the VIDEO 1/
DVD/MD IN or VIDEO 3 terminals is selected as a source for
the VIDEO 1 or VIDEO 3 function, and one connected to the
VIDEO 2/LD/TV terminals for the VIDEO 2 function.
NOTE
The “DIGITAL” mode changes to the “ANALOG,” when pressing
the TAPE MONITOR button.
When the “OVER LEVEL” indicator lights up
The unit is equipped with the OVER LEVEL indicator. When input
analog signals from the connected equipment are too high to
accept, the indicator lights on the right side of the display. In this
case, adjust the input level as mentioned below so that the
indicator disappears.
To adjust the sound level of the connected source
The input sensitivity level of each functioh can be adjusted
(except the TUNER, VIDEO 1 (DIGITAL), VIDEO 2 (DIGITAL)
and VIDEO 3 (DIGITAL) functions).
When the sound level of the connected source is higher or lower
than that of the TUNER, adjust it as follows.
1 Select the function to be adjusted.
Turn the FUNCTION or press the TAPE MONITOR button
and play the source.
2 Press the UP or DOWN button repeatedly.
i'i"-:
I M
■■■
Selected video source
V1: VIDEO 1, V2: VIDEO 2, V3: VIDEO 3
The selected video source is indicated on the display and the
video signal through the MONITOR VIDEO OUT jack is output
on the TV.
Adjust the level so that the “OVER LEVEL” indicator does
not light on the display.
• The level can be adjusted between -6dB (MIN) and +8dB
(MAX) in 2dB steps. Adjust the level so that the sound is
output at the same level as the TUNER.
• The input sensitivity level of the TAPE MONITOR can be
adjusted to OdB or -6dB.
11
ENGLISH