Two Brothers Racing Triumph Sprint ST 1050 User Manual
V.a.l.e, Sprint st 1050
V.A.L.E.
V a r i a b l e a x i s l o c k i n g e x h a u s t
TM
Parts List
IMPORTANT - PLEASE READ CAREFULLY
We recommend that this performance part be installed by a qualified
motorcycle technician. If you have any doubts as to your ability to install this
performance part, please consult with your local motorcycle dealer. Read all
instructions first before starting installation. Make sure the motorcycle and
exhaust system are completely cool before starting the installation. Also,
make sure the bike is secure on a centerstand or ideally a service lift during
installation. Be sure to save all stock components for possible use later.
Installation Instructions
2006-10 Triumph
Sprint St 1050
V.A.L.E.™ Slip-on Exhaust System with M-5 Canister
Part # 005-1540419V, 005-1540420V
Qty.
Description
Part Number
1
M-5 Muffler Canister
Varies
1
Stainless Steel S-Bend Slip-On Tube
005-15501S
1
HARDWARE KIT
005-154-3
1
X-Lite™ V.A.L.E.™Retaining Ring
005-7-2-2
1
Licence Plate Bracket
005-17304B
1
Rear LED Tail Light /Plate Lights
005-17504LK
1
Turn Signal Marker Lights (Set of 2)
005-88T2
1
C-5/M-5 Oval Muffler Clamp Halves (set 2)
005-5C-6A
2
8x20mm Socket Head Cap Screw
005-SH820
4
M6 Split Lock Washer
005-WL6
1
Muffler Hanger Bracket LEFT
005-154-13L
1
Muffler Hanger Bracket RIGHT
005-154-13R
4
6x14mm Socket Head Cap Screw
005-SH614
2
8mm Nylon Insert Lock Nut
005-NN8
1
5mm Long Handle Ball end hex key
005-9-18610
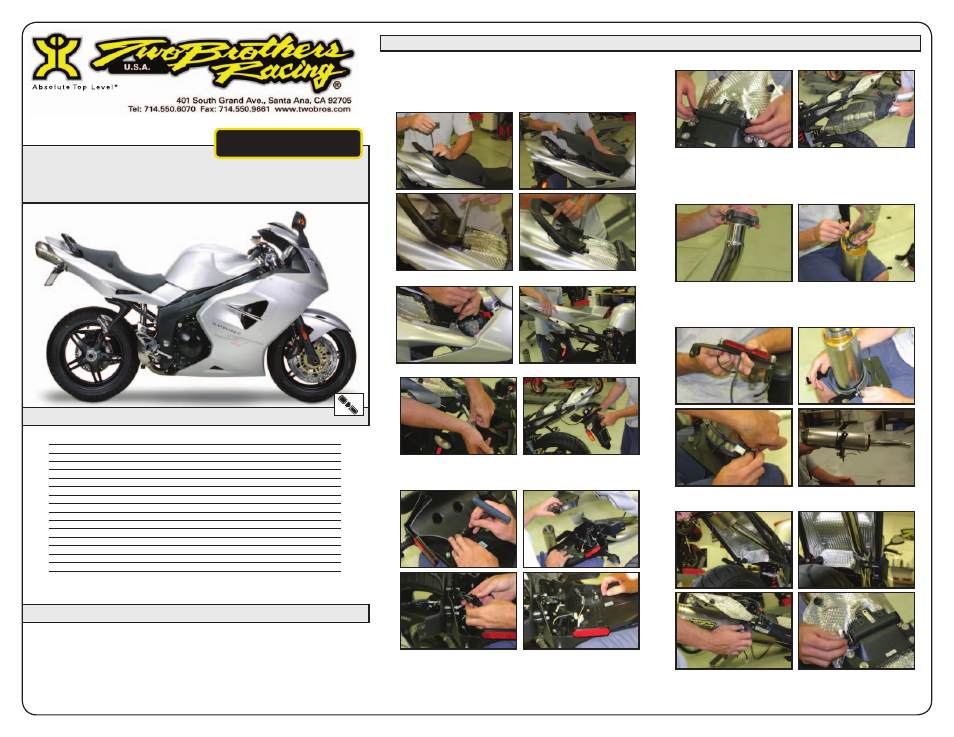
1. Make sure the bike is completely cool before starting the
installation. Make sure the bike is secure on center stand
or ideally a service lift.
2. Remove the seat and handle:
3. Remove the rear cowling:
4. Remove the fender assembly:
5. Remove the plastic cover on fender assembly to expose
the brake and turn signal wires. Disconnect the brake
light wires:
6. Remove the OEM muffler:
7. To install the Two Brothers Racing Slip-on Exhaust
System: Attach the slip-tube with the X-Lite Ring™ to
the muffler using the 4 (four) 6x14mm socket head cap
screws and split lock washers provided. Leave loose for
now.
8. Attach the rubber lined muffler clamps and plate
brackets as shown to the muffler assembly using the
2 (two) 8x20mm socket head cap screws and nuts
provided. Leave loose for now.
9. Install muffler assembly using the OEM mounting bolts
and joint clamp.