Replacing the back panel, Removing the back panel, Installing the back panel – Dell Studio Hybrid D140G (Mid 2008) User Manual
Page 3
Back to Contents Page
Replacing the Back Panel
Dell™ Studio Hybrid Service Manual
Removing the Back Panel
1.
Follow the procedures in
Before You Begin
.
2.
Remove the computer cover (see
Removing the Computer Cover
).
3.
Remove the drive cage (see
Removing the Drive Cage
).
4.
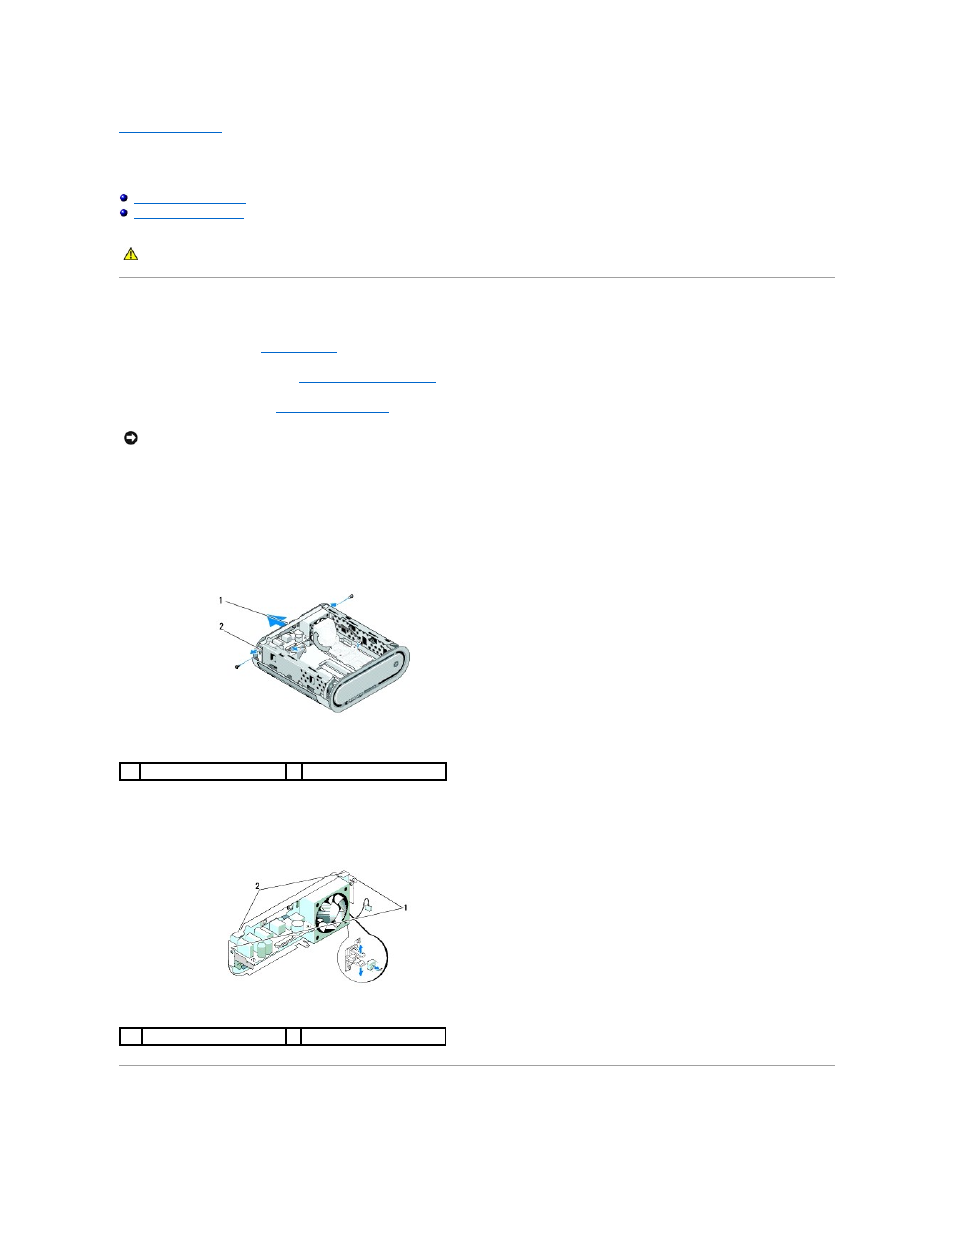
Disconnect the SYS_FAN1 cable from the system board, the black antenna cable from the WLAN card, and the flex-cable from the back I/O board.
5.
Remove the two screws on either side of the chassis.
6.
Spread the tabs apart on either side of the back panel and gently pull the back panel away from the chassis.
.
7.
Spread the tabs apart and gently pull the RF receiver cable away from the back panel.
Installing the Back Panel
CAUTION:
Before working inside your computer, read the safety information that shipped with your computer. For additional safety best
practices information, see the Regulatory Compliance Homepage at www.dell.com/regulatory_compliance.
NOTICE:
Carefully note the routing of each cable before you disconnect it, so that you re-route the cable correctly. An incorrectly routed or a
disconnected cable could lead to computer problems.
1
back panel
2 latches (2)
1
latches
2 tabs