Attaching the rackmount brackets -6, Rackmount bracket rackmount bracket screws, Installing the device 3-6 installation – Cabletron Systems 2200 User Manual
Page 36: Figure 3-3 attaching the rackmount brackets, Reset
Installing the Device
3-6
Installation
Rack Mounting the 2E253-49R
Proceed as follows to install the 2E253-49R into a 19-inch rack:
1.
There are several mounting holes in the rackmount brackets and the bottom of the chassis.
These mounting holes allow each mounting bracket to be adjusted forward or backward to
mount the device further into, or out of the rack, depending on the installation requirements.
Position the rackmount brackets over the appropriate holes.
2.
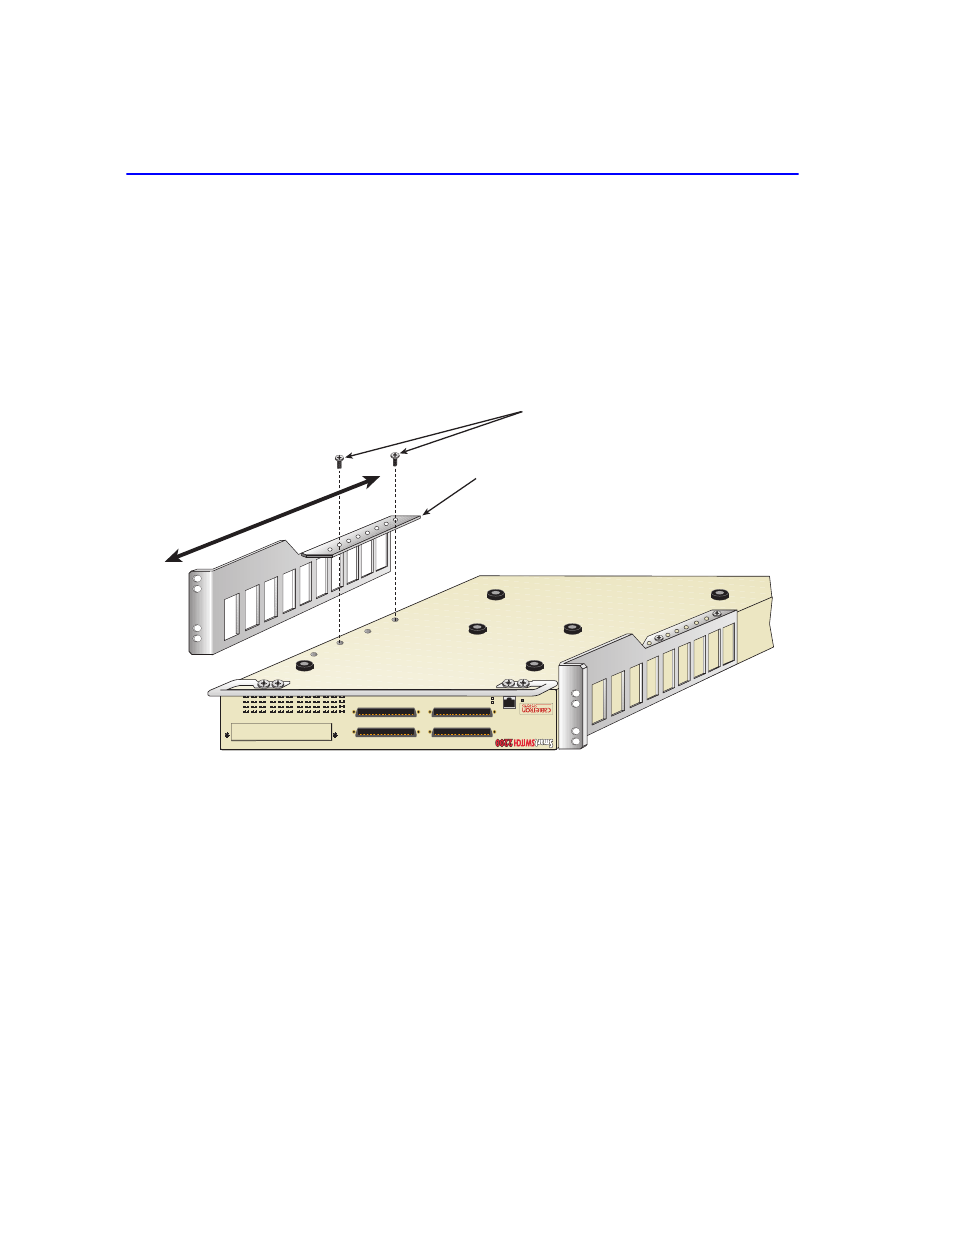
Locate the four 6-32 x 1/4-inch flathead screws in the rackmount kit. Use these screws to attach
the rackmount brackets to the bottom of the 2E253-49R as shown in
.
Figure 3-3
Attaching the Rackmount Brackets
3.
With the mounting brackets attached, position the 2E253-49R between the vertical frame
members of the 19-inch rack and fasten it securely with mounting screws as shown in
.
TELCO
CONSOLE
ETHERNET WORKGROUP SWITCH
2E253-49R
COM
RESET
37
48
25
36
13
24
12
1
PWR
CPU
13
14
15
16
17
18
19
20
21
22
23
24
25
26
27
28
29
30
31
32
33
34
35
36
37
38
39
40
41
42
43
44
45
46
47
48
1
2
3
4
5
9
6
7
8
10
11
12
Rackmount Bracket
Rackmount Bracket Screws
2504-04