Keyboard, Removing the keyboard – Dell Inspiron 5160 User Manual
Page 17
Back to Contents Page
Keyboard
Dell™ Inspiron™ 5160 Systems Service Manual
Removing the Keyboard
1.
Follow the instructions in "
Preparing to Work Inside the Computer
."
2.
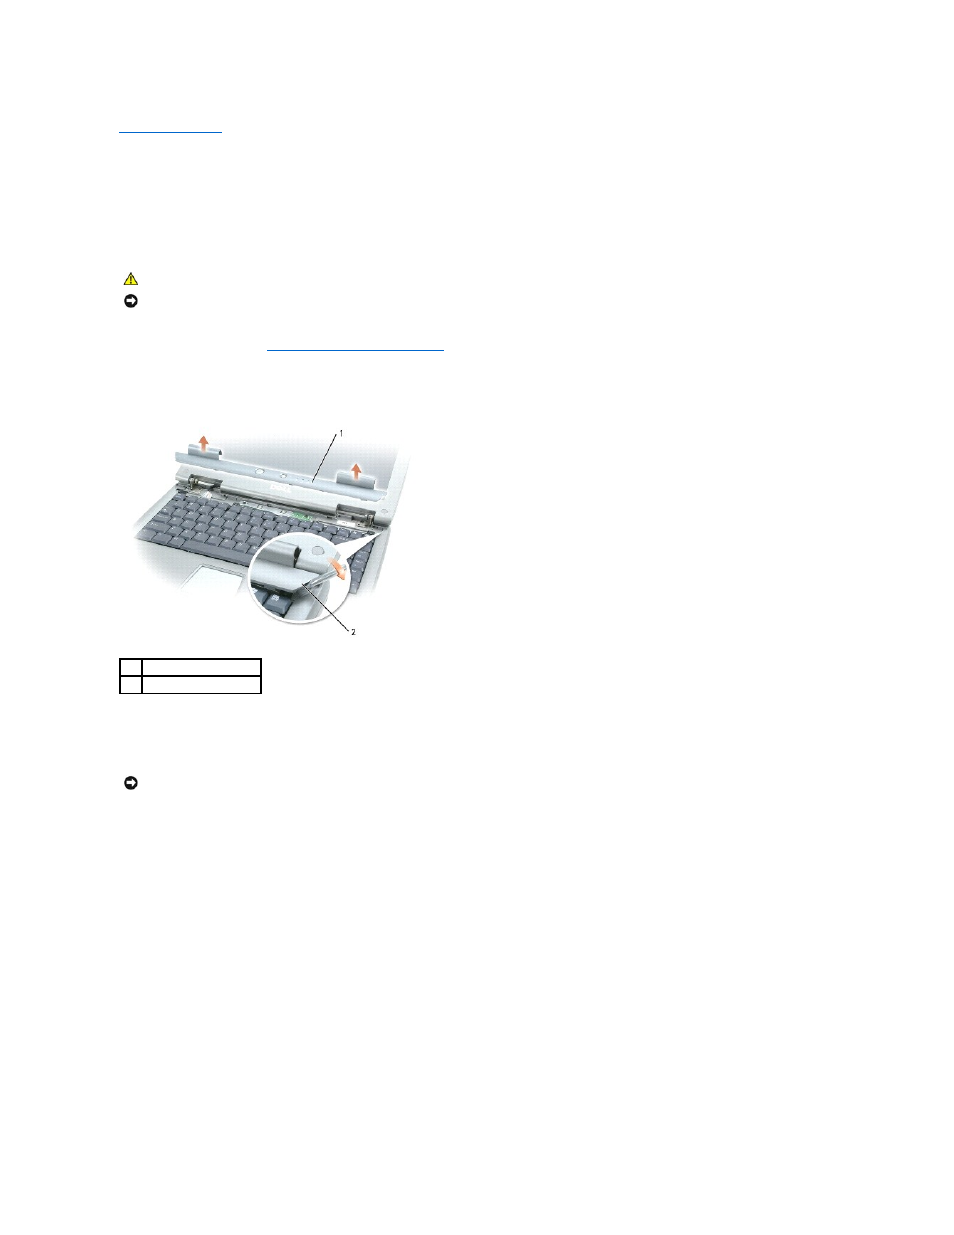
Use a small flat-blade screwdriver or plastic scribe to lift the notched right edge of the hinge cover, and pry the cover loose from the hinges and
computer base.
3.
Lift the hinge cover up and away from the hinges and computer base.
4.
Remove the four M2 x 3-mm keyboard screws.
5.
Lift the top of the keyboard out of the computer base, and pull the keyboard out at an angle (towards the display). Rest the keyboard face down on the
palm rest.
6.
Grasp the keyboard flex cable near the connector, and pull up on the flex cable to disconnect it from the interface connector on the system board.
7.
Remove the keyboard from the computer base.
CAUTION:
Before working inside your Dell™ computer, read the safety instructions in your
Product Information Guide.
NOTICE:
To prevent static damage to components inside your computer, discharge static electricity from your body before you touch any of your
computer's electronic components. You can do so by touching an unpainted metal surface.
1
hinge cover
2
notched edge
NOTICE:
The keycaps on the keyboard are fragile, easily dislodged, and time-consuming to replace. Be careful when removing and handling the
keyboard.