Display-assembly interface cable, Lcd display hinge – Dell Latitude Cpi User Manual
Page 41
Dell Latitude CP and CPi — Parts Removal and Replacement Guide
35
!
$ . "
6 . 5$ 57
1.
Remove the display assembly.
2.
Remove the LCD panel.
3.
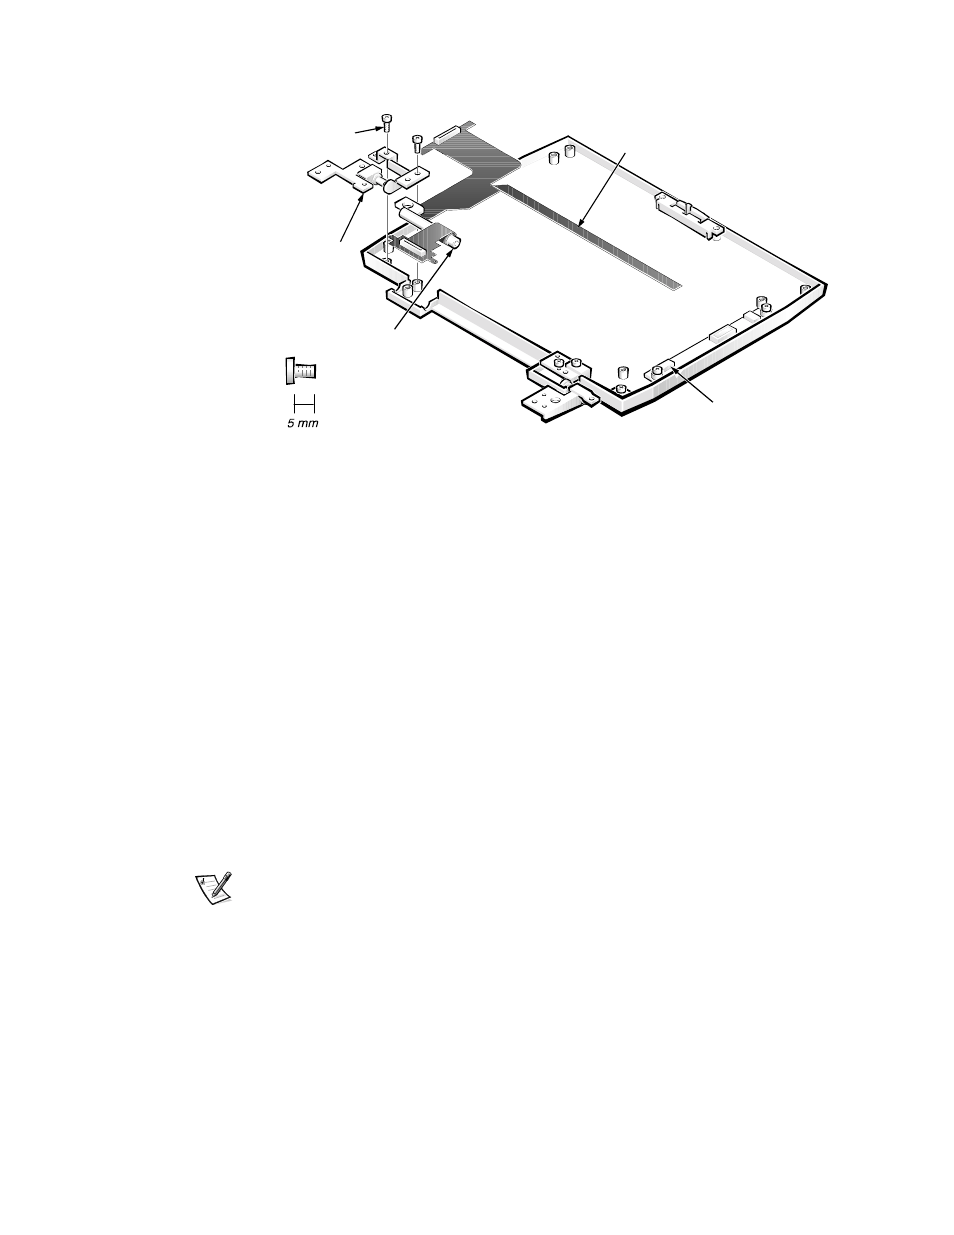
Disconnect the display-assembly interface cable from ZIF connector
J1 on the LCD inverter board.
4.
Remove the two 5-mm screws securing the left hinge, and then
remove the hinge from the display-assembly top cover.
5.
If you are removing the display-assembly interface cable from a
13.3-inch display, remove the left top-cover brace from the
display-assembly top cover (see Figure 22).
To remove the top cover brace, remove the 3-mm screw securing it.
6.
Lift the display-assembly interface cable out of the display-assembly
top cover.
NOTE: When replacing the display assembly, reinstall the screws securing the
left hinge at the locations marked on the hinge by arrows. Ensure that the
display-assembly interface cable wraps once around the plastic bobbin before
connecting the cable to the system board.
#!$
1.
Remove the LCD display assembly from the computer.
2.
Remove the display assembly bezel.
display-assembly interface cable
connector J1
left hinge
plastic bobbin
5-mm
screws (2)