Chateau™ decorative gas appliance, Pilot flame adjustment – Vermont Casting DVT38S2 User Manual
Page 33
33
Chateau™ Decorative Gas Appliance
20009543
Pilot Flame Adjustment
Typically, the top 3/8” or 1/2” of the thermopile should be
engulfed in the pilot flame. (Page 26, Fig. 54)
To adjust pilot burner:
1. Remove pilot adjustment cap located on valve.
2. Adjust pilot screw to provide properly sized flame.
3. Replace pilot adjustment cap.
10. Install the conversion orifice.
11. Reinstall pilot hood. Be sure to align hood with index
tab.
12. Open the control panel and remove the cover by
removing two (2) screws. While holding the valve
cover plate with one hand, disconnect the wiring to
the switch and the pilot indicator. NOTE: Do not allow
the valve cover plate to hang from the pilot wires as
this could damage the wires. Remove the extension
knob(s). Replace the valve regulator.
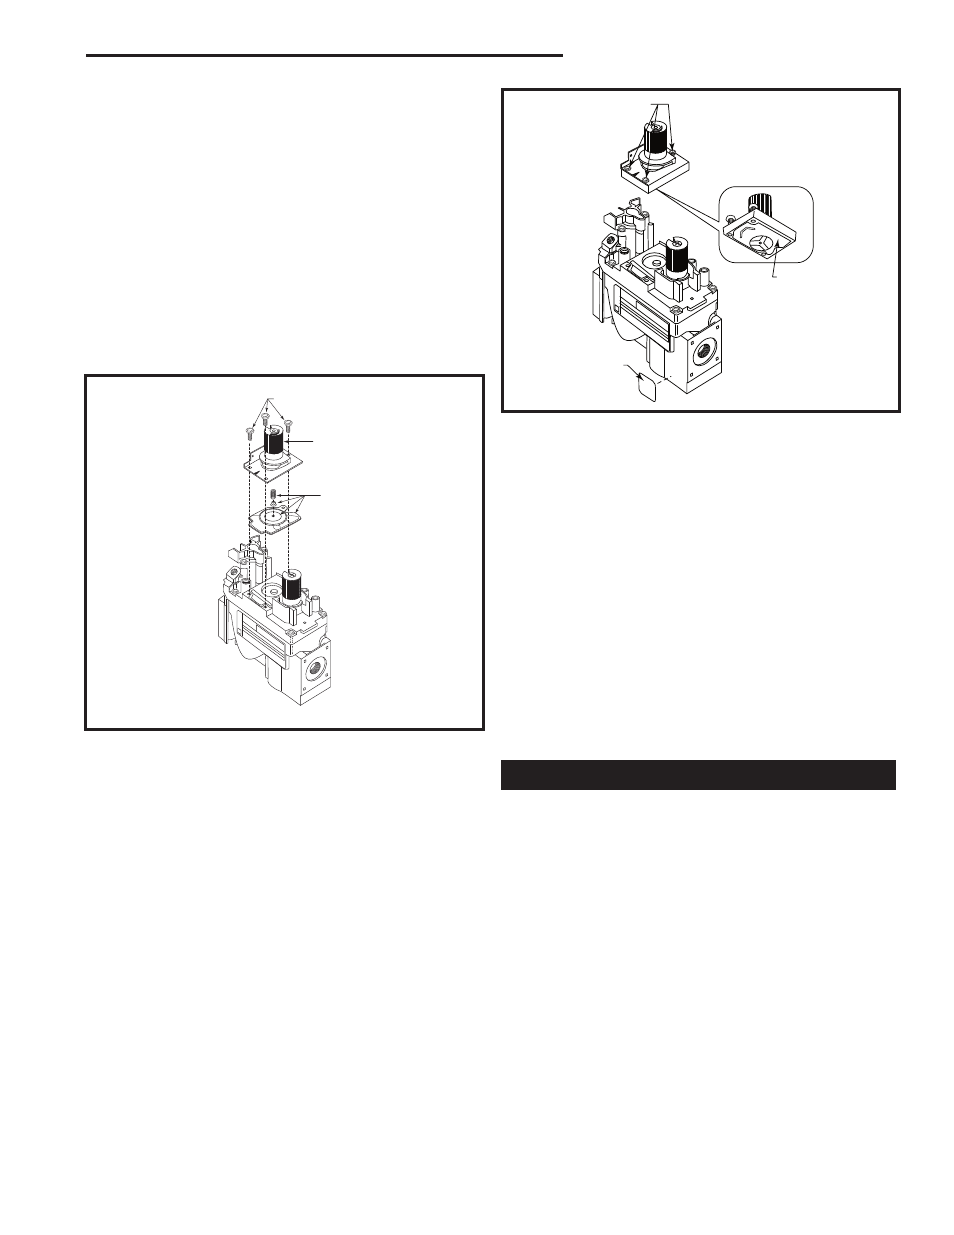
13. Using the TORX T20 bit remove and discard the three
(3) pressure regulator mounting screws (A), pressure
regulator tower (B) and the spring and diaphragm as-
sembly (C). (Fig. 61)
14. Insure the rubber gasket (D) is properly positioned
and install the new HI/LO pressure regulator assembly
to the valve using the new screws (E) supplied with
the kit. Tighten the screws securely. (Ref. torque =
in/lb) (Fig. 62)
15. Install the enclosed identification label (F) to the valve
body where it can easily be seen. (Fig. 62)
16. Regulator conversion complete.
17. Test for Leaks
•
Apply gas to the system and light the pilot.
•
With a soapy solution check for leaks around the
pilot assembly where the tube enters the pilot as-
sembly. Tighten fitting if necessary.
•
Light the main burner and check for leaks around
the new pressure regulator assembly. Tighten
screws if necessary.
•
With the main burner “ON” check for leaks around
the burner orifice. Be careful of the burner flame.
Tighten orifice if necessary.
•
With the main burner “ON” rotate the HI/LO knob
and verify proper burner operation.
18. Replace burner to original position.
19. Replace burner leg.
20. Replace burner tube and fettle.
21. Follow instructions on Page 23 to reinstall logs, lava
rock, volcanic rock and embers.
22. Replace glass frame.
Conversion complete.
Fig. 62 Replace regulator.
D
E
F
FC108
SIT
regulator
conversion
10/03
OFF
PIL
OT
O
FC108
Fig. 61 Remove valve regulator.
FC107
FC107
SIT820
valve conversion
10/03
A
B
C
OFF
PIL
OT
ON