Dell Studio XPS 7100 (Mid 2010) User Manual
Page 24
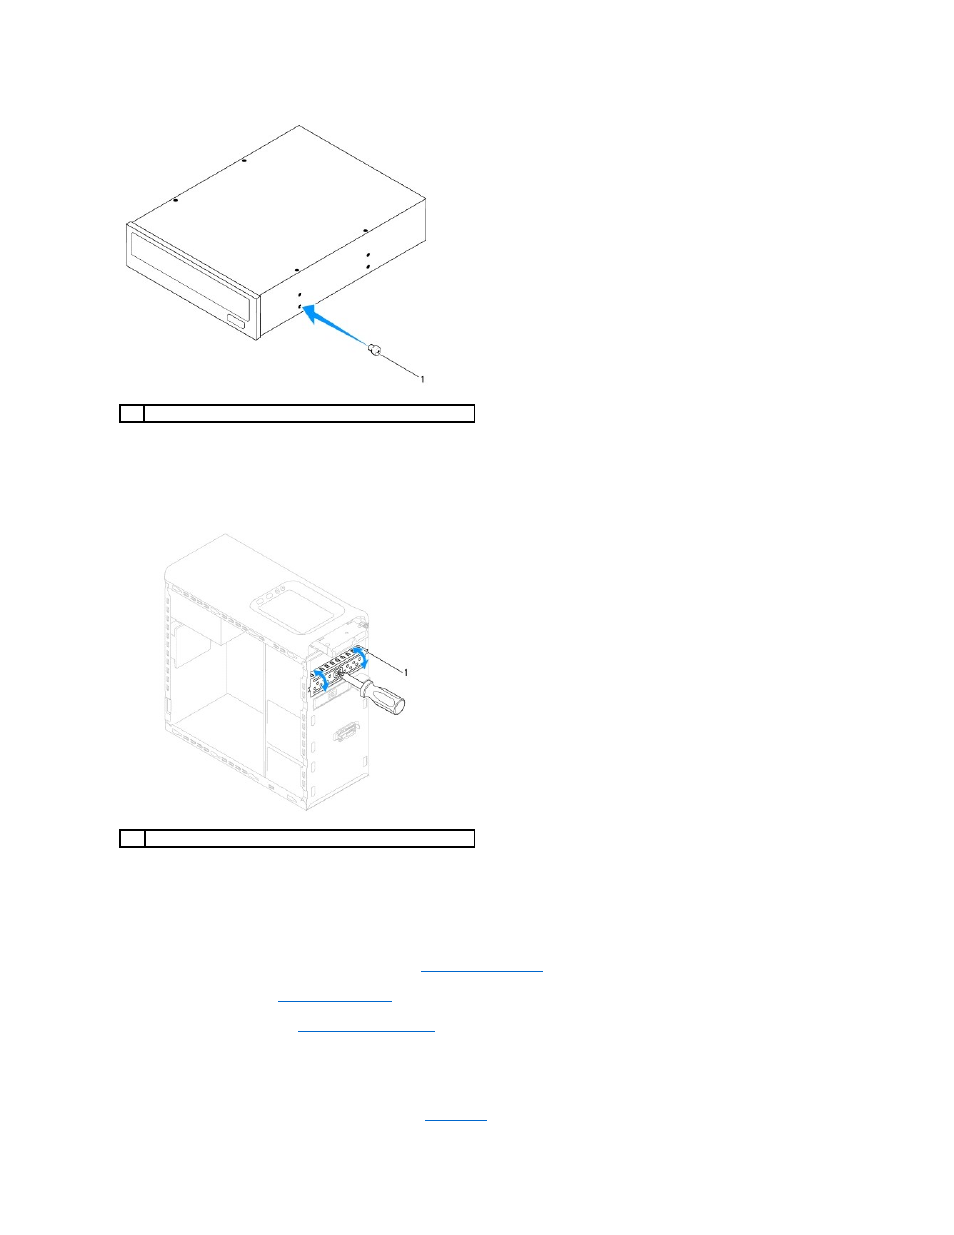
3.
To install a secondary optical drive, insert a screw driver and twist it to remove the break-away metal plate.
4.
Pull the break-away metal plate away from the chassis.
5.
Gently slide the optical drive into the optical drive bay through the front of the computer.
6.
Align the screw holes on the optical drive with the screw holes on the chassis.
7.
Replace the two screws that secure the optical drive to the chassis.
8.
Connect the power and data cables to the optical drive (see
System Board Components
).
9.
Replace the front bezel (see
Replacing the Front Bezel
).
10.
Replace the computer cover (see
Replacing the Computer Cover
).
11.
Connect your computer and devices to electrical outlets, and turn them on.
12.
See the documentation that shipped with the drive for instructions on installing any software required for drive operation.
13.
Check the System Setup for drive configuration changes (see
System Setup
).
1
screw
1
break-away metal plate
- Inspiron 530 (2 pages)
- OptiPlex 755 (622 pages)
- OptiPlex 755 (528 pages)
- OptiPlex 755 (82 pages)
- OptiPlex 755 (45 pages)
- OptiPlex 755 (248 pages)
- OptiPlex 760 (76 pages)
- OptiPlex 760 (203 pages)
- OptiPlex 745 (212 pages)
- OptiPlex 745 (360 pages)
- OptiPlex 745 (428 pages)
- OptiPlex 780 (73 pages)
- OptiPlex 780 (40 pages)
- OptiPlex 780 (14 pages)
- OptiPlex 780 (89 pages)
- OptiPlex 780 (10 pages)
- OptiPlex 780 (74 pages)
- OptiPlex 780 (80 pages)
- OptiPlex GX620 (294 pages)
- OptiPlex GX620 (338 pages)
- OptiPlex GX620 (221 pages)
- Inspiron 530 (226 pages)
- OptiPlex 960 (Late 2008) (16 pages)
- OptiPlex GX260 (100 pages)
- OptiPlex GX260 (235 pages)
- OptiPlex FX160 (Late 2008) (20 pages)
- OptiPlex FX160 (Late 2008) (132 pages)
- OptiPlex FX160 (20 pages)
- OptiPlex 210L (128 pages)
- OptiPlex 210L (300 pages)
- OptiPlex 210L (258 pages)
- OptiPlex 210L (150 pages)
- OptiPlex 210L (130 pages)
- OptiPlex 320 (266 pages)
- OptiPlex 320 (356 pages)
- OptiPlex 320 (44 pages)
- OptiPlex 320 (140 pages)
- OptiPlex 320 (132 pages)
- OptiPlex 320 (312 pages)
- OptiPlex GX240 (144 pages)
- OptiPlex GX240 (121 pages)
- OptiPlex GX240 (86 pages)
- OptiPlex GX240 (283 pages)
- OptiPlex GX240 (298 pages)
- OptiPlex GX240 (182 pages)