Display bezel, Display panel – Dell Latitude D600 User Manual
Page 12
Display Bezel
1.
Follow the instructions in "
Preparing to Work Inside the Computer
."
2.
Remove the
keyboard
.
3.
Remove the
.
4.
Use a plastic scribe to pry the six display bumpers out of the screw holes located on the front of the bezel.
5.
Remove the six M2 x 5-mm screws located on the front of the bezel.
6.
Starting at the bottom of the display panel (by the Dell™ logo), use your fingers to separate the bezel from the top cover by lifting the inside edge of
the bezel away from the top cover.
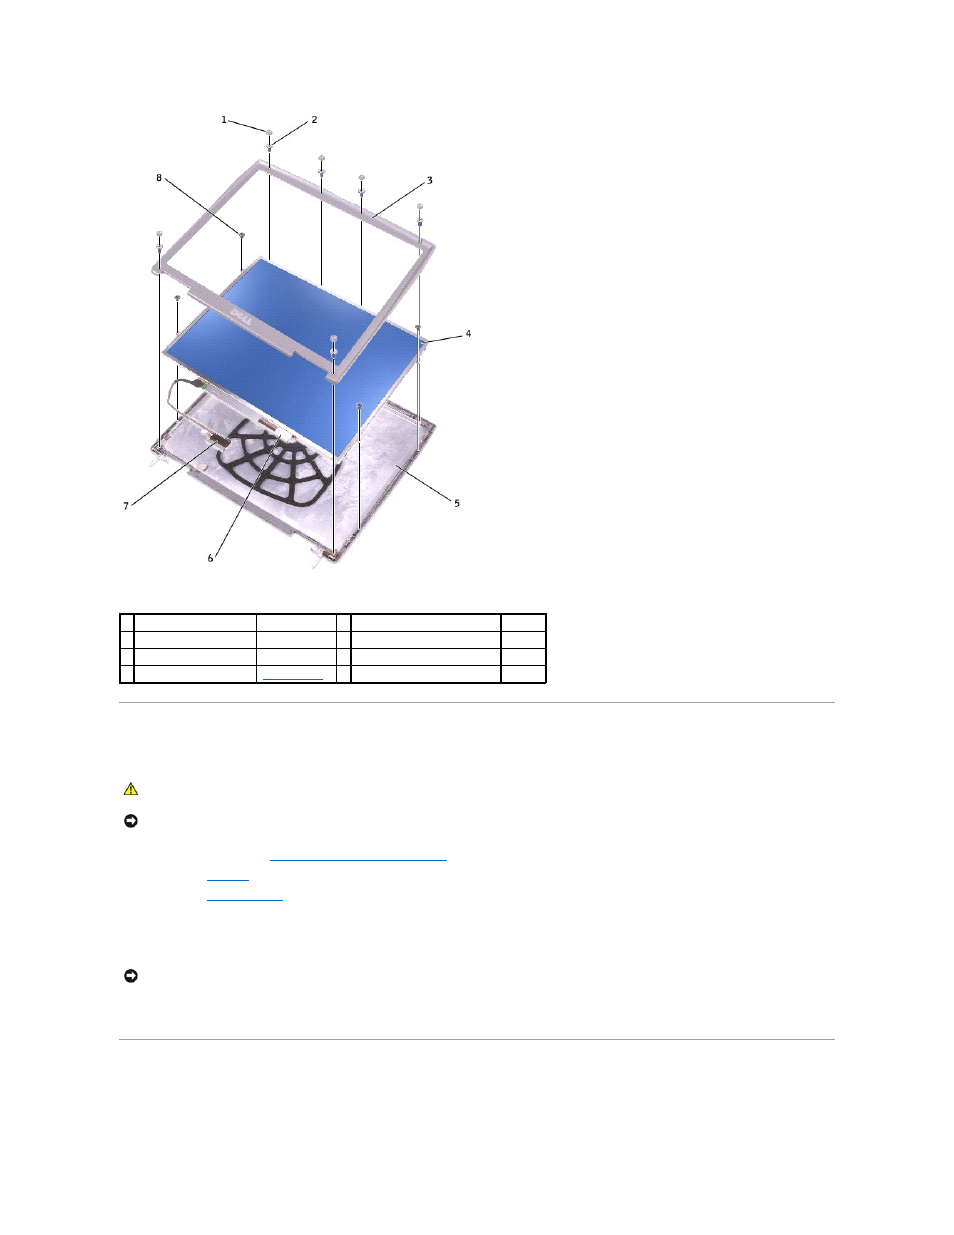
Display Panel
1 display bumpers (6)
6R933
5 top cover
8M669
2 M2 x 5-mm screws (6)
1428U
6 flex-cable retention bracket
4270E
3 display bezel
6M873
7 flex cable
6M871
4 display panel
See MINI RSL
8 M2 x 5-mm screws (4)
CAUTION:
Before performing the following procedures, read the safety instructions in your System Information Guide.
NOTICE:
To avoid electrostatic discharge, ground yourself by using a wrist grounding strap or by periodically touching an unpainted metal surface (such
as the back panel) on the computer.
NOTICE:
Carefully separate the bezel from the top cover to avoid damage to the bezel.