Display latch, Replacing the display panel, Removing the display latch – Dell Inspiron 9200 User Manual
Page 52
5.
Remove the eight M2 x 3-mm screws from each side of the display panel.
6.
Lift the display panel out of the display cover.
7.
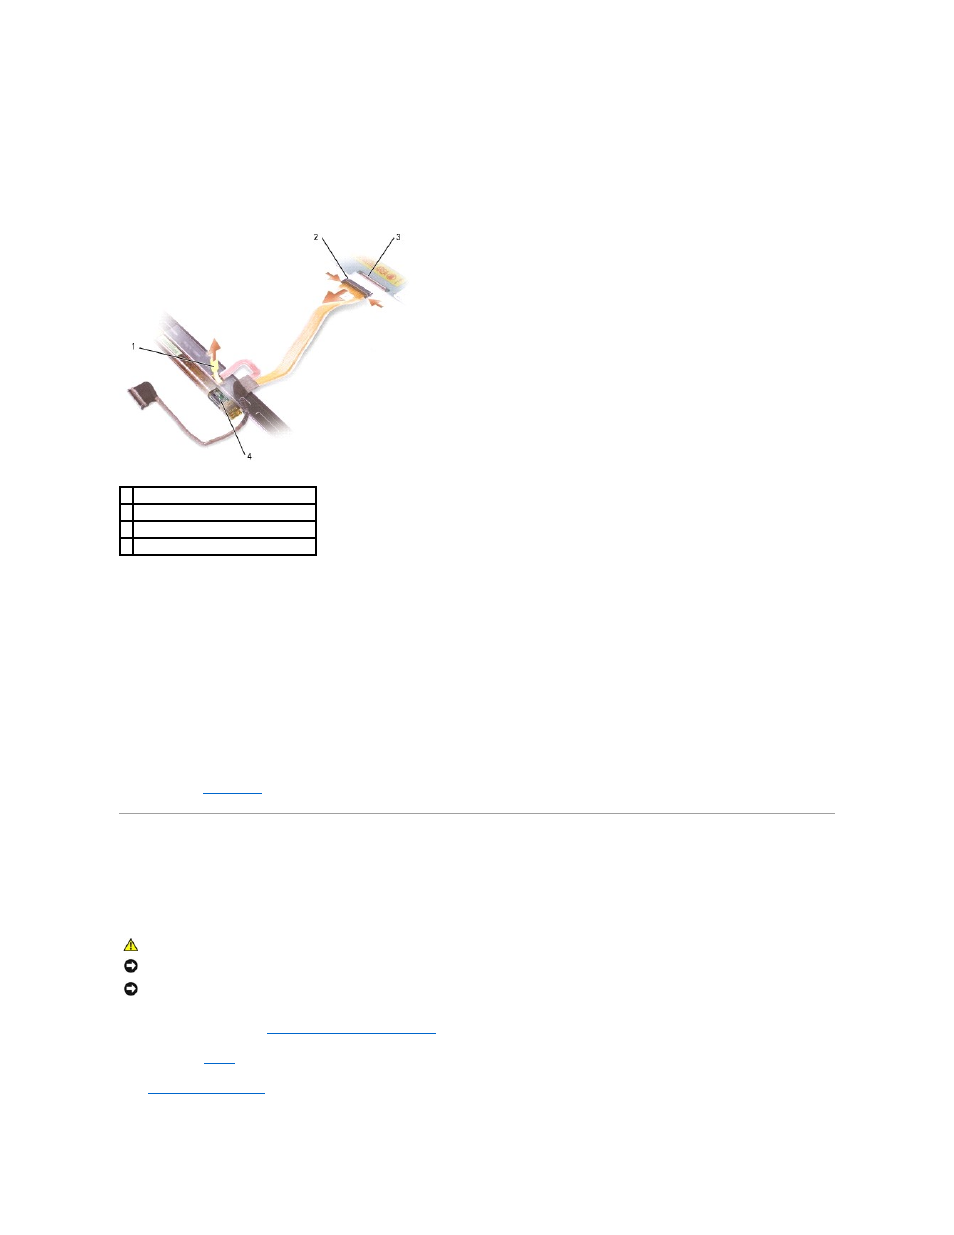
Press in both sides of the top flex-cable connector, and pull the top flex-cable connector away from the display connector.
8.
Use the pull-tab to disconnect the bottom flex-cable connector from the inverter connector.
Replacing the Display Panel
1.
Reconnect the top display cable connector to the top flex-cable connector.
2.
Reconnect the bottom flex-cable connector to the inverter connector.
3.
Replace the display panel inside the top cover.
4.
Replace the M2 x 3-mm ground screw that attaches the display-panel ground wire to the back display cover.
5.
Replace the eight M2 x 3 screws (four on each side) around the display panel.
6.
Display Latch
Removing the Display Latch
1.
Follow the instructions in "
Before Working Inside Your Computer
."
2.
.
3.
1 pull-tab on bottom flex-cable connector
2 top flex-cable connector
3 display connector
4 inverter connector
CAUTION:
Before you begin any of the procedures in this section, follow the safety instructions located in the Product Information Guide.
NOTICE:
To avoid electrostatic discharge, ground yourself by using a wrist grounding strap or by touching an unpainted metal surface on the computer.
NOTICE:
To avoid damaging the system board, you must remove the main battery before you begin working inside the computer.