Battery latches, Removing the battery latches, Replacing the battery latches – Dell Inspiron X200 User Manual
Page 2
Back to Contents Page
Battery Latches
Dell™ X200 Service Manual
Removing the Battery Latches
1.
Remove the
battery
.
2.
Remove the
keyboard
.
3.
Remove the
palm rest
.
4.
Remove the
hinge covers
.
5.
Remove the
display assembly
.
6.
Remove the
keyboard tray
.
7.
Remove the
hard drive
.
8.
Remove the
memory module
.
9.
Remove the
Mini PCI card
, if present.
10.
Remove the
system board
.
11.
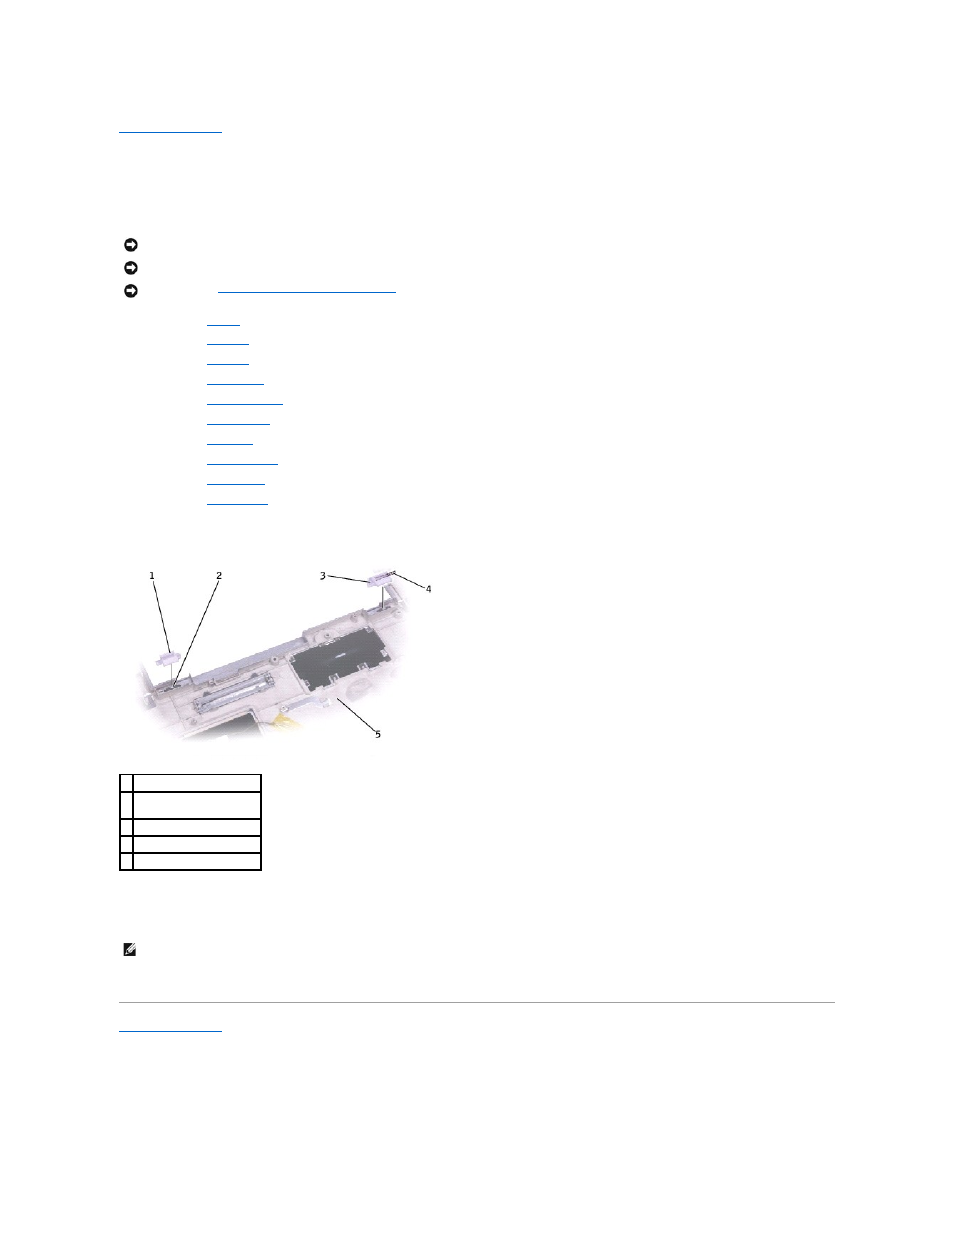
On the inside of the bottom case, use your fingers to unhook the latch from the bottom case and the snap tabs, catching the latch button on the
outside of the bottom case.
Replacing the Battery Latches
1.
Snap in the new latch button from behind the bottom case, making certain that the snap tabs are fully engaged in the latch.
2.
Ensure that the newly installed latch moves smoothly and freely when pushed and released.
Back to Contents Page
NOTICE:
Disconnect the computer and any attached devices from electrical outlets.
NOTICE:
To avoid ESD, ground yourself by using a wrist grounding strap or by touching an unpainted metal surface on the computer.
NOTICE:
Read "
Preparing to Work Inside the Computer
" before performing the following procedure.
1 battery lock latch
2 snap tabs (3 per latch
button)
3 battery latch release
4 spring
5 bottom case
NOTE:
The battery latch release has a spring and should be installed on the right side of the bottom case.