Floppy drive, Removing a floppy drive – Dell Dimension 5000 User Manual
Page 85
Removing and Installing Parts
85
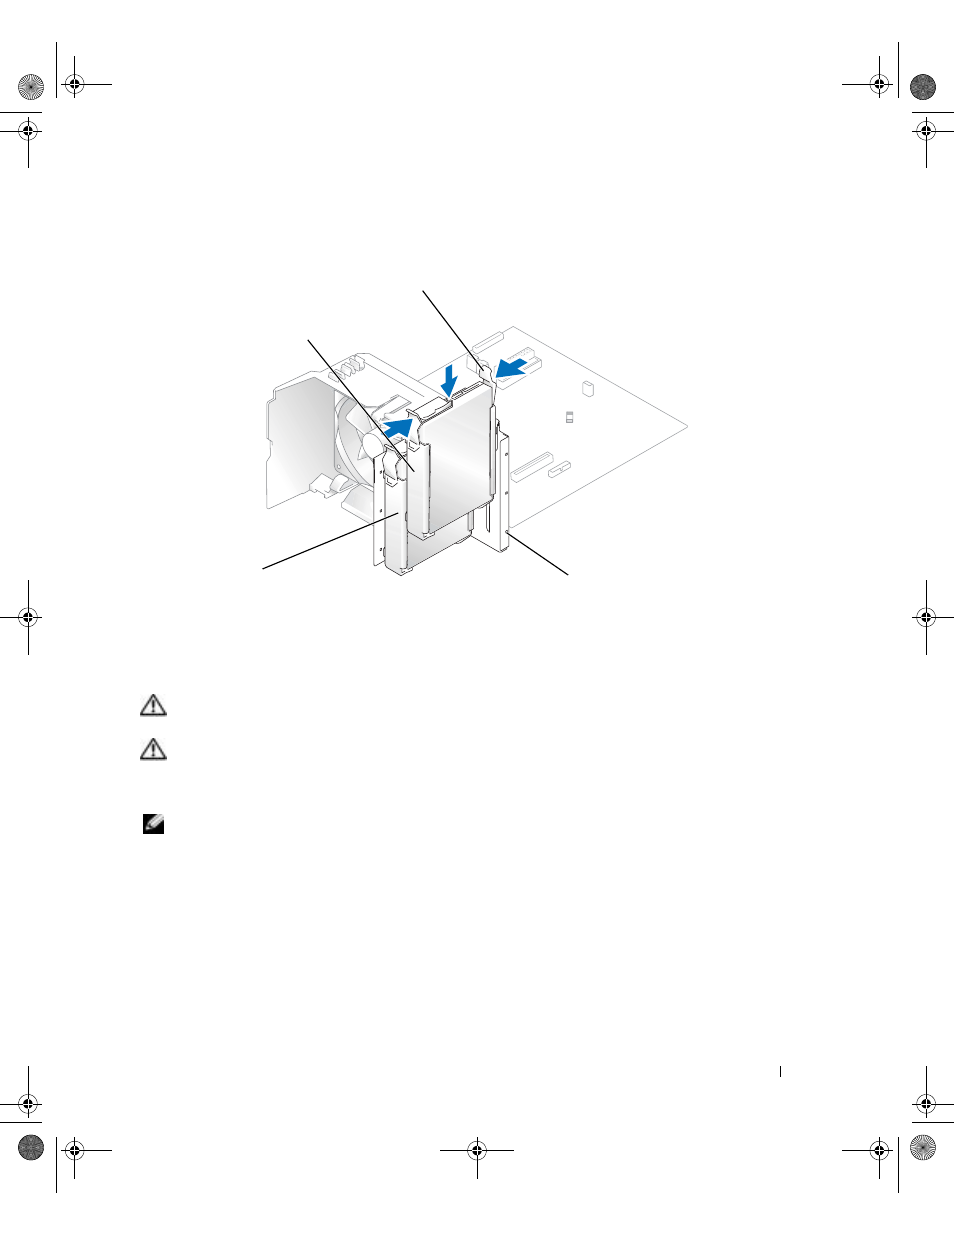
5 Gently slide the new drive (second hard drive) into place until you hear a click or feel the
drive securely installed.
6 Connect a power cable to the drive.
7 Connect the data cable to the drive and to the system board (see page 61).
Floppy Drive
CAUTION:
Before you begin any of the procedures in this section, follow the safety instructions
located in the Product Information Guide.
CAUTION:
To guard against electrical shock, always unplug your computer from the electrical outlet
before removing the cover.
Follow the procedures in "Before You Begin" on page 53.
NOTE:
If you are adding a floppy drive, see "Installing a Floppy Drive" on page 87.
Removing a Floppy Drive
1 Follow the procedures in "Before You Begin" on page 53."
2 Remove the drive panel (see page 76).
rail tabs (2)
primary hard drive
in upper bay
secondary hard
drive in lower bay
hard drive bay
C7565bk1.book Page 85 Wednesday, January 26, 2005 1:37 PM
- Inspiron 530 (2 pages)
- OptiPlex 755 (528 pages)
- OptiPlex 755 (82 pages)
- OptiPlex 755 (45 pages)
- OptiPlex 755 (248 pages)
- OptiPlex 755 (622 pages)
- OptiPlex 760 (76 pages)
- OptiPlex 760 (203 pages)
- OptiPlex 745 (360 pages)
- OptiPlex 745 (428 pages)
- OptiPlex 745 (212 pages)
- OptiPlex 780 (14 pages)
- OptiPlex 780 (89 pages)
- OptiPlex 780 (10 pages)
- OptiPlex 780 (74 pages)
- OptiPlex 780 (80 pages)
- OptiPlex 780 (73 pages)
- OptiPlex 780 (40 pages)
- OptiPlex GX620 (338 pages)
- OptiPlex GX620 (221 pages)
- OptiPlex GX620 (294 pages)
- Inspiron 530 (226 pages)
- OptiPlex 960 (Late 2008) (16 pages)
- OptiPlex GX260 (235 pages)
- OptiPlex GX260 (100 pages)
- OptiPlex FX160 (Late 2008) (20 pages)
- OptiPlex FX160 (Late 2008) (132 pages)
- OptiPlex FX160 (20 pages)
- OptiPlex 210L (300 pages)
- OptiPlex 210L (258 pages)
- OptiPlex 210L (150 pages)
- OptiPlex 210L (130 pages)
- OptiPlex 210L (128 pages)
- OptiPlex 320 (44 pages)
- OptiPlex 320 (140 pages)
- OptiPlex 320 (132 pages)
- OptiPlex 320 (312 pages)
- OptiPlex 320 (266 pages)
- OptiPlex 320 (356 pages)
- OptiPlex GX240 (121 pages)
- OptiPlex GX240 (86 pages)
- OptiPlex GX240 (283 pages)
- OptiPlex GX240 (298 pages)
- OptiPlex GX240 (182 pages)
- OptiPlex GX240 (144 pages)