16 english, Setting the clock – Clarion compact disc User Manual
Page 10
The operation panel turns upward and down-
ward several times and stops at the stored
angle.
5) Press the ADJ button
to return to the pre-
vious mode.
*
If you want to change the stored angle, per-
form the same operation from step 1).
Notes:
•
In step 3) above, the operation panel turns upward
and downward several times to store the set
angle. During this operation, be careful not to let
your fingers get caught in the panel.
•
Under some operating conditions, the stored
angle may vary slightly.
•
If you press the Close button
when the opera-
tion panel is turned downward (tape is ejected),
the panel will not be set to the stored angle.
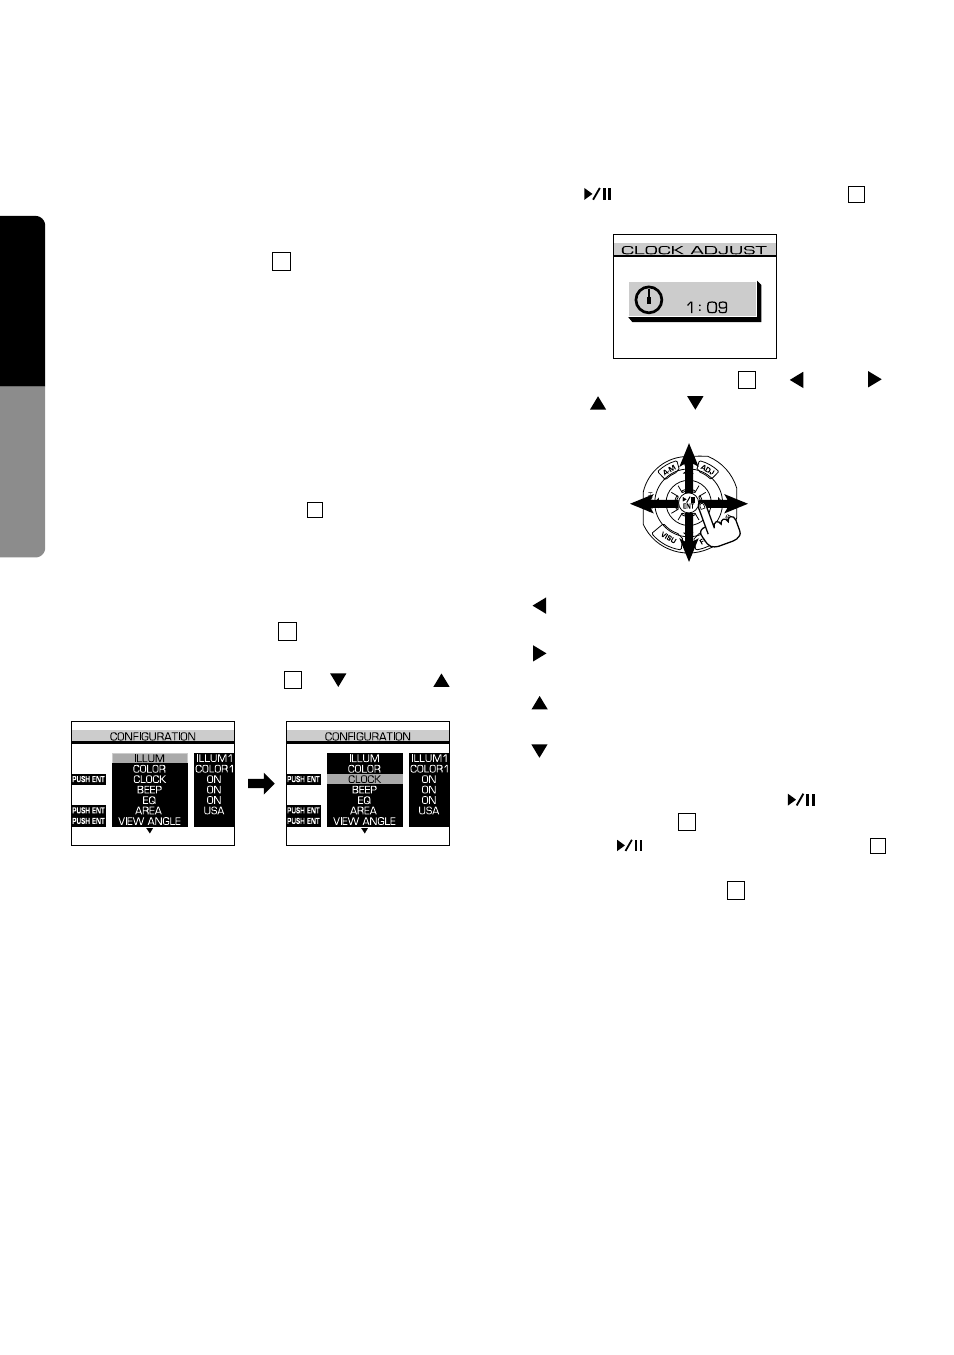
Setting the clock
1) Press the ADJ button
to go to the CON-
FIGURATION display.
2) Slide the Up/Down button
to
(down) or
(up) and move the cursor to “CLOCK.”
3) Press
(center) of the ENT button
to
go to clock setting mode.
4) Slide the Up/Down button
to
(left),
(right),
(up), or
(down) to set a time.
: Selects the hour (the hour becomes blue
and can be changed).
: Selects the minute (the minute becomes
blue and can be changed).
: The hour or minute increments while the
corresponding figure is blue.
: The hour or minute decrements while
the corresponding figure is blue.
5) After adjusting the time, press
(center)
of the ENT button
to set it.
*
Pressing
(center) of the ENT button
resets the second to zero.
6) Pressing the ADJ button
returns the mode
to the previous one.
Note:
•
The time is always displayed in radio, tape, CD,
and CD changer modes. (However, when the
“CITY LIGHTS” pattern in the spectrum analyzer
is selected or the security camera is used, the
time is not displayed.)
10
11
11
Increments the figure.
Selects the minute.
Selects the hour.
Decrements the figure.
11
11
11
10
28
10
16
English
Owner
’s Guide