Teach-in procedure, 5 teach-in procedure – Baumer BA IRxx.DxxL User Manual
Page 9
en_BA_IRxx
.DxxL.docx
9/12
Baumer Electric AG
10.11.2014 14:03/simg V1.0 ANW_81146130
Frauenfeld, Switzerland
4.5 Teach-in procedure
4.5.1
General concepts
Baumer inductive sensors with a linearized output can be configured for the following reasons:
Compensate tolerances (mechanical tolerances at installation, variation in target geometry and
material, variation of sensors): here typically a 1-point teach is useful.
Quick setup of sensors: 1-point teach is useful as it allows mount the sensor without the need of
respecting very high tolerances
Get maximal system accuracy: With 2-point teach is most useful as the minimal and maximal distance
can be defined. This allows adjusting the measuring range of a sensor to the distance relevant in an
application.
Set a digital alarm or indicate a valid/invalid position: sensors which have an additional digital output
can be set to deliver a high output value only if an object is within a defined measuring range.
Set sensor to a defined state: factory reset
The teach procedure always requires to connect the teach wire with the positive supply voltage of the sensor
(+Vs). Depending on how long this connection is made different teach-in procedures can be used. Sensors
which have an LED indicate that the teach-in procedure is started by the blinking of the yellow LED.
Baumer sensors with teach-in have typically three teach levels which can be activated. Each teach level might
have a sub variant for teaching. The different sensors have the following teach capabilities:
Sensor
Teach level 1
Teach level 2
Teach level 3
IR12.D06L-xxx
1-point teach analog
Window teach digital
Factory reset
IR18.D08L-xxx
1-point teach analog
Window teach digital
Factory reset
4.5.2
Teach of analog output
4.5.2.1 1-point teach
The 1-point teach is typically used in applications where a quick setup is required and where the installation
tolerances shall be compensated. Two situations can be distinguished:
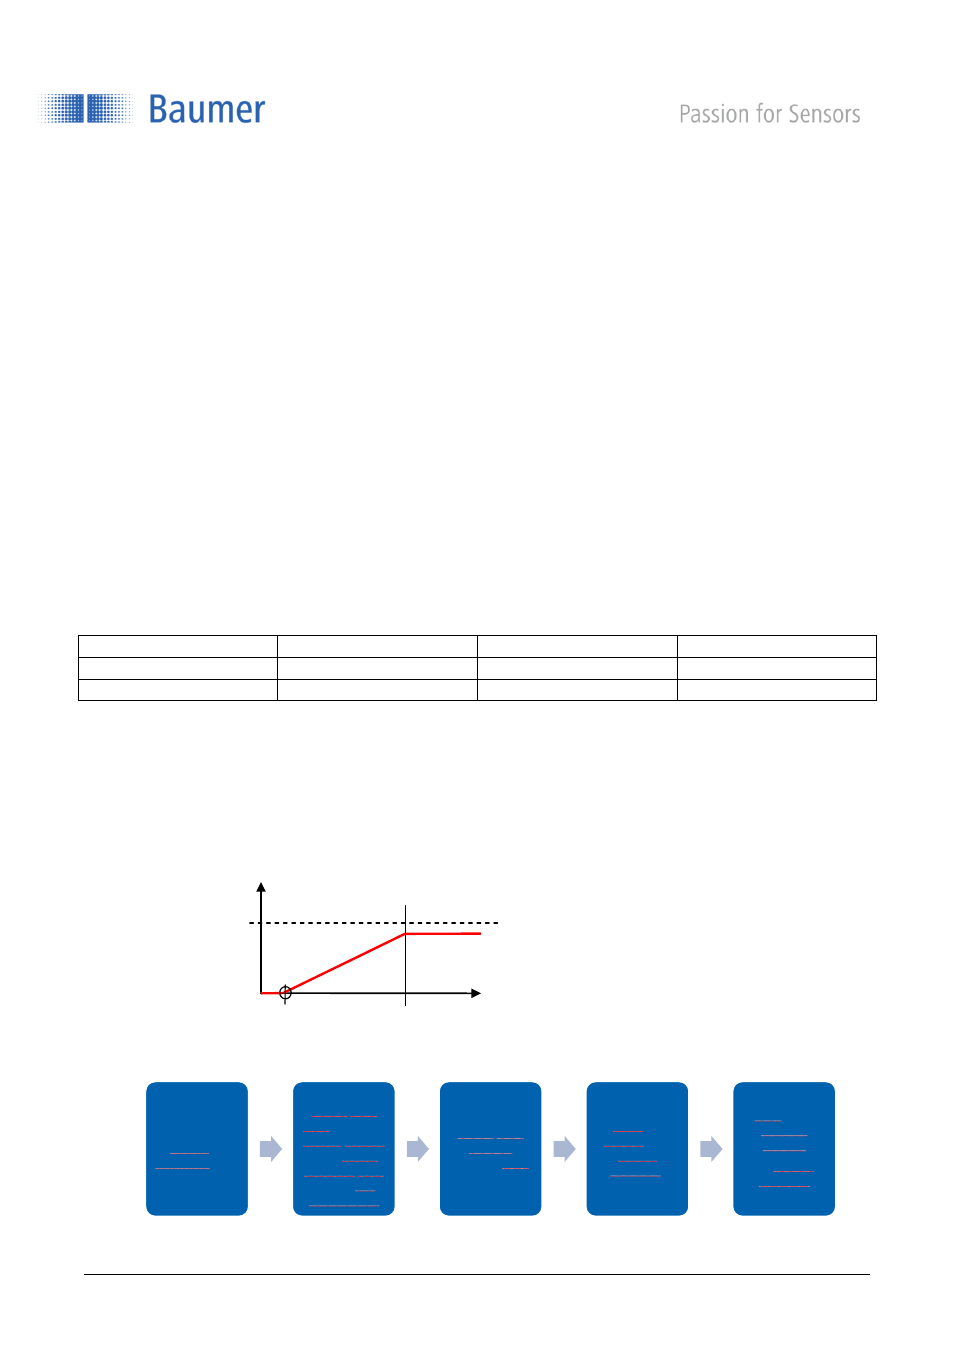
1) When the sensor is taught, the target is at the minimal distance (desi
gnated “A” in the lower graph). In
the application the target only moves away from the sensor. In this situation it is recommended to
teach the sensor in a way such that it has 0V (or 4mA) at the minimal position.
Teach procedure: 1-point teach (object is close and moves away from sensor)
Position
object at
distance «A»
Connect
teach wire
with +V (2s).
When yellow
LED starts
flashing with
1 Hz , cut
connection
Connect
teach wire
shortly
(>0.2s) with
+V
Wait 4s
(yellow LED
keeps
flashing)
Red LED
flashes
shortly
Teach
finished
Distance
Sd max
10V/20mA
A
0V/4mA
slope