Setting an ip address (sx80), Setting ip address of the computer, Sx80) – Canon HDMI SX800 User Manual
Page 120: P120
120
Setting an IP Address (SX80)
By connecting SX80 to the network, you can receive an error notification message from
the projector or control the projector from your computer. (
To connect via the network, an IP address must be assigned to the projector. Set an IP address
by following the steps below. (The examples shown are Windows XP screenshot images.)
■Setting IP Address of the Computer
1
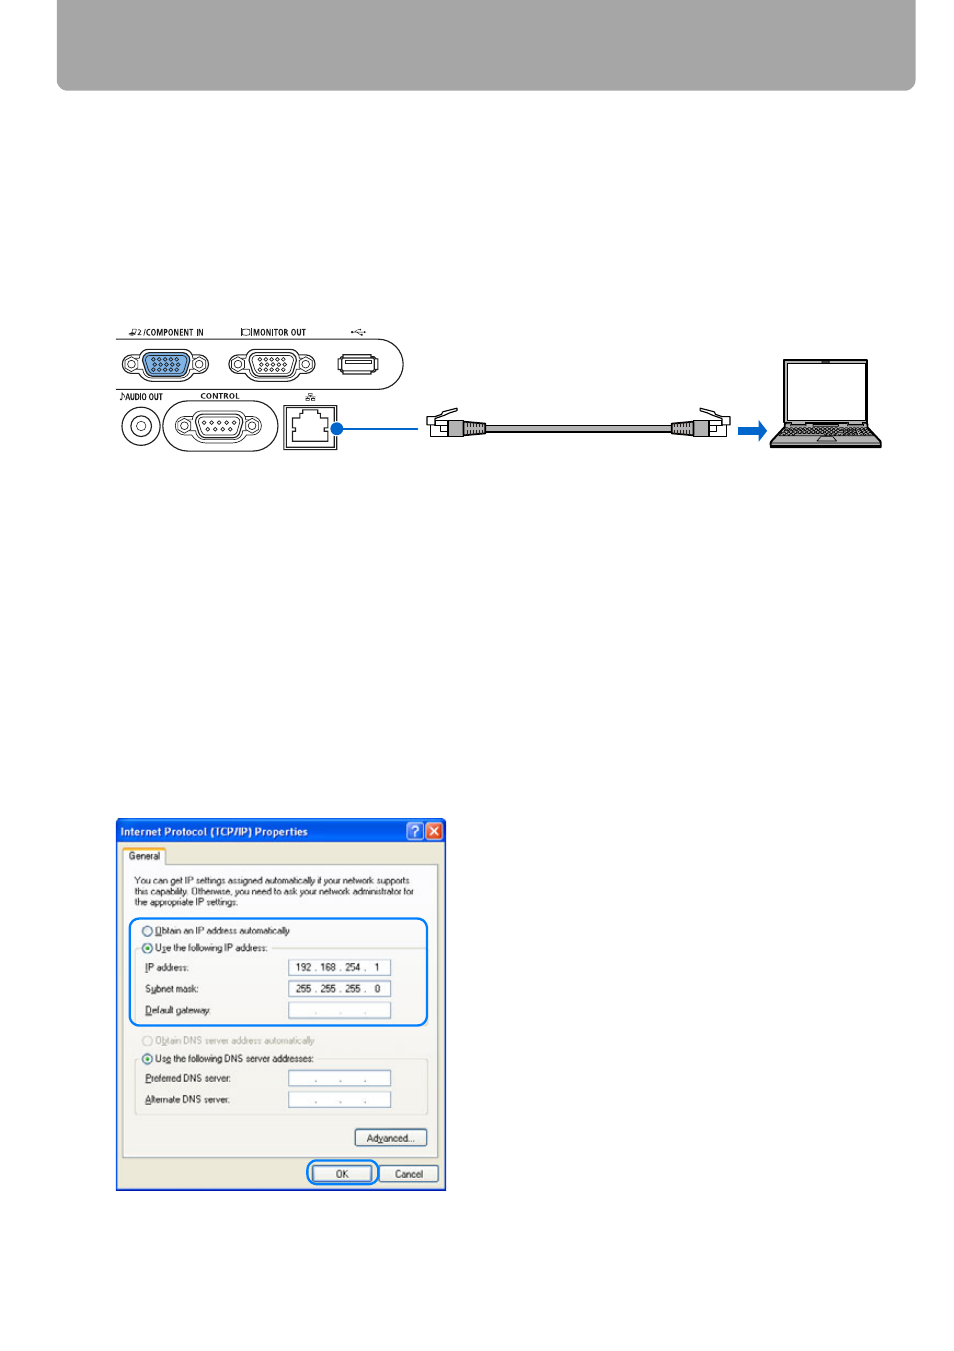
Connect the projector and a computer directly via a cross type LAN cable.
2
Turn on the power of the projector and computer.
3
Open [Control Panel] from the [Start] menu, then select [Network and Internet Con-
nections] - [Network Connections].
4
Right-click [Local Area Connection], and open [Properties].
5
Select [Internet Protocol (TCP/IP)] and click the [Properties] button. Take notes of the
original network settings (IP address, subnet mask, DHCP settings, etc).
6
Select [Use the following IP address] and set as follows:
[IP address]:
192.168.254.1
[Subnet mask]:
255.255.255.0
7
When you have specified the settings, click the [OK] button and then click the [OK] but-
ton on the [Local Area Connection Properties] window to close it.
Commercial cross type LAN cable