Bio-Rad Gel Doc™ EZ System User Manual
Page 10
6 Image Lab Software for Obtaining Stain-Free Gel and Blot Images
Obtaining Stain-Free Blot Images
Instructions
1. Once the blotting step is complete, remove the blot and place it directly on a stain-free enabled
Bio-Rad UV transilluminator plate (ChemiDoc MP, ChemiDoc XRS+, Gel Doc XR+) or stain-free tray
(Gel Doc EZ).
Note: No fixation or rinsing steps are required. Membranes are more transparent to UV illumination when
wet. For optimal imaging, keep membranes wet with transfer buffer or water. Transfer buffer or water
also helps minimize air bubbles that can be trapped under the membrane.
Note: Do not place any material, such as plastic film, between the blot and the plate or tray.
2. Open Image Lab software.
a. Version 4.1 or later for Gel Doc EZ or ChemiDoc MP.
b. Version 5.1 or later for Gel Doc XR+ or ChemiDoc XRS+.
Download Image Lab version 5.1 at www.bio-rad.com/imagelabsoftware.
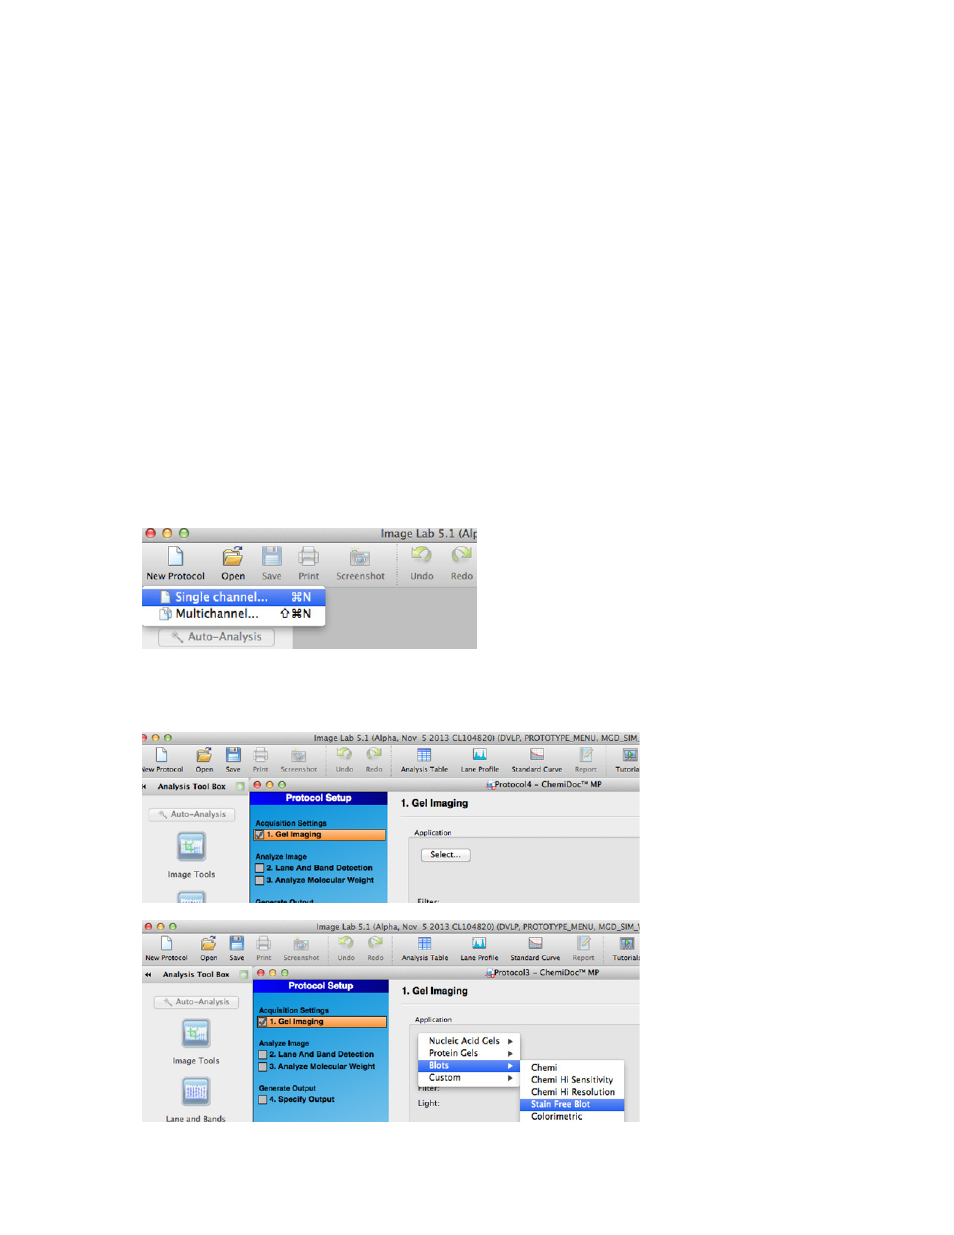
3. To acquire a stain-free blot image, configure the acquisition setting.
a. Select
New Protocol for Gel Doc EZ, Gel Doc XR+, and ChemiDoc XRS+.
b. Select
Single channel for ChemiDoc MP.
4. In the Application pane, click Select and then Blots > Stain Free Blot.
Note: For the Gel Doc EZ, Stain Free Blot is under the Protein Gels Application