Bio-Rad Peelable Foil Heat Seal User Manual
Page 11
Chapter 2 — Using the PX1 PCR Plate Sealer
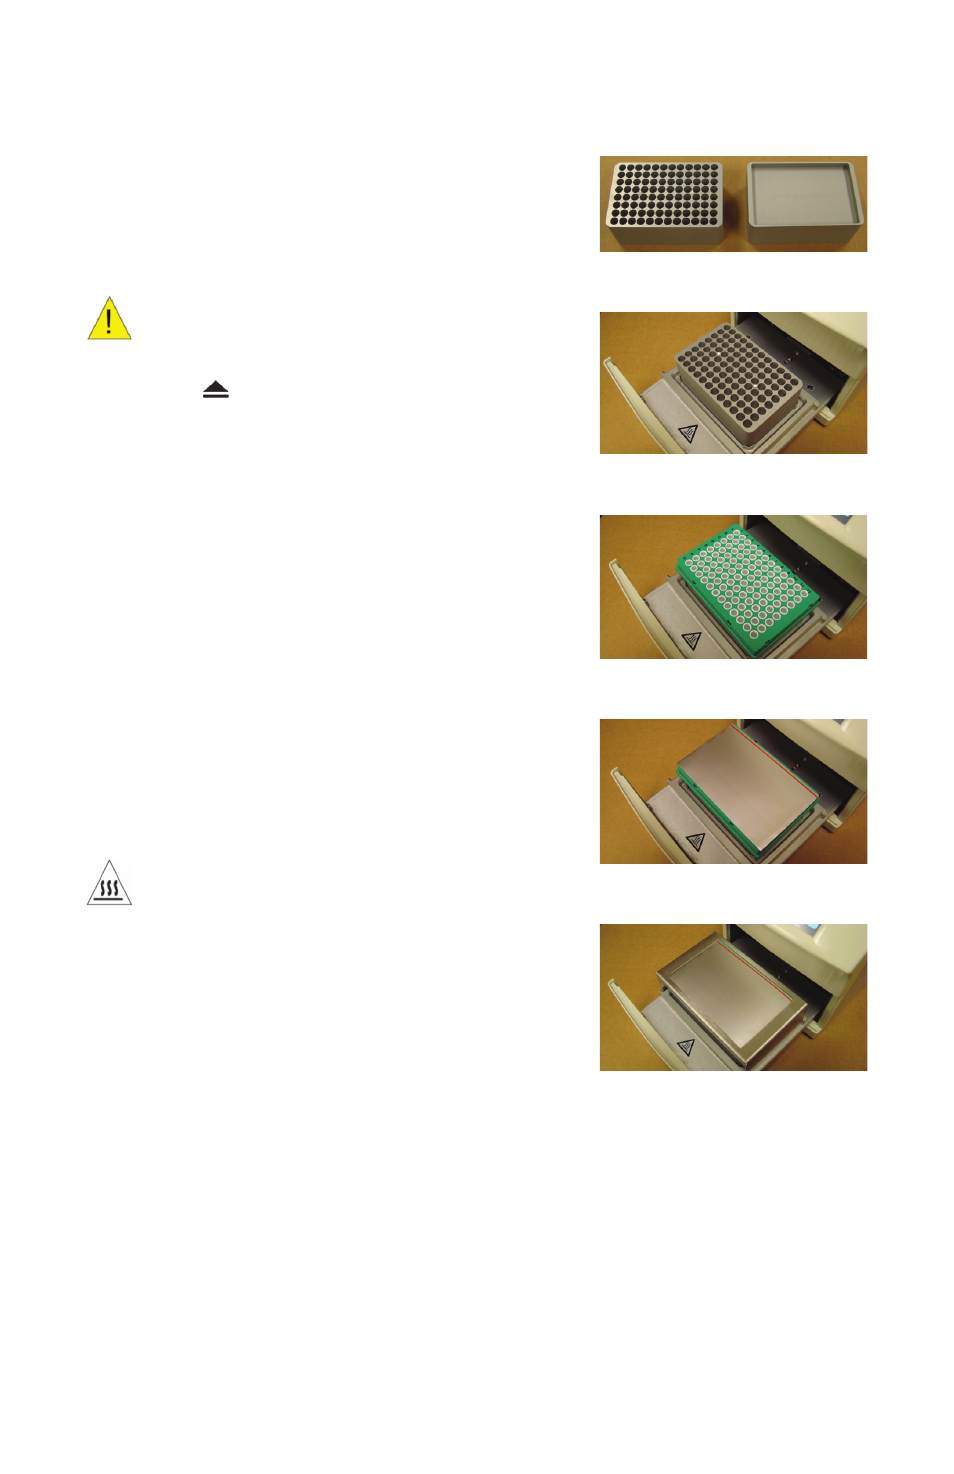
3. Seal the plate (Figure 8).
A. Determine correct side of the reversible 96/384-
well plate support block to use (A).
– 96-well plates, side with the 96 recesses up
– 384-well plates, flat side up
WARNING! Using the incorrect side of the
plate support block may result in poor sealing
and may possibly damage the instrument.
B. Touch
to open the drawer. Place plate
support block in the drawer (B).
C. Place PCR plate in plate support block (C).
D. Place seal on plate (D). The yellow sticker on
the Bio-Rad heat seal bag identifies the
sealing surface.
E. Some seals (including Permanent Clear Heat
Seal and Peelable Foil Heat Seal) require
the sealing frame to hold the seal in place. If
required, place sealing frame on top of seal,
aligning frame sides with outer grooves on the
drawer guides (E).
F. Touch Seal when the set temperature has been
reached and the seal button is green. The drawer
will close and the plate will be sealed. When
sealing is complete, the drawer will automatically
open and the plate can be removed.
WARNING! The plate and seal remain hot for
a few seconds after sealing. Use caution
when removing the plates.
Tip: Keep the plate support block and sealing
frame outside the instrument between sealings
so they do not become hot. Alternatively, the
drawer can be kept open to prevent the block
and frame from heating up.
Fig. 8. A, Determine correct
plate support block side.
B, Place plate support block in
drawer.
C, Place plate in plate support
block.
D, Place seal on plate (seal side
down).
E, Add sealing frame if necessary.
5