Basestation 3200 – Baseline Systems BaseManager 2.0 User Manual
Page 8
BaseManager 2 Quick Start Guide
BaseStation 3200
1. After you have installed, connected, and configured your communication equipment, turn the
dial on the BaseStation 3200 controller to Network position.
2. Press the Next button to highlight the
Ethernet Setup option, and then press Enter.
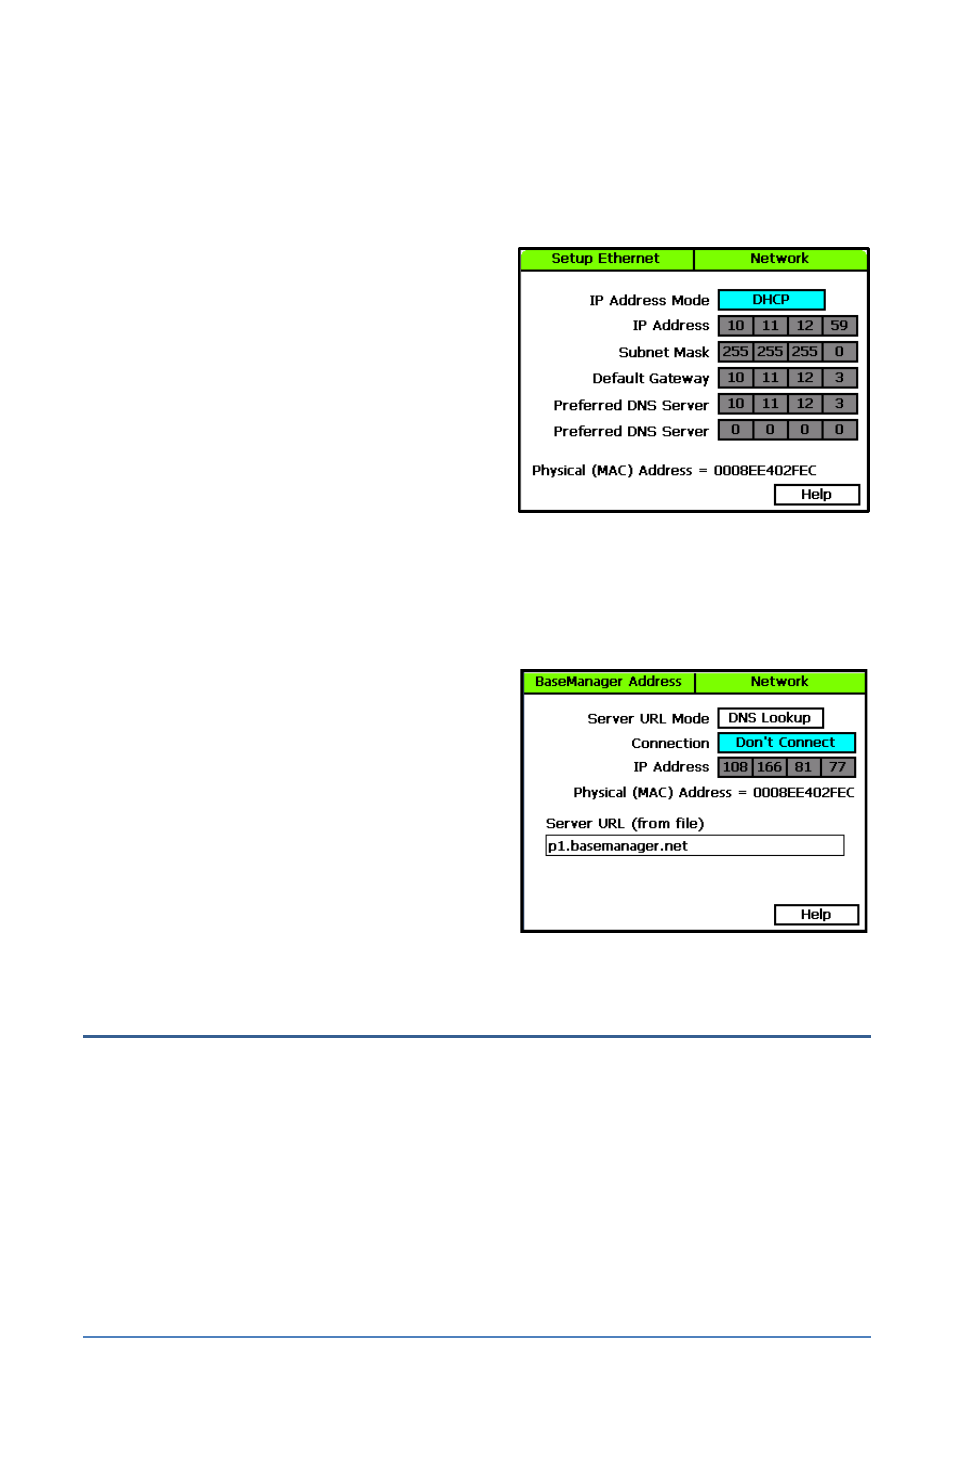
The Setup Ethernet screen displays.
3. Make sure that DHCP displays in the IP
Address Mode field.
Note: DHCP (Dynamic Host Configuration
Protocol) allows your controller to
automatically obtain an IP address, which
enables the connection to the Internet. DHCP
is the default network configuration for the
BaseStation 3200.
In some cases, private network configurations or network security issues might require that
you configure a static IP address for your controller. If your controller requires a static IP
address, refer to Setting Up a Static IP Address in the BaseStation 3200 User Manual.
4. Press the Back button to return to the Network menu.
5. When the BaseManager Server Setup option
is highlighted, press the Enter button to select
it.
6. Press the Next button to move to the
Connection field, and then press the + button
to change the setting in the field from Don’t
Connect to the connection method for your
controller.
Note: If the controller is connected with an
Ethernet radio or a Wi-Fi module, select the
Ethernet option in the Connection field.
Step 4 – Get the Registration Code from Your Controller
When your controller connects to the BaseManager server for the first time, the server detects the
connection and checks for an associated BaseManager account. If no account is found, the server
sends a registration code to your controller. You might see the PIN displayed on the controller’s
main screen. You need the PIN when you call Baseline to set up your BaseManager account. You
also need the PIN to add a controller to an existing BaseManager account.
After you create your BaseManager account, the PIN no longer displays on the controller.
Page 4