Step 3 – connect your controller to basemanager, Basestation 1000 – Baseline Systems BaseManager 2.0 User Manual
Page 7
BaseManager 2.0 Quick Start Guide
Step 3 – Connect Your Controller to BaseManager
IMPORTANT NOTE:
Follow the steps below to connect your controller to Baseline’s BaseManager
server. If the controller needs to connect to a self-hosted BaseManager server, refer to the topic in
the Appendix.
BaseStation 1000
1. Press the System Setup button. The System Setup menu displays.
2. Press the button to highlight the Network Setup option, and then press the OK button to
select it. The Network Setup menu displays.
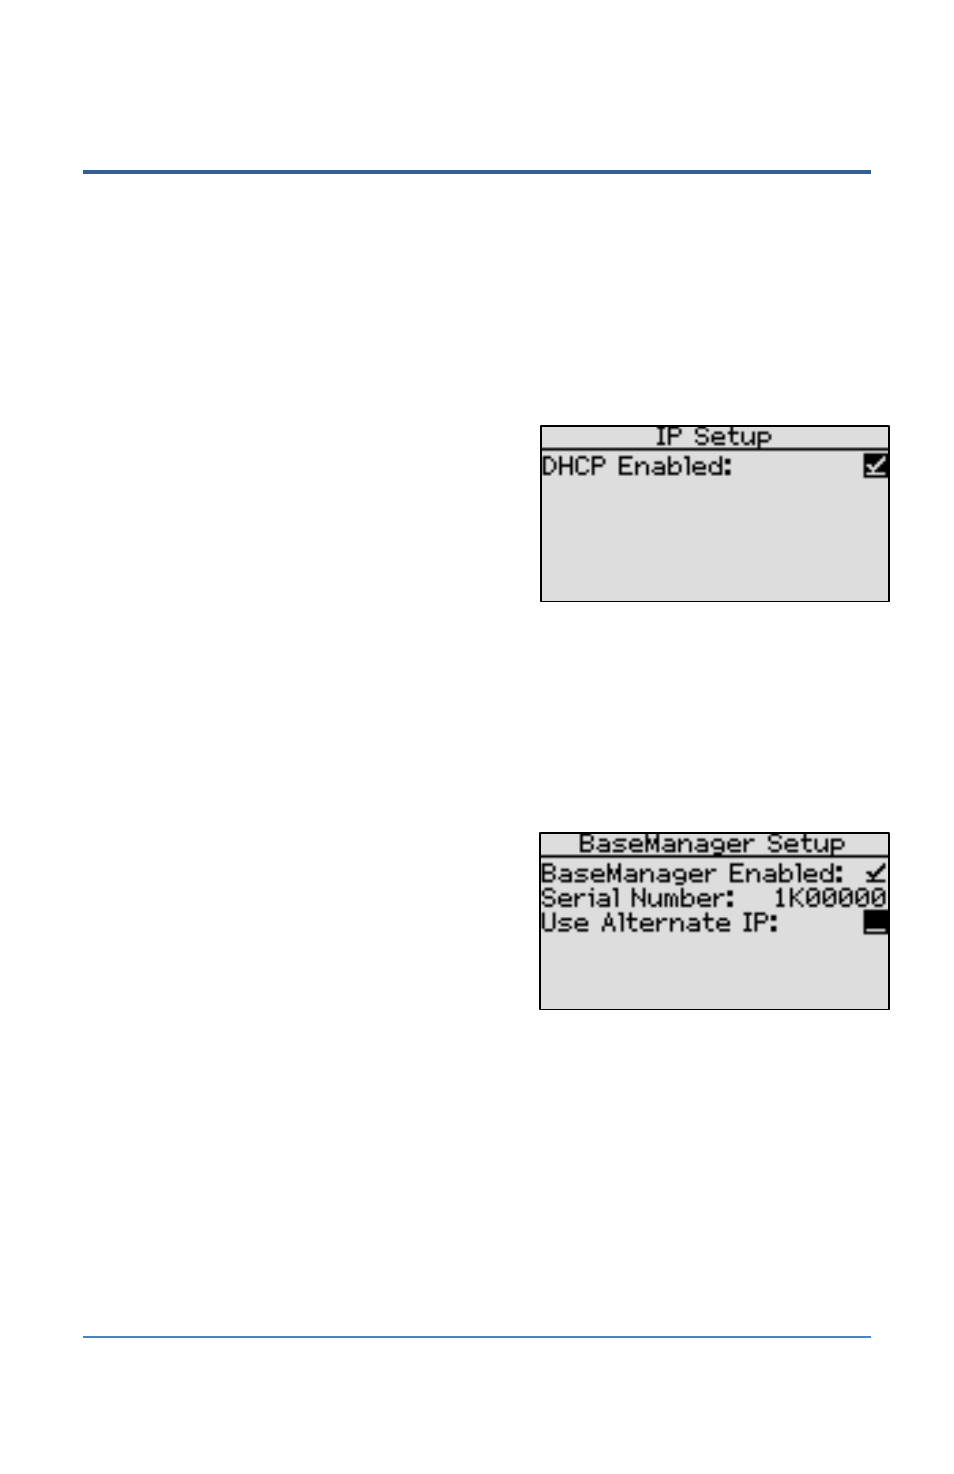
3. The IP Setup option should be highlighted. If it is
not highlighted, press the or button to
highlight it, and then press the OK button. The IP
Setup screen displays.
4. Make sure that a checkmark displays in the
DHCP Enabled field.
Note: DHCP (Dynamic Host Configuration
Protocol) allows your controller to automatically
obtain an IP address, which enables the connection to the Internet. DHCP is the default
network configuration for the BaseStation 1000.
In some cases, private network configurations or network security issues might require that
you configure a static IP address for your controller. If your controller requires a static IP
address, refer to Setting Up a Static IP Address in the BaseStation 1000 User Manual.
5. Press the Back button to return to the Network Setup menu.
6. Press the button to highlight the
BaseManager Setup option, and then press the
OK button to select it. The BaseManager Setup
screen displays.
7. Make sure that a checkmark displays in the
BaseManager Enabled field. If the checkmark is
not there, press the + or – button to enter it in
the field.
Page 3