Installation: mira led wall mount, Installing wall arm, Notice – Amico Mira LED User Manual
Page 15: Caution
www.amico.com
15
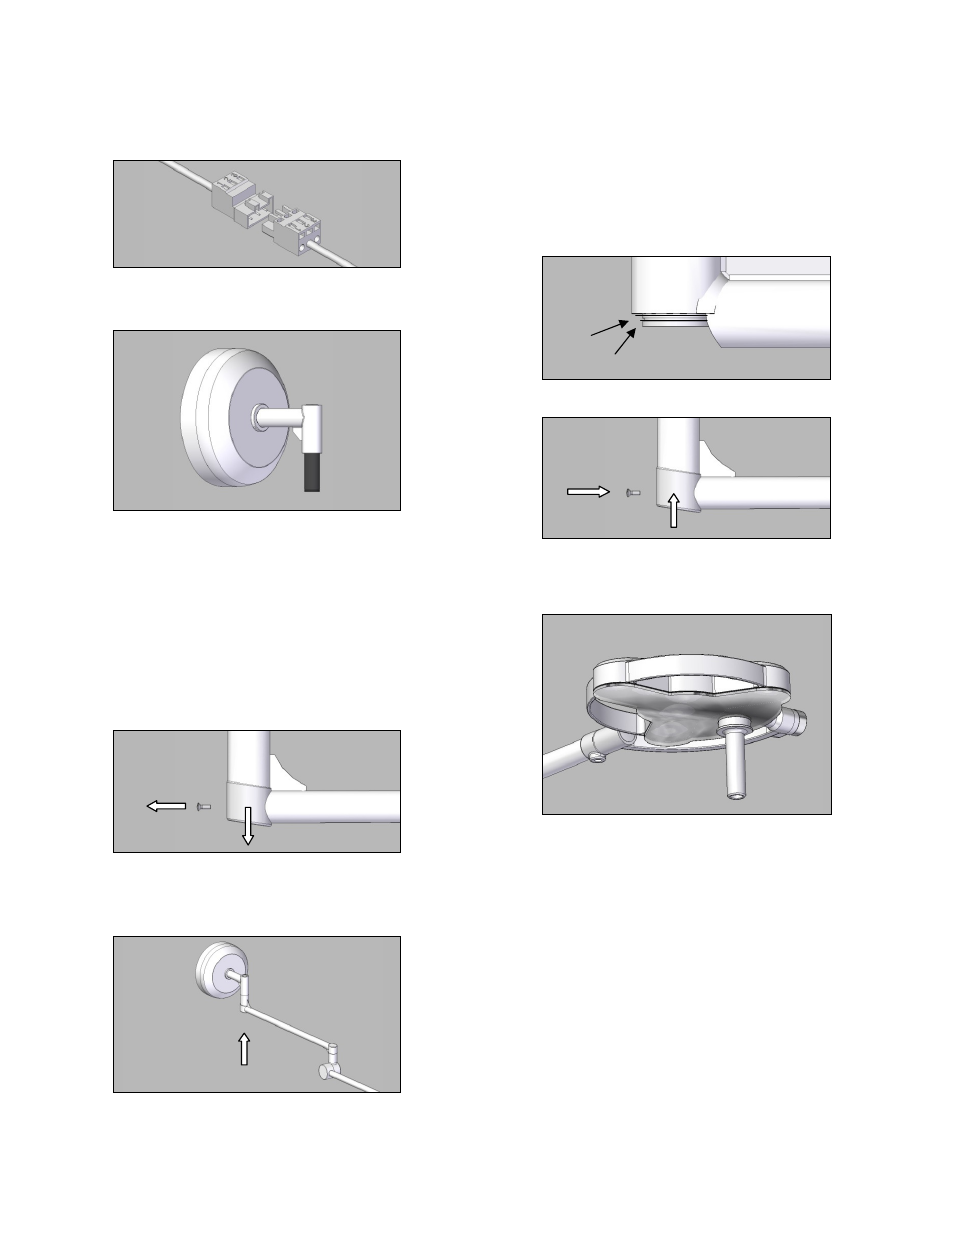
• Connect the lamp cable.
• Push the cover towards the wall.
• Tighten with the ring.
Installing wall arm
NOTICE
Observe the Ondal operating instructions supplied.
CAUTION
Danger of injury from unfolding spring arm.
• Remove screw on the side and remove cover cup
with plug.
• Installing wall arm.
CAUTION
Light may fall if inaccurately fastened.
• Locking ring must click into groove and be evenly
positioned all around.
• First install washer 1, then the locking ring 2.
• Pull on the plug with cover cup and fasten with
Allen screw.
• To continue with installing the light head see the
Installing Light Head section later in this manual.
Installation: Mira LED Wall Mount
ENG
INSTALLING triango 30 W; Installing wall arm
14
Connect the lamp cable.
Push the cover towards the wall.
Tighten with the ring.
6.3
Installing wall arm
NOTICE
Observe the Ondal operating instructions
supplied.
CAUTION
Danger of injury from unfolding spring arm.
Remove screw on the side and remove
cover cup with plug.
Installing wall arm.
CAUTION
Light may fall if inaccurately fastened.
Locking ring must click into groove and be
evenly positioned all around.
First install washer 1, then the locking ring 2.
Pull on the plug with cover cup and fasten
with Allen screw.
To continue with installing the light head see
Sec. 8
1
2