Installation: mira led ceiling mount, Installing ceiling arm, Notice – Amico Mira LED User Manual
Page 13: Caution
www.amico.com
13
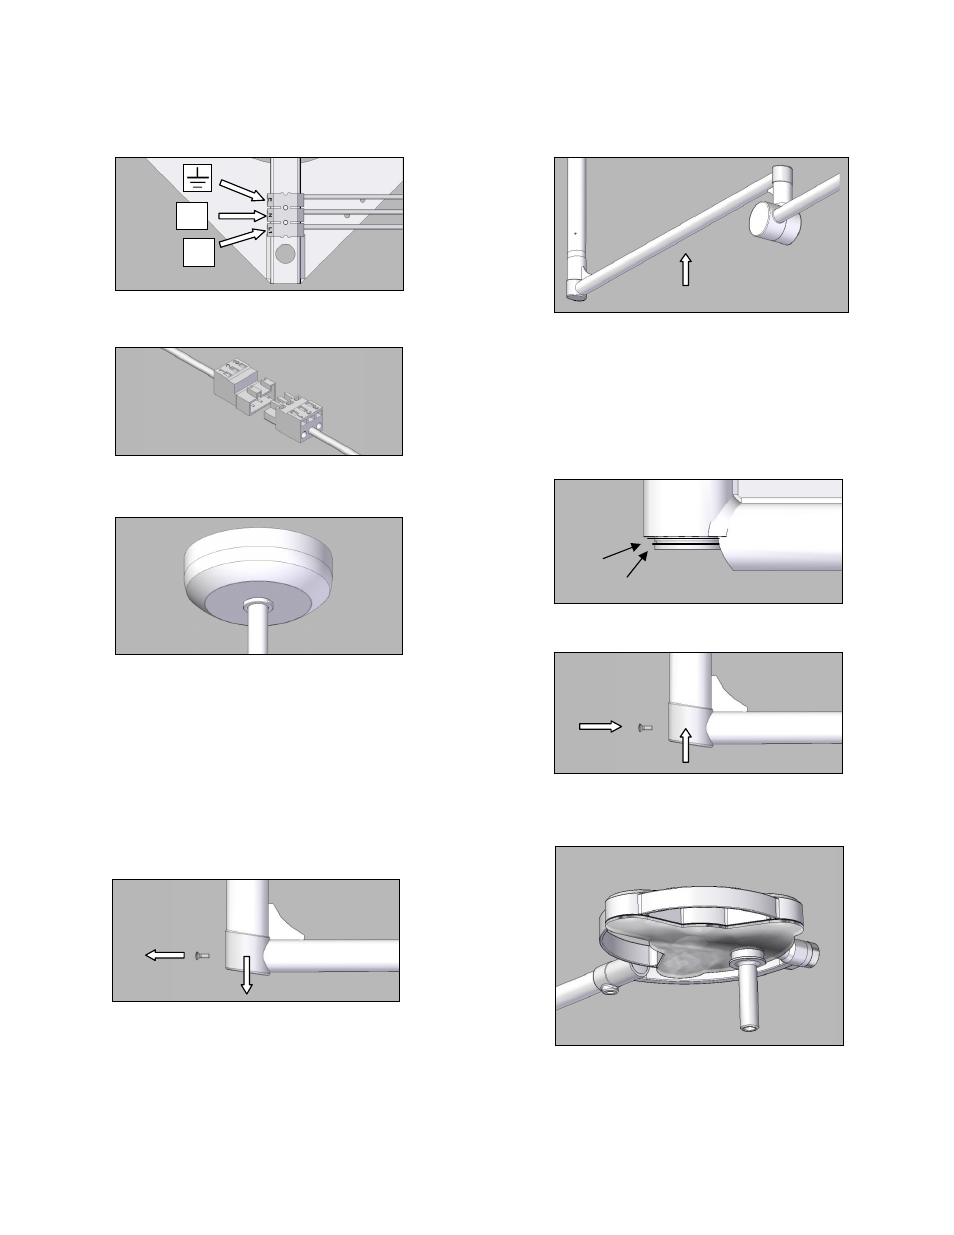
• Connect to the main power supply.
• Connect the lamp cable.
• Slide cover and ring over ceiling mount and screw
in place.
Installing ceiling arm
NOTICE
Observe the Ondal operating instructions supplied.
CAUTION
Danger of injury from unfolding spring arm.
• Remove screw on the side and remove cover cup
with plug.
• Installing ceiling arm.
CAUTION
Light may fall if inaccurately fastened.
• Locking ring must click into groove and be evenly
positioned all around.
• First install washer 1, then the locking ring 2.
• Pull on the plug with cover cup and fasten with
Allen screw.
• To continue with installing the light head see the
Installing Light Head section, later in this manual
Installation: Mira LED Ceiling Mount
INSTALLING triango 30 C; Installing ceiling mount
ENG
11
Check clearances.
CAUTION
Risk of injury from the falling luminaire.
The ceiling mounting must be fixed with the
mounting material corresponding to the
Material of the ceiling.
CAUTION
Risk of injury from the falling luminaire.
Two people are required for the installation.
NOTICE
Use safety equipment recommended by tool
manufacturer.
Drill holes and blow out with blower.
CAUTION
Risk of injury from the falling luminaire.
The ceiling must be solid concrete to
ensure a secure mount.
Use appropriate wall anchors.
Hold ceiling mounting against the ceiling and
knock in the masonry anchors using a
hammer.
Tighten the nuts (observing the torque
specified
by
the
ceiling
anchor
manufacturer).
Pull the lamp cable from the ceiling tube
through the mounting.
Insert the ceiling tube into the mounting.
Secure with the mounting screw M8 1
Tighten M8 locking screw and nut 1
Also tighten the 4 Allen screws in the
mounting 2
WARNING
Danger of death from electric shock.
Switch off circuit breaker before working on
the mains connection.
Connect to the main power supply.
Connect the lamp cable.
Slide cover and ring over ceiling mount and
screw in place.
1
1
2
240
170
L1
N
ENG
INSTALLING triango 30 C; Installing ceiling arm
12
5.3
Installing ceiling arm
NOTICE
Observe the Ondal operating instructions
supplied.
CAUTION
Danger of injury from unfolding spring arm.
Remove screw on the side and remove
cover cup with plug.
Installing ceiling arm.
CAUTION
Light may fall if inaccurately fastened.
Locking ring must click into groove and be
evenly positioned all around.
First install washer 1, then the locking ring 2.
Pull on the plug with cover cup and fasten
with Allen screw.
To continue with installing the light head see
Sec. 8
1
2