Install two channel harnesses – Great Plains 116-283A Installation Instructions User Manual
Page 8
8
Great Plains Manufacturing, Inc.
LOUP 2/3 CHANNEL SHAFT MONITOR
116-284M
2013-08-27
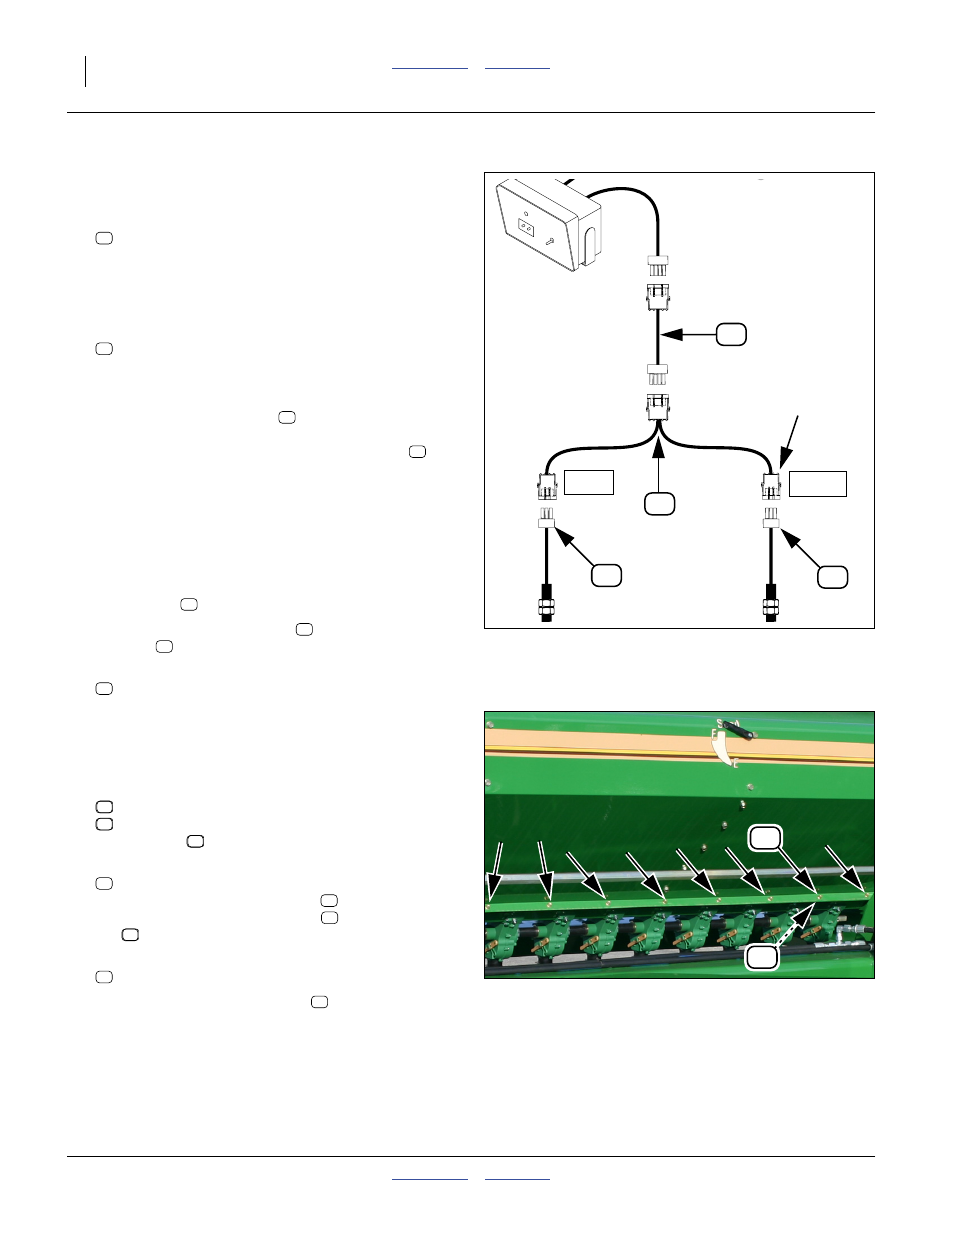
Install Two Channel Harnesses
Review the “General Harness Guidelines” on page 7.
41. Select one new:
318917 HARNESS 2 SHAFT MONITOR LOUP
Dress the harness across the drill, making sure that
the leads labelled LEFT and RIGHT are routed to
their respective seed boxes.
42. Select one new:
833-596C SHAFT MONITOR EXT. 25’4P WP
Note: On a two-point drill, this extension cable may not
be needed. If so, continue at step 44.
43. Dress the extension cable
along the tongue, or
through any accessory hitch. Make sure that the
connector that mates with the 2-way harness
toward the rear.
Verify that the forward end of the extension cable
reaches the hitch.
44. Route the 2-way leads through available holes and
near attachment points for cable ties.
45. Connect each 2-way lead to its respective shaft
sensor lead
46. Connect the extension cable
harness
47. Select all of new (not shown):
48. These clips are used to secure the sensor leads to
the flange that joins each seed box to its tray.
Allocate them for equal clip spacing on each box.
49. At each desired support point, remove the existing:
803-088C NUT HEX LOCK 1/4-20 FLG
Save the nut
50. Select all of new:
Insert the sensor lead in the clip
to the flange with the new screw
, and the saved
nut
51. Select all of new (not shown):
800-112C CABLE TIE .19X7.25 1.75D 50LB
52. Starting at the inner-most clips
cable along its route, leaving a little slack (more at
pivots).
Continue at “Install Monitor Console” on page 10.
Figure 10
Two Channel Harness
34215
LEFT
RIGHT
4-pin
weatherpak
3-pin
weatherpak
4-pin
weatherpak
Figure 11
Tray-to-Box Screws
34219