Install magnets, Shaft face install – Great Plains 116-283A Installation Instructions User Manual
Page 3
Install Magnets
Great Plains Manufacturing, Inc.
3
2013-08-27
116-284M
Install Magnets
Apply the instructions for “Tube Install” (step 10) or
“Shaft Face Install” (step 17 on page 4) for each
mounting position.
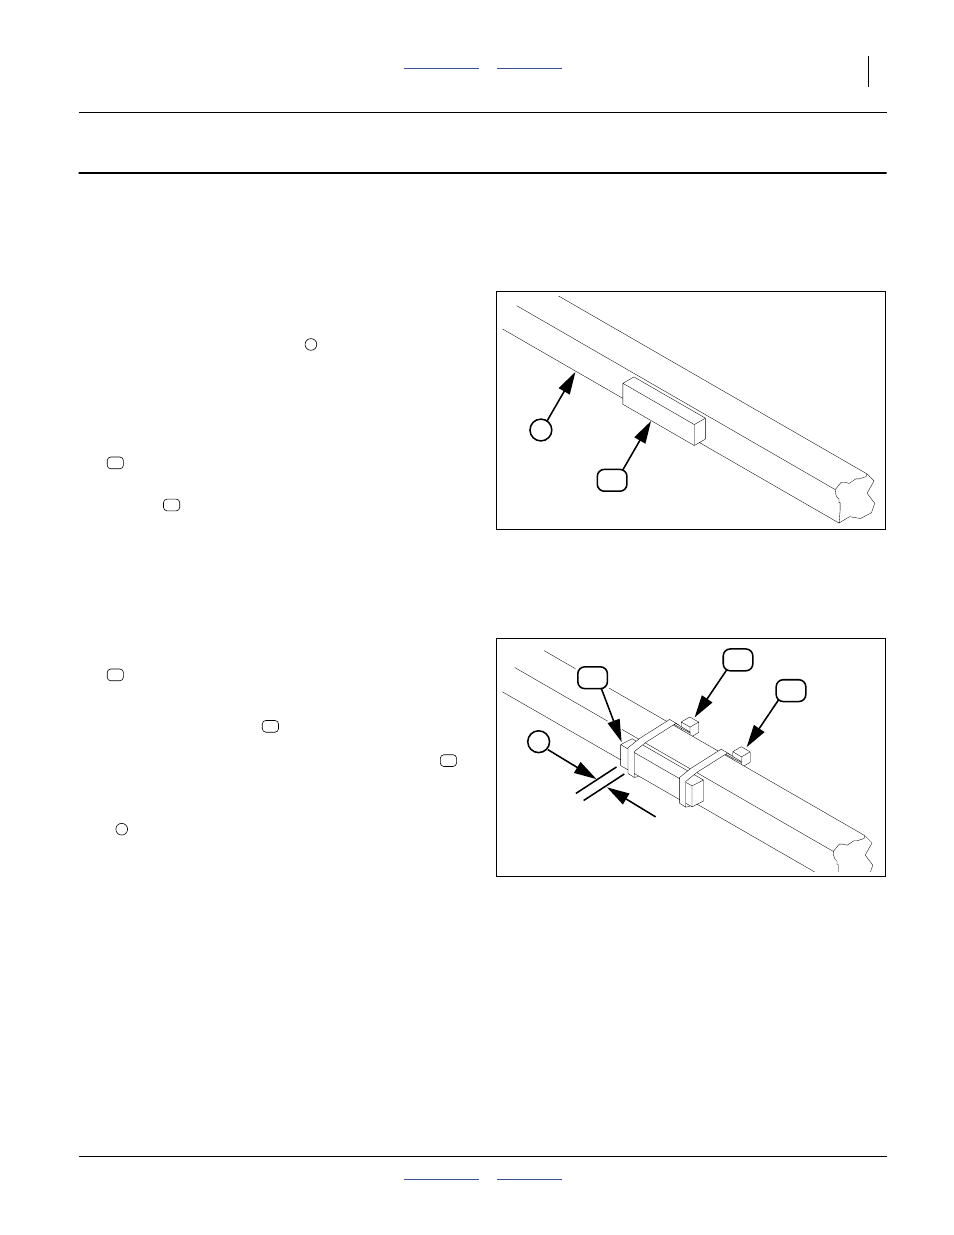
Shaft Face Install
If the location has a polymer tube over the shaft,
continue at “Tube Install” on page 4.
10. De-grease and dry the shaft
11. Using the calibration crank or other means to rotate
the shaft so that two faces are at vertical, and two
are horizontal.
12. Select one new:
540017 MAGNET, ADHESIVE BACKED, LARGE
13. Before removing the release backing, check that the
magnet
fits. If it does not fit, trim it as required,
keeping it longer than the minimum length specified
in the “Notes:” on page 2.
14. Remove the release backing film. Aligning with the
shaft center-line (and to the extent possible, in the
center of the cup-to-cup gap), apply the adhesive
side of the magnet to the shaft.
15. Select two new:
(These are the smaller ties)
Loosely install the ties
at each end of the magnet,
so that when finally tightened, the ratchet end of the
tie will be on the shaft face opposite the magnet
.
Position the ties so that the ends of the magnet are
exposed by at least dimension:
1
⁄
4
inch (6 mm).
Tighten the ties.
16. Continue with the next magnet location at step , or if
all magnets are installed, at “Drill Mounting Holes”
on page 5.
Figure 4
Magnet on Shaft
34212
3
3
Figure 5
Magnet Secured by Ties
34212
a