Install hose handle and jic fittings – Great Plains DVN8324 Assembly Manual User Manual
Page 23
Great Plains Manufacturing, Inc.
Assembly
19
11/25/2013
550-466Q-ENG
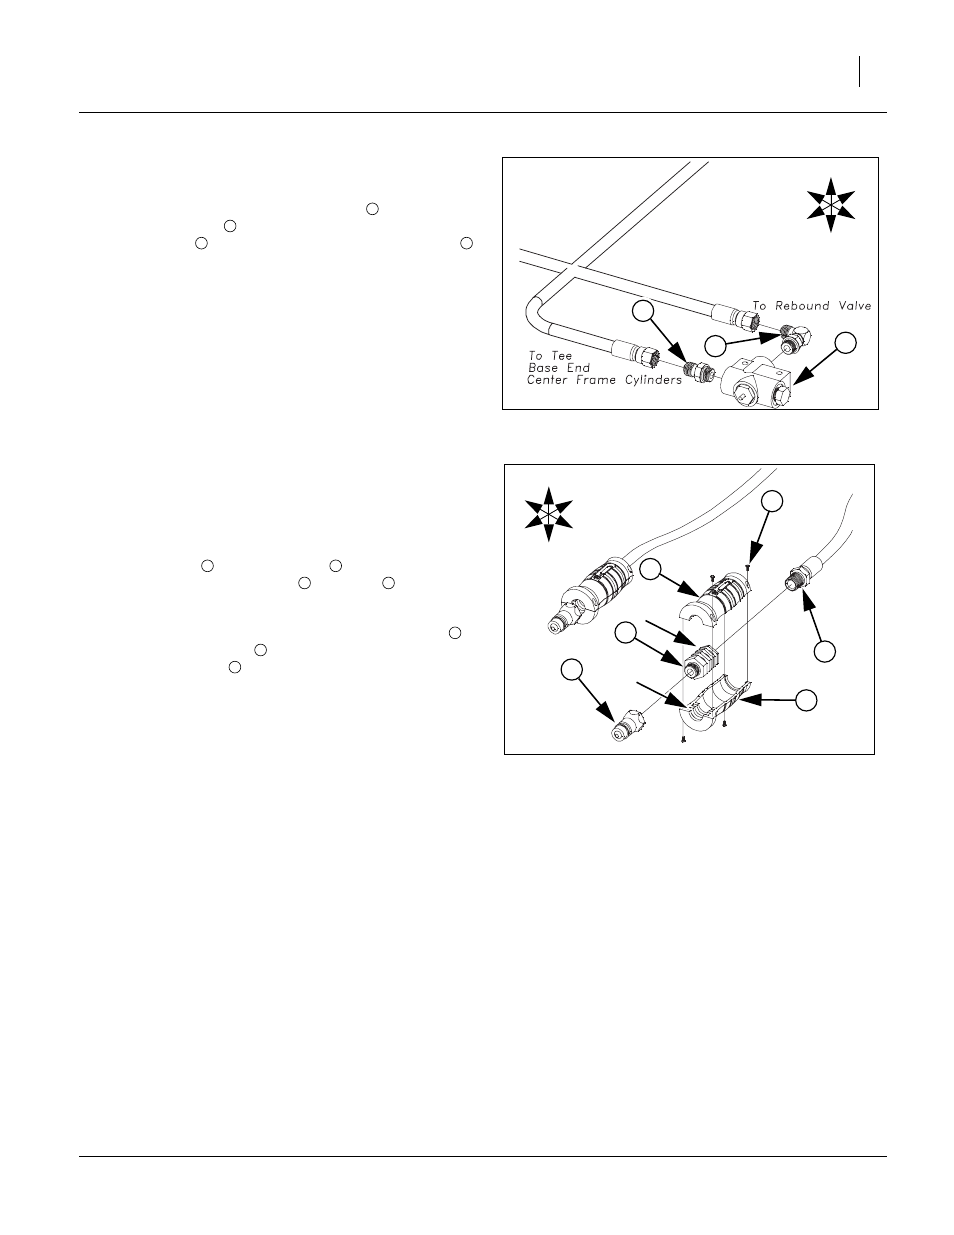
Install Depth Control Valve and O-Ring Fittings
82. Thread elbow (adjustable stud) fitting
into rear port of
depth stop valve
. Thread straight (non- adjustable
stud) fittings
into right port of depth control valve
.
83. Tighten as shown in steps 84-85.
Install Hose Handle and JIC Fittings
Note: Hose handles are color coded. See “Hydraulic Hose
Hookup” on page 20 for proper placement on hoses.
84. Install fittings
to end of hoses
running to front of
hitch. Attach poppet fittings
to fittings
.
85. Tighten as shown in steps 83-84.
86. Align the grooves in the front of the hose handles
with
the ribs in the fittings
as shown and install the self
threading screws
through holes.
87. Route hoses as shown in layout section in “Operator’s
Manual.
88. When the JIC hoses are routed, follow the following pro-
cedure for hooking up and tightening.
a.Inspect for possible contamination or damage from
shipping or handling. Sealing surface should be
smooth. Annular tool marks of (100uin) concentric with
thread permissible.
b.Lubricate the threads and the entire surface of the
cone with hydraulic fluid or a light lubricant.
c.Align mating componets for hand connection and turn
flare nut until sealing surfaces make full contact.
d.Torque nut to the values shown in “Torque Value Chart”
page 23. If a wrench pad is provided next to nut, place
a second wrench on pad to prevent flare from rotating
while being torqued.
e.
When torquing nut onto a straight flared fitting, it may be
necessary to also place a wrench on the flared fitting
wrench pad to prevent it from turning during assembly.
Figure 16
Depth Control Valve Fittings
42099
U
D
F
B
L
R
2
1
3
2
1
3
1
Figure 17
Hose Handle Assembly
41672
U
D
F
B
L
R
3
4
1
5
2
4
2
1
3
2
4
2
5