Insert pipe in hopper, Cap and position pipe, Drill 150 bu holes – Great Plains 401-516A Installation Instructions User Manual
Page 15: Step 53
Great Plains Manufacturing, Inc.
Installation Instructions
13
12/28/2007
401-514M
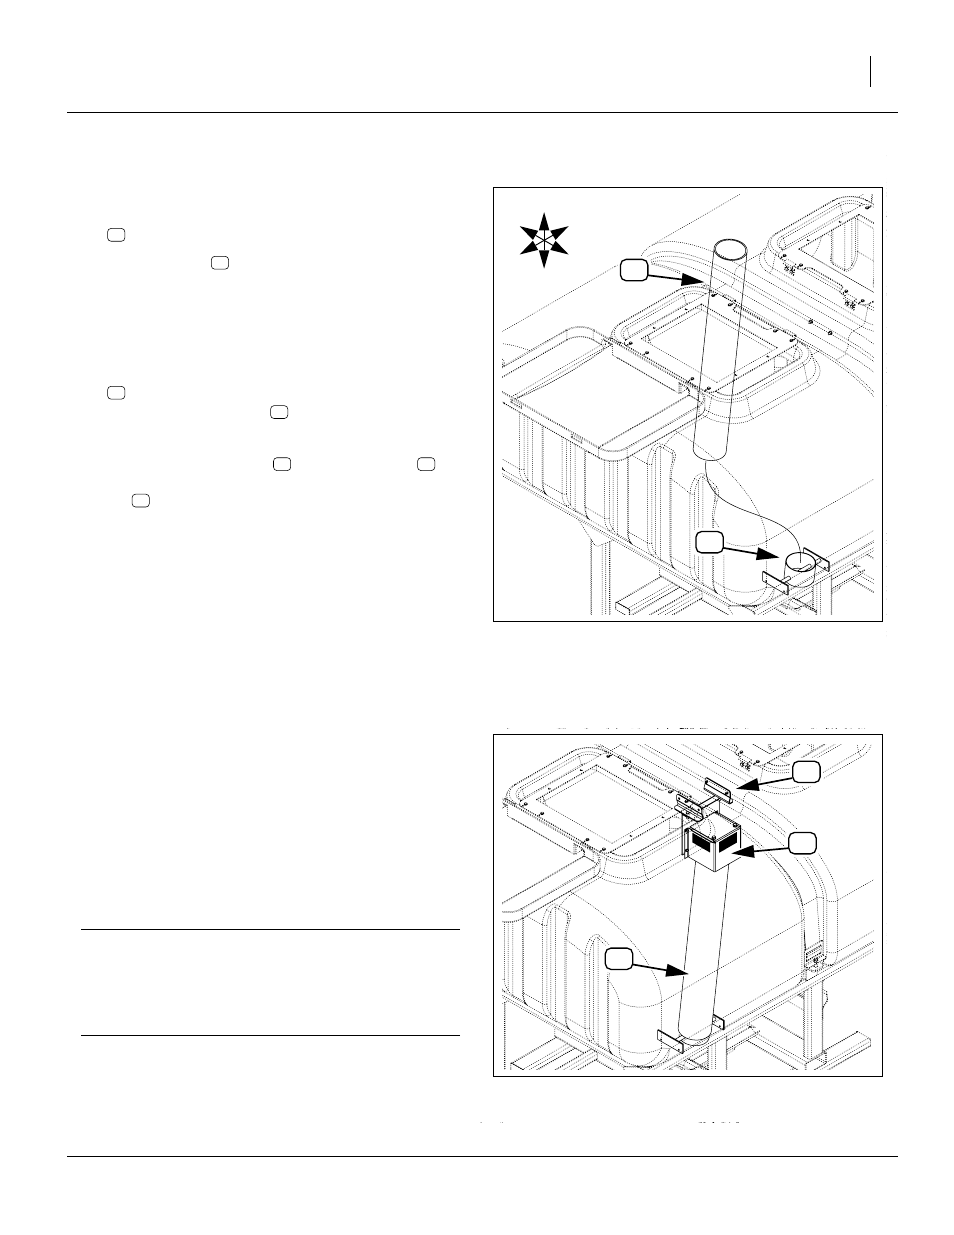
Insert Pipe in Hopper
Refer to Figure 16
50. Select one new:
403-427D 150 BU AIR PRESSURE PIPE
51. Insert the pipe
into the hopper and slide it over
the lower pipe support weldment. Have a second
worker hold it, or temporarily lean it against the back
of the hopper.
Cap and Position Pipe
52. Select the:
403-242S UPPER PIPE SUPPORT WELDMENT
with the angle brackets
Refer to Figure 17
53. Place the cap assembly
on top of the pipe
and
maneuver it so that the four holes in the angle brack-
ets
align with the marks for the holes to be drilled.
It may be necessary to temporarily remove one
angle bracket in some cases.
If all four holes cannot be aligned, align to the for-
ward holes. If both left and right side forward holes
cannot be aligned, use the left forward hole.
54. Make sure the angle bracket bolts are finger tight,
and make final marks for drilling. Fore-and-aft loca-
tion of the holes is not critical, but if a hole needs to
be re-marked, make sure the vertical position is on
the centerline marked at step 49.
Drill 150 bu Holes
These holes need to be drilled from the inside, as the
exterior channel of the stiffener rib is not wide enough for
most portable drills.
55. Swing the pipe assembly clear.
56. Drill pilot holes. Re-check hole placement and drill
final holes.
57. Sweep out any drill swarf that might eventually clog a
seed meter.
IMPORTANT !
If any error is made in hole drilling, close the hole with
a
5
⁄
16
in or 8mm bolt, washers and nut, coated with
silicone sealant. A hole left open adversely affects
seed delivery.
Figure 16:
Insert 150 bu Pipe
27364
U
D
L
R
B
F
Figure 17:
Position 150 bu Pipe
27366