Great Plains 3000 Operator Manual User Manual
Page 16
14
Section 3 Adjustments
2700 and 3000 Three-Point Drill 118-365M-A
9/9/10
Great Plains Mfg., Inc.
3. Position Seed-Cup Doors
For wheat and other small seeds. move the seed-cup-
door handles to the highest position. For soybeans
and other large seeds, lower the handles to the sec-
ond position. If excessive seed cracking occurs, lower
the handles to the third position. Move the handles to
the fourth, wide-open position for seed-cup clean out.
Make sure all handles are in the same position before
drilling.
Figure 3-12
Seed-Cup-Door Handle
4. Check Seeding Rate
a.
Record the weight of an empty container large
enough to hold the seed metered for one acre.
b.
Place several pounds of seed over three seed
cups on an outside end of the drill box. Pull the
seed tubes off these three openers.
c.
Raise the drill off the ground.
d.
Turn the gauge wheel a few turns to fill the cups
with seed. Turn wheel until seed drops to the
ground from all three cups.
e.
Place a container under the three seed tubes to
gather the seed as it is metered.
13867
f.
Turn the drive gauge wheel until one acre has
been tallied on the acremeter (200 rotations on
a 27-foot drill or 182 rotations on a 30-foot drill).
Check that the three seed cups have plenty of
seed coming into them.
g.
Weigh the metered seed. Subtract the initial
weight of the empty container. Divide by three
for the amount metered by each seed cup, then
multiply by the number of drill openers for the
pounds-per-acre seeding rate. If this figure is
different than desired, adjust the seed-rate han-
dle and recheck the rate.
NOTE: If your results vary greatly from the charts, you
may want to repeat the calibration procedure.
When satisfied with the rate, set the same seeding rate
on the opposite drill box by repeating steps 1 through 3.
Small Seeds Attachment
To calibrate the seeding rate on the optional small seeds
attachment, follow these steps.
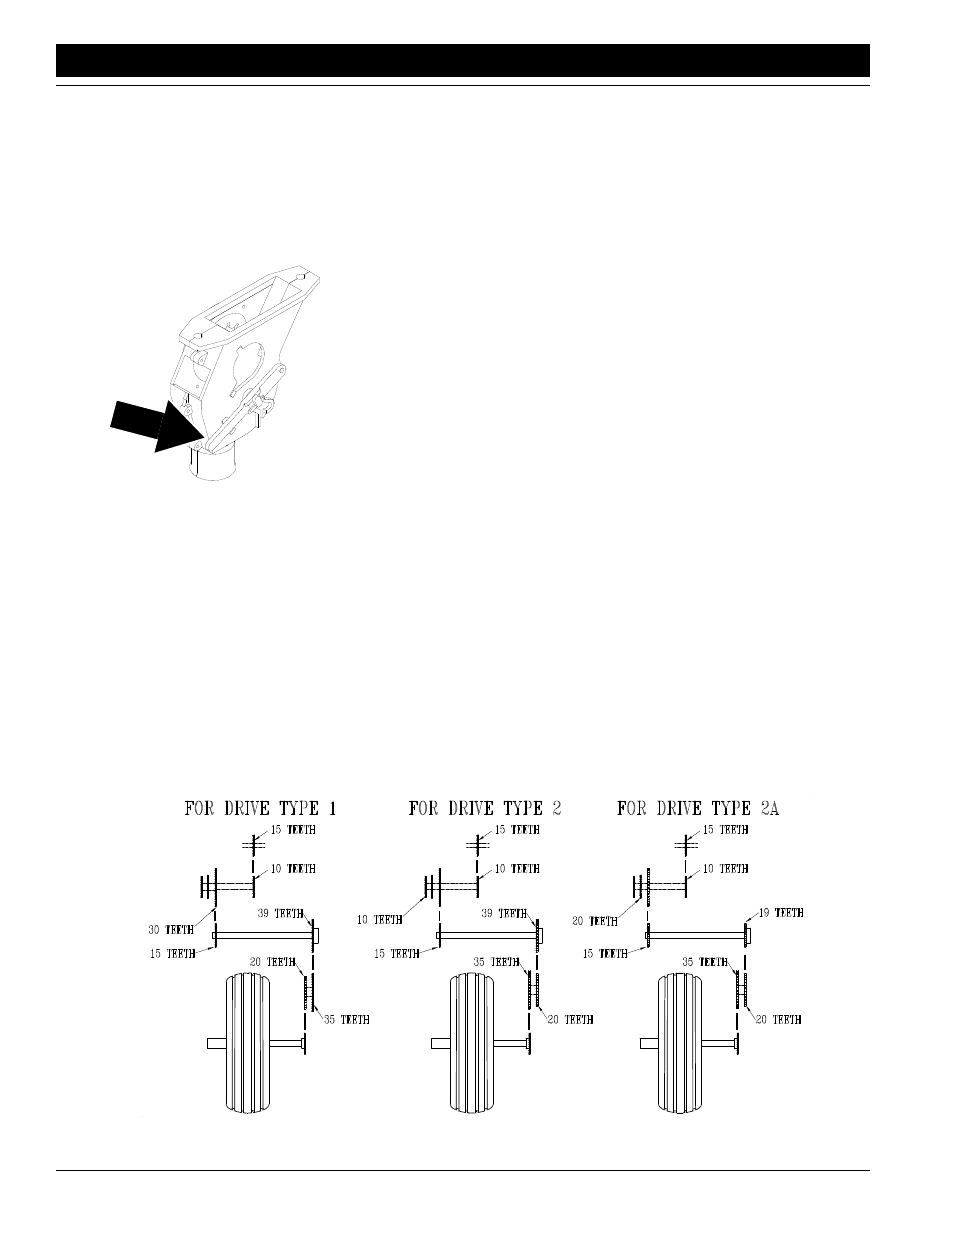
1.
Refer to Figure 3-13 for the proper small-seeds
sprocket arrangement given different drive types on
the main drill box. Arrange the sprockets on the
small-seeds attachment according to which drive
type you will use on the main drill box.
NOTE: For accurate metering on the small seeds at-
tachment, the main drill box sprockets must be set to
drive type 1, 2 or 2A.
2.
Set the seed-rate adjustment handle on the small
seeds attachment as indicated by the chart on
Small Seeds Attachment Seed Rate Chart, page
17.
3.
Calibrate the small seeds attachment to your mate-
rial by following the steps under Check Seeding
Rate, page 14.
Figure 3-13
Small Seeds Sprocket Arrangements
16399