Close-out, Appendix, Chain setup – Great Plains YP Fertilizer Ground Drive Update User Manual
Page 8: Chain clip orientation, Chain slack
8
Great Plains Manufacturing, Inc.
Ground Drive Update
407-630M
04/11/2011
Close-Out
47. Remove all part number tags, grease-pencil and
paint-pencil part numbers.
48. Fill the pump with clean water or RV antifreeze.
This completes the installation.
Appendix
Chain Setup
Set chain clip orientation when mounting chains and
check it before adjusting slack on factory-installed
chains. Set or check initial slack on all chains prior to
delivery.
Chain Clip Orientation
Refer to Figure 13 (arrow shows chain direction)
Whenever mounting a chain, make sure the clip at the
removable link is oriented to minimize snags.
Install clip with open end facing away from direction of
chain travel (shown by gray or striped arrows in chain
routing diagrams).
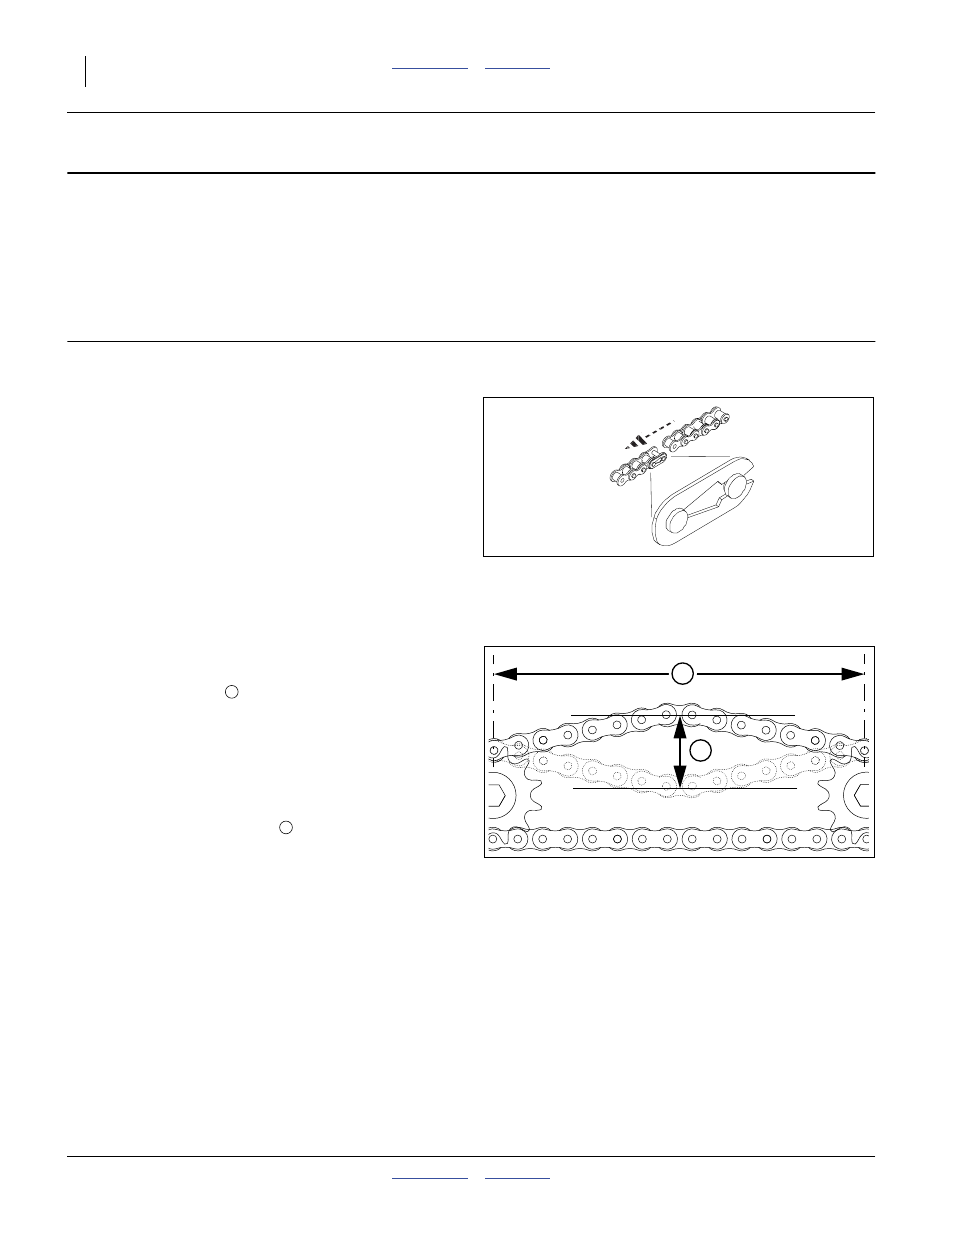
Chain Slack
Refer to Figure 14, which, for clarity, greatly exaggerates
slack, and omits the idlers.
1.
Measure the span
for allowable slack:
Locate the longest span of each chain (usually the
span which does not run through the idlers).
2.
Determine the ideal slack:
Long chains (over 91cm/36in): 2.1cm/m (
1
⁄
4
in per ft)
Vertical short chains: 2.1cm/m (
1
⁄
4
in per foot)
Horizontal short chains: 4.2cm/m (
1
⁄
2
in per foot).
3.
Measure the current slack
:
Acting at a right angle to the chain span at the center
of the span, deflect the chain in both directions. The
slack is the distance of the movement.
4.
Adjust the idlers for ideal slack.
.eps
60%
Figure 13
Chain Clip Orientation
26482
.eps
50%
Figure 14
Measuring Chain Slack
27264
2
1