Transfer saved parts, Install upper idlers, Install sprockets – Great Plains YP Fertilizer Ground Drive Update User Manual
Page 5: Install spring
Transfer Saved Parts
Great Plains Manufacturing, Inc.
5
04/11/2011
407-630M
Transfer Saved Parts
Install Upper Idlers
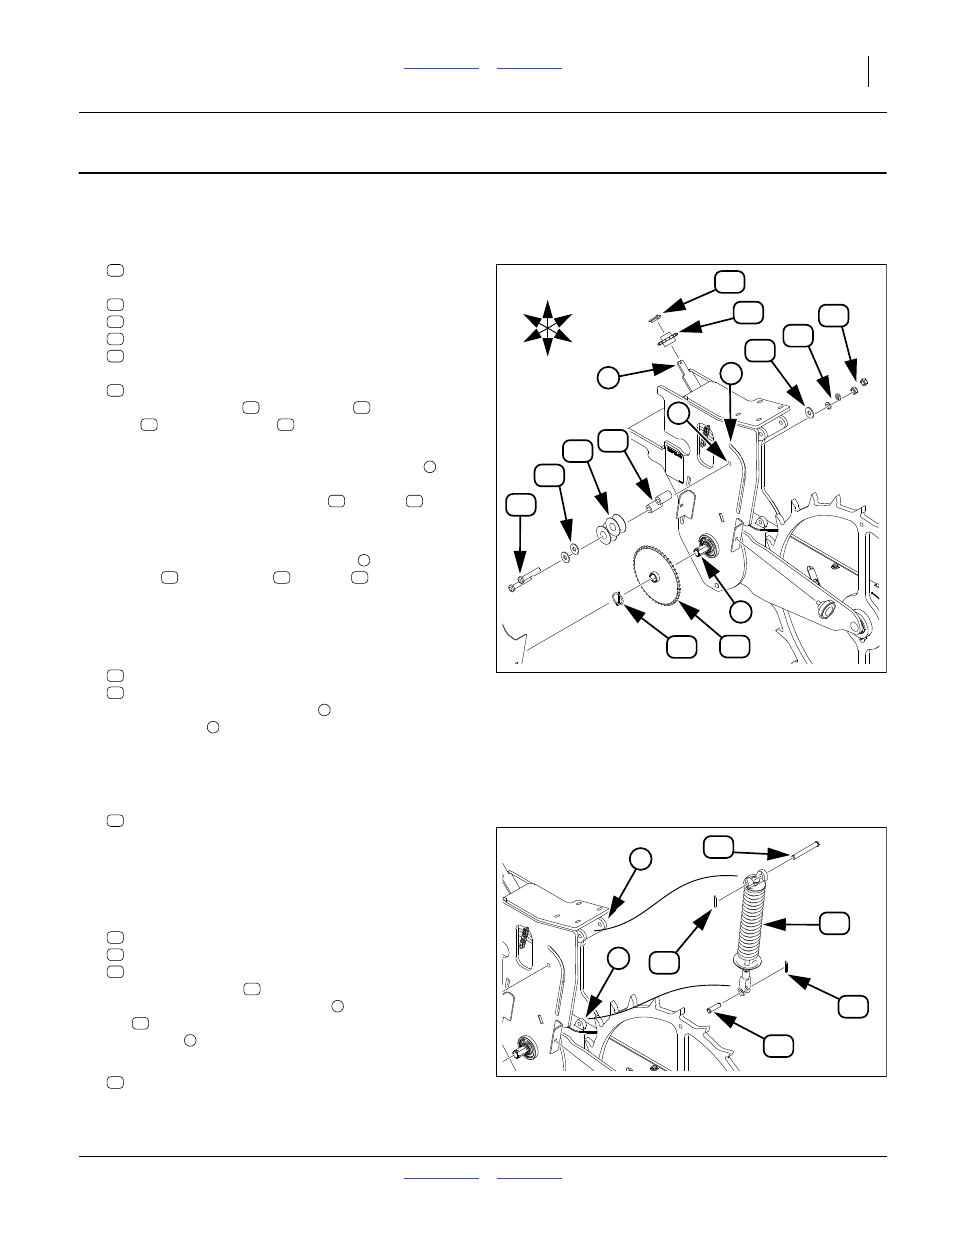
Refer to Figure 6
24. Select two saved:
817-406C IDLER 1 PC 2.38X1.01X1.062
two sets new:
407-598D IDLER PIVOT TB 1ODX.56IDX1.84L
804-015C WASHER LOCK SPRING 1/2 PLT
and three new:
804-113C WASHER FLAT 1/2 USS HARD PLT
Place a flat washer
on each bolt
. Add a saved
idler
and a pivot tube
25. From the left side of the mount weldment, insert one
of the bolt assemblies through the single hole
inside the arc of the slot. Secure to Grade 5 torque
specification with a lock washer
and nut
not use a second flat washer on this bolt assembly.
26. From the left side of the mount weldment, insert the
other bolt assembly through the slot
washer
, lock washer
and nut
, finger-tight.
Slack is adjusted after installing the chain at step 40.
Install Sprockets
27. Select one each saved:
808-147C SPKT 40C15 X 7/8 HEX BORE
808-262C SPKT 40C47 X 7/8 HEX BORE
Place one on the storage post
the pivot shaft
. Select which goes where by where
they were previously installed. This update does not
change fertilizer rate. The previous Range setup is
likely to be the correct for the next use of this planter.
28. Select two saved:
805-240C PIN LINCH 3/16 X 1 9/16 LONG
Secure the sprockets at tree and shaft.
Install Spring
Refer to Figure 7
29. Select one each saved:
805-234C PIN CLEVIS 1/2 X 4 PLATED
805-127C PIN CLEVIS 1/2 X 1 3/4
121-763S OPENER SPRING ROD ASSY. SHRT.
Use the shorter pin
to connect the clevis end of
the spring to the lower (arm) lug
pin
to connect the base end of the spring to the
upper lugs
30. Select two new:
805-045C PIN COTTER 5/32 X 1 1/4 LG
Secure both clevis pins.
Null4
Figure 6
Install Idlers and Sprockets
32111
1
2
U
D
L
R
B
F
3
4
1
2
3
Null4
Figure 7
Install Spring
32111
5
6