Section 2 operating instructions, Prestart checklist tractor requirements, Hitching tractor to drill – Great Plains 2N-3010 Operator Manual User Manual
Page 17: Warning, Prestart checklist, Tractor requirements
15
Section 2 Operating Instructions
12/27/05
2N-2410 and 2N-3010 Folding No-Till Drill 196-126M
Great Plains Mfg., Inc.
Section 2
Operating Instructions
This section will help you prepare the tractor and drill for
use. It will also give you general operating procedures. Ex-
perience, machine familiarity and the following information
will lead to efficient operation and good working habits. Al-
ways operate farm machinery with safety in mind.
Prestart Checklist
1.
Carefully read “Important Safety Information,” page
1.
2.
Lubricate the drill as indicated under Lubrication,
“Maintenance and Lubrication,” page 41.
3.
Check all tires for proper inflation as indicated on Tire
Inflation Chart, “Appendix,” page 50.
4.
Check all bolts, pins and fasteners. Torque as speci-
fied on Torque Values Chart, “Appendix,” page 50.
5.
Check the drill for worn or damaged parts. Repair or
replace them before going to the field.
6.
Check hydraulic hoses, fittings and cylinders for leaks.
Repair or replace them before going to the field.
7.
Check disk scrapers for proper adjustment. Refer to
Disk Scraper Adjustment, “Adjustments,” page 34.
8.
Check that the drive-clutch linkage is operating proper-
ly. The clutch jaws should be fully engaged with the drill
in seeding position. When the drill is fully raised the
clutch jaws should be completely separated.
9.
Rotate both gauge wheels to see that seed cups and
drive are working and free from foreign material.
Tractor Requirements
Recommended Minimum Tractor Size
24-foot drill - 165 horsepower
30-foot drill - 200 horsepower
NOTE: When determining tractor size, soil type, terrain
and tillage practices must be considered.
!
WARNING!
Towing the drill at high speeds or with a vehicle that is not
heavy enough can lead to loss of vehicle control. Loss of vehicle
control can lead to serious road accidents, injury and death.
The reduce the hazard:
• Do not exceed 20 mph.
• Use a towing vehicle heavy enough to control the drill.
Minimum Towing Vehicle Weight
16,000 pounds
Hydrualics
Your tractor must have two remote outlets.
Safety Lights
Your tractor must be wired for the standard 7-pin electrical
connector. If your tractor is not equipped with this connec-
tor, consult your dealer for installation.
Hitching Tractor to Drill
1.
Use the drill jack to raise or lower the tongue as need-
ed. Hitch the drill to the tractor using a hitch pin of ad-
equate strength (at least one inch in diameter).
2.
Install a retaining clip on the hitch pin to prevent it from
working up. Securely attach drill safety chain to tractor
drawbar.
!
WARNING!
Escaping fluid under pressure can have sufficient pressure to
penetrate the skin causing serious injury. Avoid the hazard by
relieving pressure before disconnecting hydraulic lines. Use a
piece of paper or cardboard, NOT BODY PARTS, to check for
leaks. Wear protective gloves and safety glasses or goggles
when working with hydraulic systems. If an accident occurs, see
a doctor immediately. Any fluid injected into the skin must be
surgically removed within a few hours or gangrene will result.
3.
Connect hydraulic hoses to tractor remotes. One pair
of hoses is for the field-lift cylinders. The other pair is
for raise-to-fold, transport-lock, fold and marker cylin-
ders.
4.
Plug the control-console cable to the drill harness.
Plug the drill light cable to the tractor.
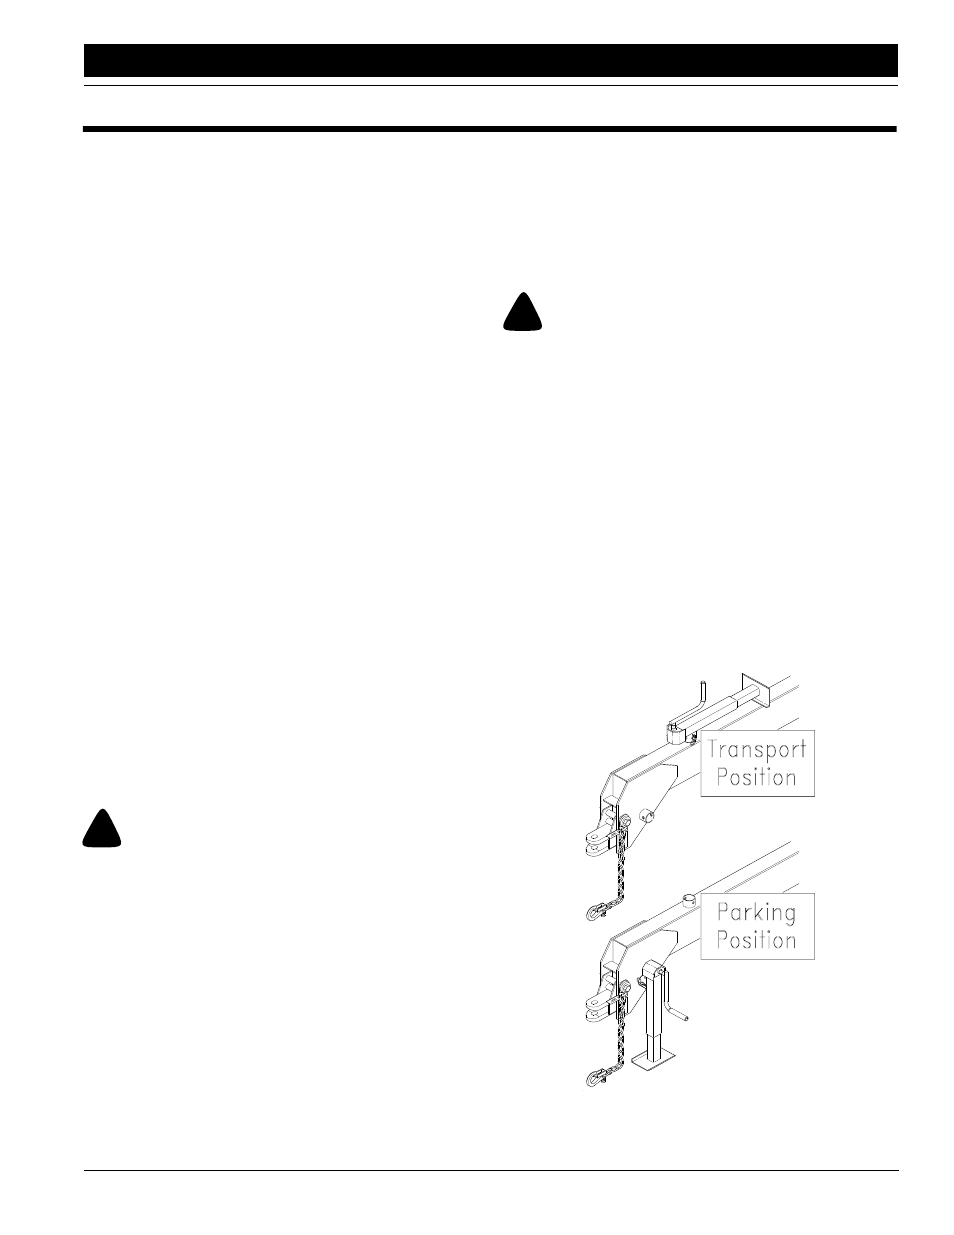
5.
Crank the jack until tongue weight is resting on the
tractor drawbar. Unpin the tongue jack from the hitch-
ing stub. Pin the jack to the stub on top of the tongue
as shown in Figure 2-1.
Figure 2-1
Jack Positions
12782