Warning – Wheatheart WHR 130 x 51-71ft Augers PTO User Manual
Page 27
WHEATHEART - GHR & WHR GRAIN AUGERS
3. A
SSEMBLY
GRAIN AUGERS SD
3.9. T
RANSPORT
U
NDERCARRIAGE
30662 R1
27
e. Tighten slotted spindle nut until hub drags slightly. Back off nut about 1/4
turn until hub turns freely.
f. Install cotter pin and dust cap.
Note:
Installing tires may not leave you with enough clearance to position and attach
undercarriage once auger tube is raised. If so, install wheels after assembly is
complete.
g. Check that pressure of pre-inflated tires matches pressure indicated on tire
sidewall. Mount wheels on hubs and attach with six 1/2” x 1-3/4” wheel
bolts.
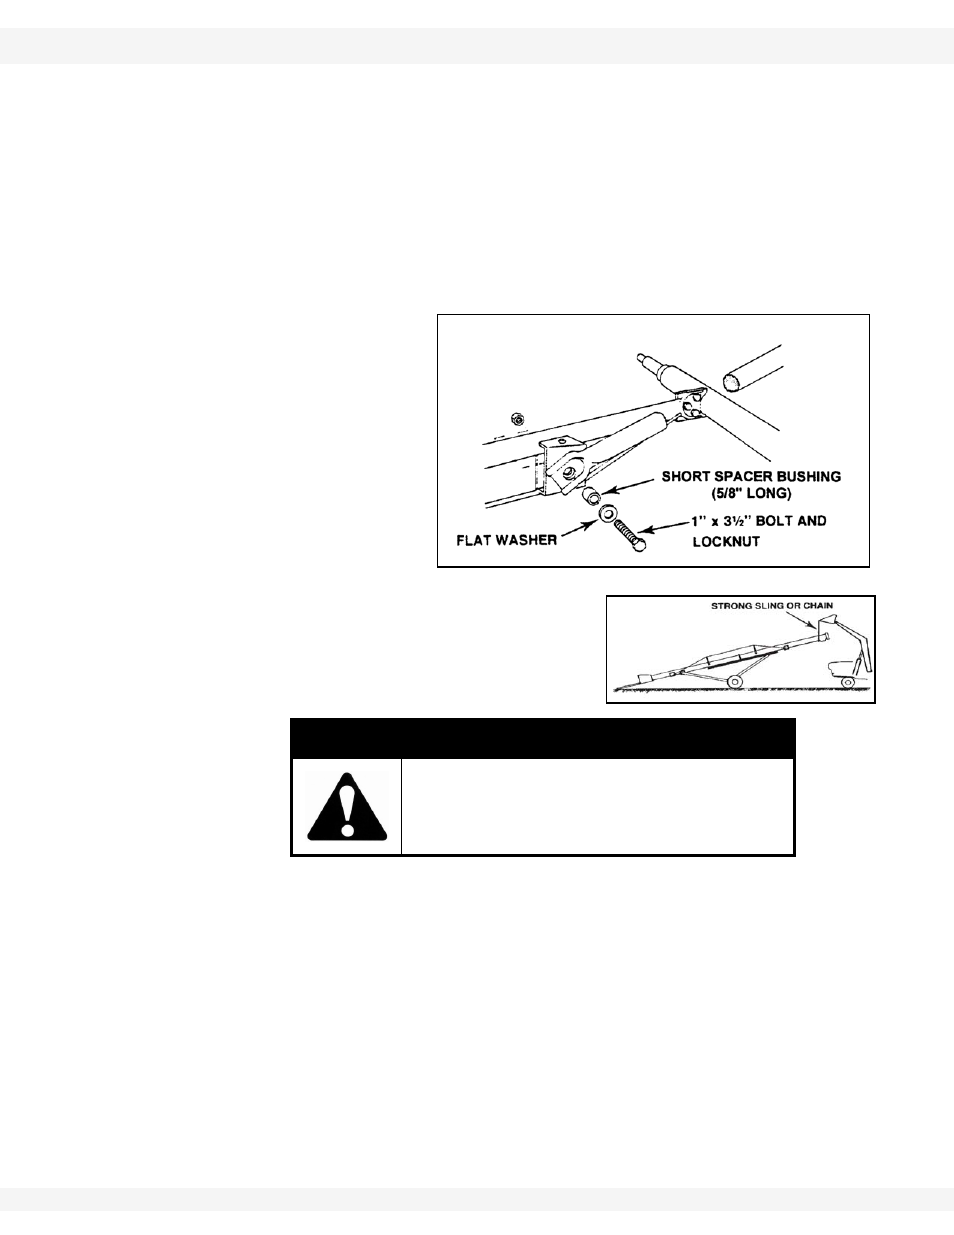
6. Fasten upper lift arms
to lower reach arms
using two short
spacer bushings (5/8”
long), flat washers,
and 1" x 3-1/2” bolts
and locknuts. Tighten
securely. Lift arms
pivot on the spacer
bushings (Figure
3.14).
7. Raise
the
discharge
end of auger with a front end loader and a
strong sling / chain or block and tackle.
The height should be sufficient to clear
undercarriage assembly.
8. Position
undercarriage beneath auger tube, then position stabilizer braces
(A) as shown in Figure 3.15. Attach lower reach arms to bracket on tube with
long spacer bushings (7/8” long), flat washers, and 1" x 3-1/2” bolts and
locknuts. Tighten securely. Reach arms pivot on the spacer bushings.
Important:
Refer to Figure 3.11 for correct placement of lower reach arms.
9. Fasten flat braces (B) to first set of holes (furthest from intake) on stabilizer
braces (A) with one 5/8” x 2" bolt and locknut. Place one 5/8” x 1-1/2” bolt
and locknut in other hole of stabilizer brace.
WARNING
Do not remove tube support until assembly at
end of Section 3.10. has been completed.
Figure 3.14