Winchester Repeating Arms X3 Shotgun User Manual
Page 38
36
37
NOTICE! do not disasseMble the trigger grouP
beyond this Point.
r
einStallation
oF
the
t
rigger
g
roup
1. Make sure the bolt is in the forward position.
2. Insert the trigger group into the receiver. Align the
holes in the trigger group with the holes on each side
of the receiver.
3. Reinsert the trigger group pins and gently tap them
into place with a plastic or wooden mallet, again using
caution not to scratch the receiver.
r
emoving
the
b
olt
a
SSemblY
1. Remove the trigger group as explained on page 35.
2.
Pull the operating handle to the rear until the bolt
locks in the open position.
3. Remove the barrel, gas piston, piston sleeve and
piston sleeve spring as explained previously.
4. Place the bolt in the forward position by holding
the operating handle and pressing the carrier
release button.
NOTICE! never allow the action to slaM
closed by Pressing the carrier release
button without the barrel installed. iF the
bolt is released Forward with the barrel
reMoved, the oPerating handle will hit the
receiver and cause daMage.
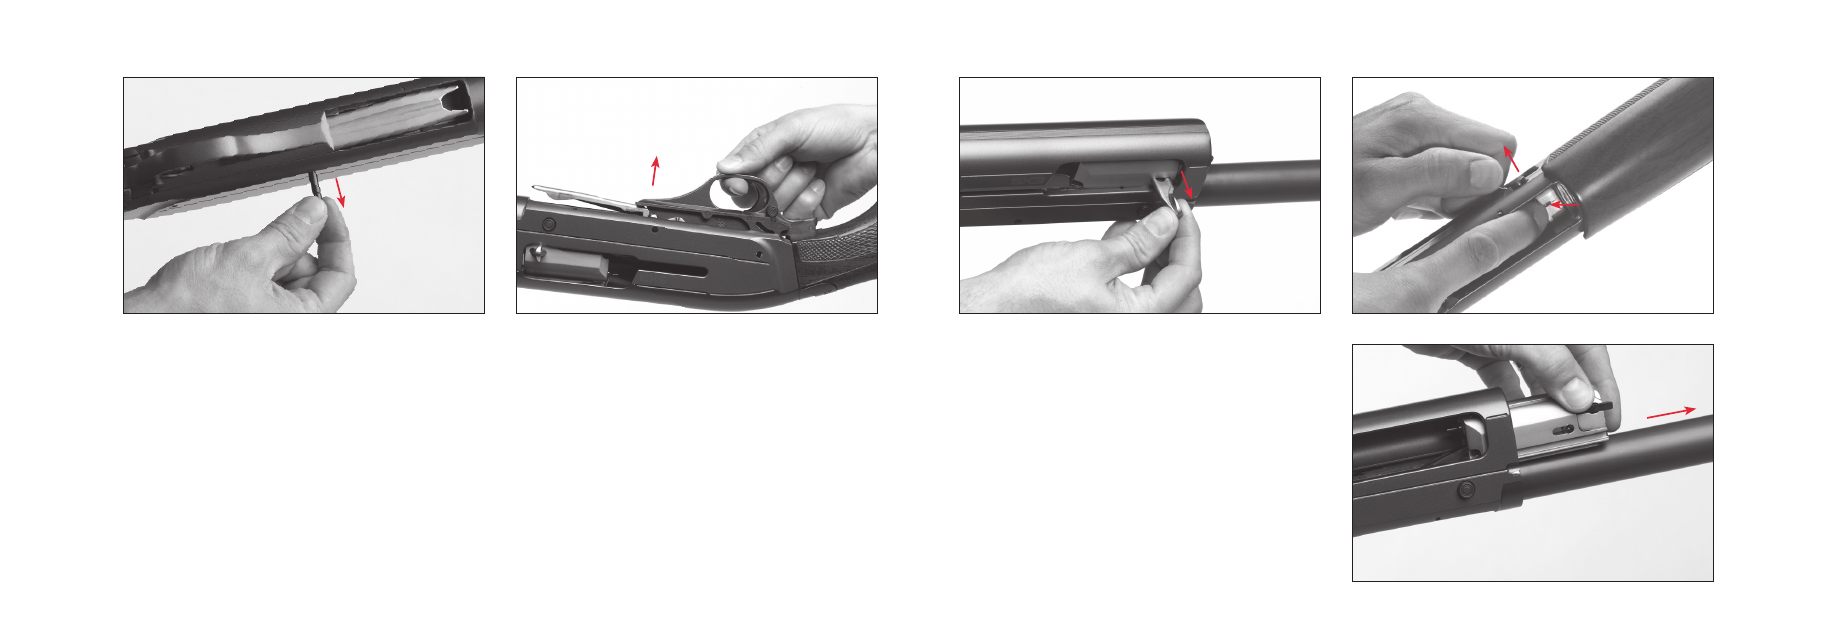
5. On 12 gauge models, remove the operating handle
by pulling it outward (Figure 27).
On 20 gauge models, remove the operating handle by
holding the shotgun with the loading port up. Press
the shell stop while pulling outward on the operating
handle (Figure 28).
6. On 12 gauge models, slide the bolt assembly forward
and out of the receiver (Figure 29).
On 20 gauge models, press the shell stop and slide the
bolt and bolt slide forward and out of the receiver.
FIGURE 26
Lift the trigger group
from the receiver.
FIGURE 25
Pull the pins completely
free from the receiver
with your fingers.
FIGURE 27
Remove the bolt handle (12 gauge).
FIGURE 28
Press the shell stop and pull
on the operating handle to
remove the handle (20 gauge).
FIGURE 29
Remove the bolt assembly forward,
out the front of the receiver.