The bearing housing assembly – Viking Pump TSM270.2: RL 16 and 25 High Pressure User Manual
Page 7
SECTION TSM
270.2
ISSUE
A
PAGE 6 OF 12
SECTION TSM
270.2
ISSUE
A
PAGE 7 OF 12
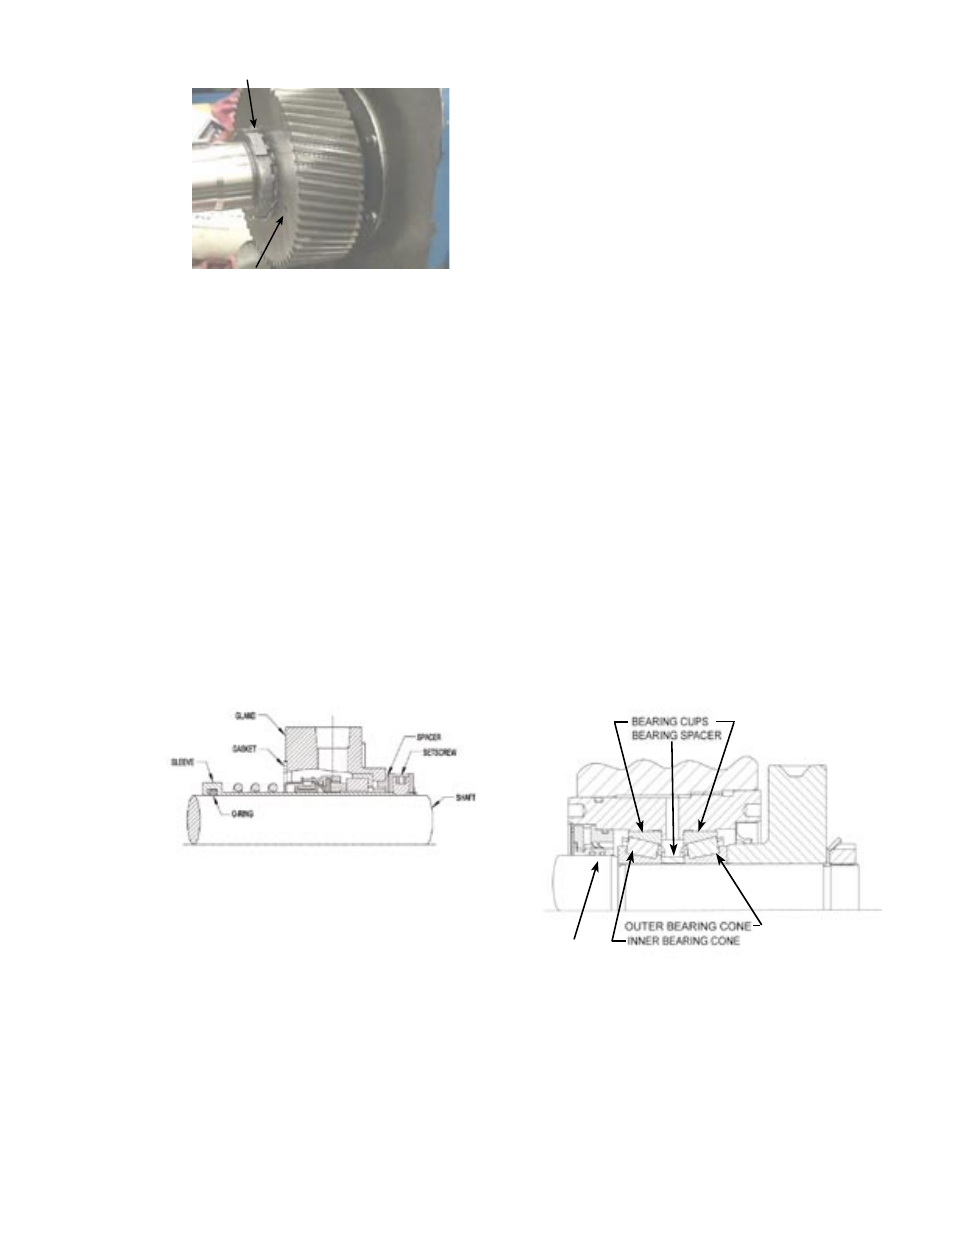
Bearing Lockwasher Tabs
3/8” Jackscrew Holes
FIGURE 6
7. Slide the timing gears off the shafts. If the timing gears
do not come off easily, use jackscrews (Suggested
Repair Tools # 6) (figure 6).
8. Loosen the setscrews (item 28) in the bracket that
secures the bearing housings.
9. Remove the Bearing Housing Assemblies using the
spanner wrench (Suggested Repair Tools # 4). For
complete Bearing Housing Disassembly, see page 7.
10. Remove the capscrews (item 32) and the bracket.
11.Remove the four capscrews and washers that hold
each cartridge mechanical seal in place and remove
the seals. Refer to figure 4. For other optional sealing
instructions refer to Mechanical Seal Information on
pages 5 and 6.
12. Remove the driven and driver lobe/shaft assemblies.
FIGURE 7
SINGLE CARTRIDGE SINGLE MECHANICAL
SEAL
THE BEARING HOUSING ASSEMBLY
DISASSEMBLY
1. Remove the retaining ring. See Figure 8.
2.Remove the labyrinth seal, and replace if needed.
CAUTION: The tapered roller bearings and spacers are
supplied as matched sets. Do not mix with cups, cones or
spacers from other sets.
ASSEMBLY
CAUTION: If the tapered roller bearings are not being
replaced, be sure to keep each cup with its respective cone,
because they track to each other during operation.
1. Press both bearing cups into the bearing housing.
2. Install the matching bearing cone closest to the labyrinth
seal first. Apply a lubricant to the ID and into the groove
on the face of the labyrinth seal and install. Install the
retaining ring.
3. On the opposite side, install the spacer, remaining
bearing cone and press in the lipseal.
FIGURE 8
3.Remove the bearing cones and inspect both cups and
cones and spacer for wear. Replace if necessary. Do
not remove the bearing cups unless they are to be
replaced, as they are pressed in.
LABYRINTH SEAL