20” high velocity floor fan assembly instructions, Model: hvff 20 – Ventamatic HVFF 20 User Manual
Page 2
20” HIGH VELOCITY FLOOR FAN
ASSEMBLY INSTRUCTIONS
Your MaxxAir™ fan requires minimal assembly. Only a Philips screwdriver is required to
complete the assembly.
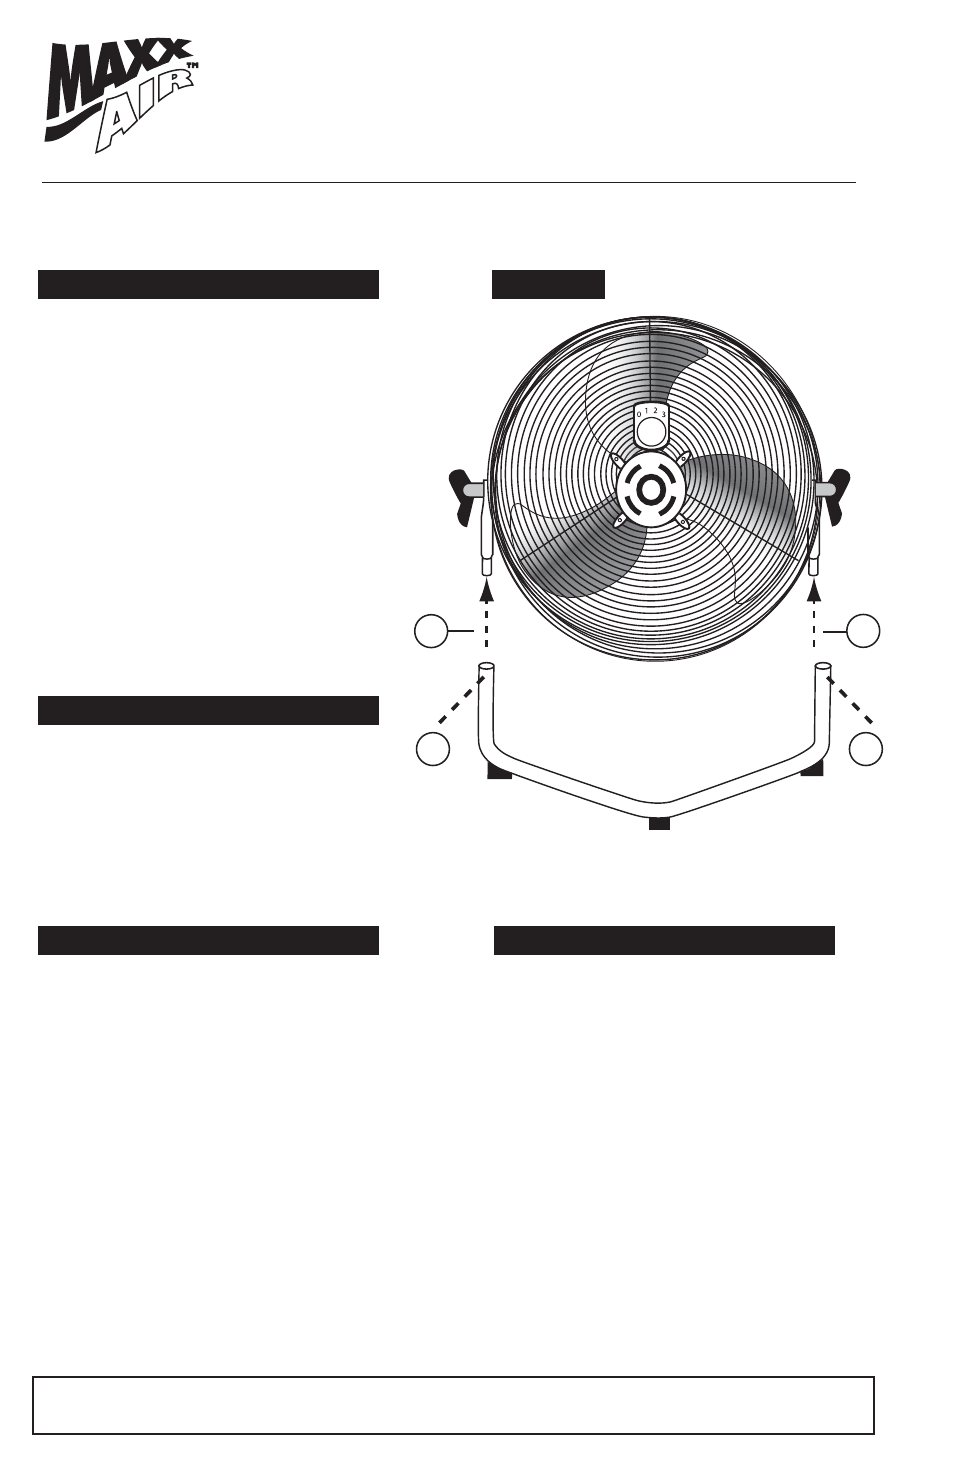
1. Remove two screws from V-shaped
tube base. Retain screws for use in
Step 4 below.
2. Slide one end of V-shaped tube
base to the fan support tube with
smaller end (Fig 1 A in diagram).
3. Slide the other end of the
V-shaped tube base to the second
other fan support tube with
smaller end (Fig 1 B in diagram).
4. Align the holes in each side of the
tube base with the holes in each
side of the fan tube. (Fig 1 C in
diagram). Secure with screws
removed in Step 1.
1 A
1 B
1 C
1 C
1. Use adjustment knobs on either
side of fan to loosen tilt nut by
turning counterclockwise.
2. Adjust fan head to desired tilt.
3. Tighten both knobs by turning
clockwise.
1. Rotate switch to LOW (3), MEDIUM
(2) or HIGH (1) speed for respective
air velocity.
PLEASE NOTE:
It is normal for the fan motor to feel
warm to the touch after continuous
operation. This fan features a
thermal cutoff that will automatically
shut off the motor should it overheat
for any reason. If this happens,
unplug the fan from the outlet
immediately.
WARNING: Unplug the fan from
electrical supply before cleaning.
• Use soft, damp cloth to clean fan.
Remove any moisture with clean,
dry cloth.
• Do not use any cleaning solution
that is harmful to paint or plastic.
• Do not bend blades when cleaning
fan.
PLEASE NOTE: The motor bearings in your MaxxAir™ fan are permanently sealed and
DO NOT REQUIRE additional lubrication.
If you should have any questions about the operation of your MaxxAir™ High Velocity Floor
Fan, please contact Ventamatic, Ltd. toll free at 1.800.433.1626
MODEL: HVFF 20
TUBE BASE ASSEMBLY INSTRUCTIONS
HOW TO ADJUST TILT
SPEED CONTROL
CLEANING
FIGURE 1