Installation, Unpacking new equipment, Hand torch installation – Tweco PWH-M 2A User Manual
Page 17: Machine torch installation, Installation -1, Hand torch installation (figure 2-a), Machine torch installation (figure 2-c)
Installation
2-1
Manual 0-2005
INSTALLATION
Figure 2-A
3
1
2
2.1. UNPACKING NEW
EQUIPMENT
Unpack the equipment, check for possible damage dur-
ing shipment. Check to be sure all items on the pack-
ing list are identified and accounted for.
WARNING
Check to be sure the main disconnect switch sup-
plying power to the welding system is open.
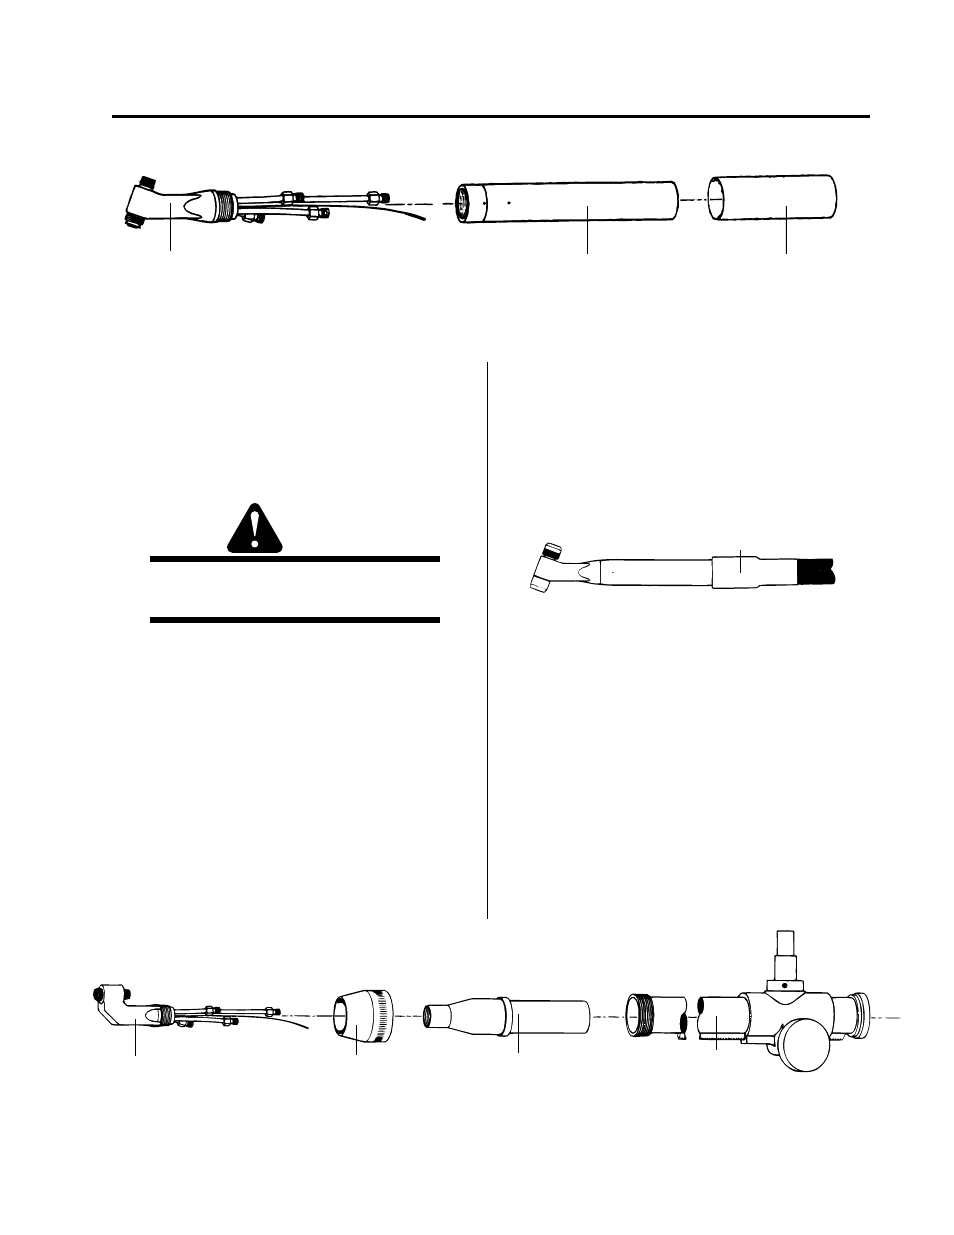
2.2. HAND TORCH INSTALLATION
(Figure 2-A)
If the torch is not already attached to the leads, as-
semble as follows:
1) Remove the handle (Item 2) from the head as-
sembly (Item 1).
2) Feed the end of the leads with the torch fittings
through the shrink tubing (Item 3) and then the
handle (Item 2) and connect to the torch (Item
1), matching the color coded lead to the color
coded torch fitting. Do not overtighten.
3) Screw the handle onto the torch.
4) Slide the shrink tubing over the handle until
about 1/2 on. With a heat gun shrink the tubing
until it is snug on the handle and the leads (Fig.
2-B).
5) Connect the other end of the leads to the appro-
priate fittings on the plasma welding console.
Shrink 0n
Figure 2-B
2.3. MACHINE TORCH
INSTALLATION (Figure 2-C)
If the torch is not already attached to the leads, assemble
as follows:
1) Loosen the nut (Item 2) and remove the posi-
tioning tube assembly (Item 4).
2) Unscrew the sleeve adaptor (Item 3).
Figure 2-C
1
2
3
4