Tweco PakMaster 75XL Plus (CE) User Manual
Page 24
INSTALLATION
3-8
Manual 0-2782
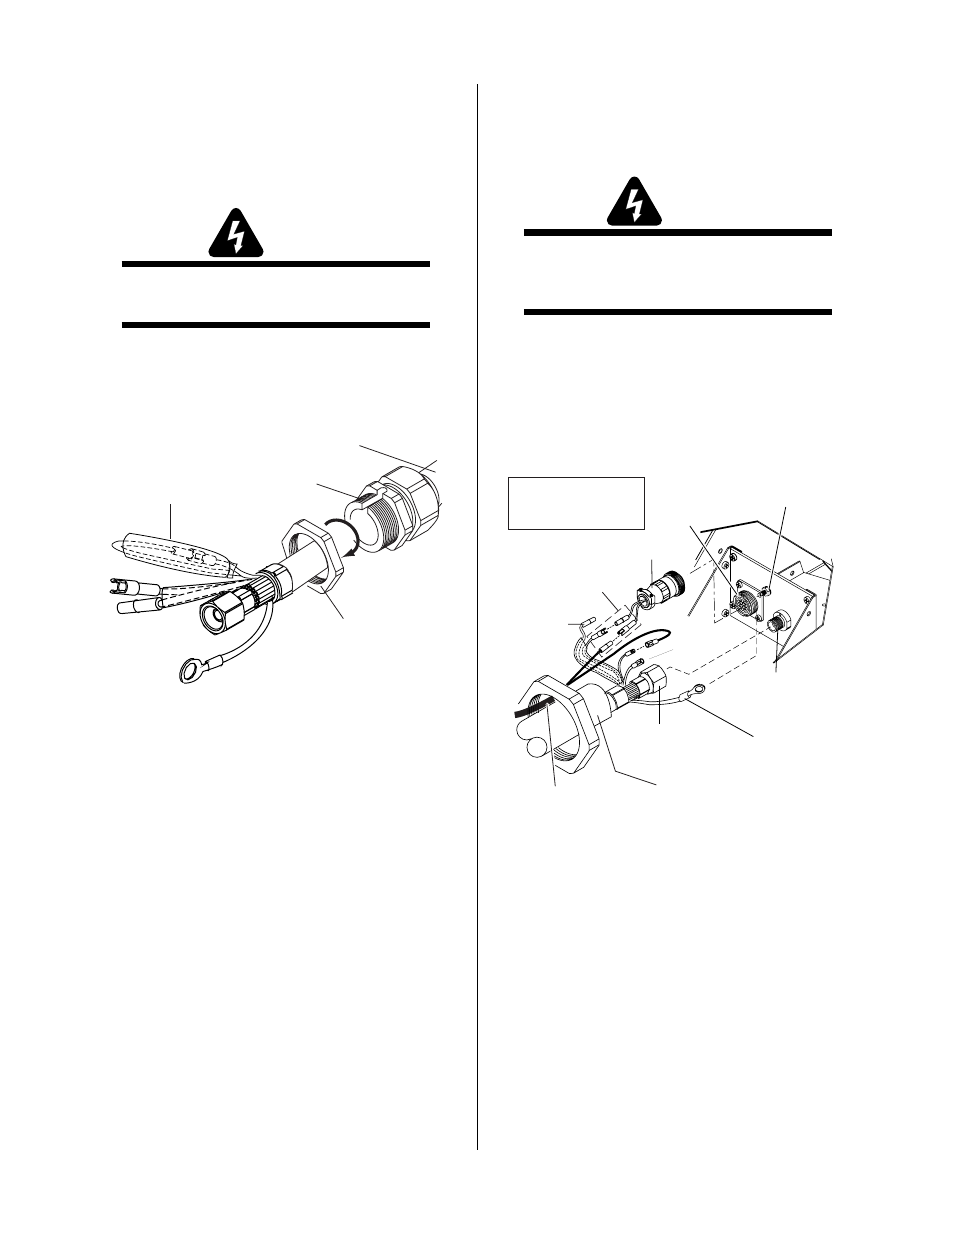
D. Machine Systems (SL100 Torch)
Torches with O2B connectors connect directly to the
power supply bulkhead. Mechanized torch leads with
O2B connectors require a remote pendant adapter to ac-
cept a remote pendant.
WARNING
Disconnect primary power at the source before dis-
assembling the torch or torch leads.
1.
Remove the Strain Relief Nut from the Strain Re-
lief.
Strain Relief
Nut
Strain Relief
Torch Leads
Assembly or ATC Adapter
A-03530
Remove Tie Wrap,
Remove Insulator,
Disconnect Wires
Strain Relief Nut Removal
2.
The leads Assembly includes two wires joined with
mating connectors and covered with an insulat-
ing sleeve. Remove the tie wrap and insulating
sleeve. Disconnect the two joined wires.
3.
Feed the end of the torch leads and the Strain Re-
lief into the hole in the unit.
4.
Route the wire harness on the Remote Pendant
Adapter through the Strain Relief and Strain Re-
lief Nut. Tighten the Strain Relief Nut to secure
the Strain Relief to the Power Supply.
5.
Connect the Negative / Plasma lead to the bulk-
head connection inside the power supply.
6.
Connect the control circuit connectors on the Torch
Leads to the mating connectors on the Remote
Pendant Adapter and Power Supply Adapter (see
Warning).
WARNING
There are two additional connectors that are not
used and must be taped out of the way to prevent
contacting the Negative / Plasma or Pilot Leads.
7.
Remove the top nut and washer from the Pilot Stud
on the power supply bulkhead.
8.
Place the Torch Leads Pilot lead terminal on onto
the stud and secure with the nut and washer re-
moved in the above Step.
A-03675
Torch Lead
Assembly
Control Circuit
Connectors
Open
Open
Power Supply
Adapter
Pilot Lead
Negative/Plasma
Lead
Adapter
Connector
Pilot Lead Stud
Negative/Plasma
Lead Connection
Note: Actual Bulkhead
configuration may
differ from that shown.
Remote Pendant
Adapter Wire Harness
Bulkhead Connection - Unshielded Machine Torch
with O2B Fittings and Remote Pendant Adapter
9.
Connect the Torch Leads connectors and the re-
mote pendant adapter connector to the power sup-
ply adapter as shown.