Saw bench mounting, Replacing the saw blade – Triton TA184CSL User Manual
Page 12
12
GB
• Check that the saw bench is equipped with
appropriate blade guarding and ensure that
they are properly adjusted and functioning
correctly before operating.
• Ensure the saw is mounted securely
to the bench. Refer to the
manufacturers instruction manual
for mounting instructions.
• Run saw up to ensure it is running smoothly
before attempting any cutting.
• Check that your saw bench is fitted with an
anti-kickback device.
• Make sure a suitable safety on/off switch is
fitted to the saw bench. The saw switch may
then be locked on using a spring clamp, cable
tie or similar and then plugged into the safety
socket on the
saw bench. This clamp MUST be taken
off when the saw is removed from the
saw bench.
• Using all safety equipment make a test cut in
an off cut piece of material making sure all
guarding is set up correctly before continuing
with your bench sawing.
SAW BENCH MOUNTING
Only use 185mm (71⁄4”) blades, with a kerf
between 2.2 & 3.5mm, designed for circular saws
with a no-load speed rating of at least 5000rpm.
Never fit high speed steel blades or abrasive
discs. Fitting of other purpose or different sized
blades will void the warranty.
• Do not fit inferior blades. Regularly check
the blade is flat, sharp and free of cracks or
defects.
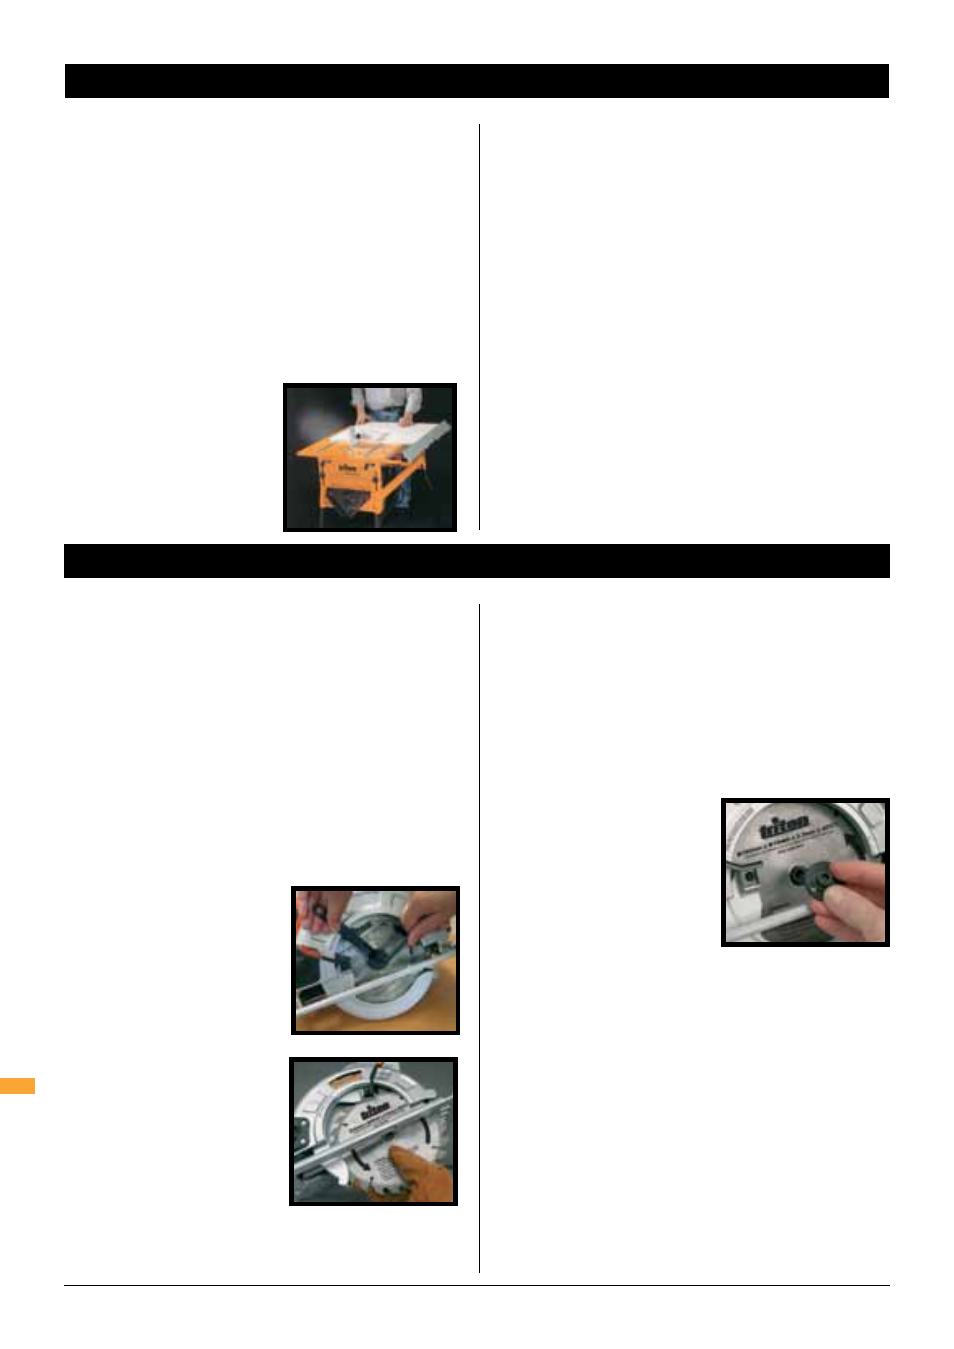
1. Ensure the saw is disconnected from power.
2. Place the supplied pin wrench (20) inside the
two holes located on the
outer blade flange. Insert
hex key (21) into the hole
in the blade bolt.
Whilst tightly holding
pin wrench turn hex key
in the direction of the
blades rotation (anti-
clockwise). When the
blade bolt is free from
the arbor hole remove
the bolt and blade flange.
3. Hold the retracting blade guard (14) fully back,
carefully slide the blade through the baseplate
and position it onto the inner washer on
the shaft, as the blade teeth are very sharp
protective gloves are required. The graphics
should face out and the arrow on the blade
should point in the same direction as the arrow
in the guard.
4. Fit the blade taking care
to locate it correctly onto
the inner flange. Refit
the outer blade flange
than lightly screw the
blade bolt through the
outer blade flange.
Double check the blade
seats flush between the inner and outer flanges
than tighten firmly with pin wrench and hex
key.
REPLACING THE SAW BLADE
Replacing the Saw Blade
12