Step 2 - disassembly, Step 3 - wiring, Maintenance – tekmar 095 Replacement Kit for Snow Sensor User Manual
Page 2: Step 4 - assembly
© 2013
M3065_D - 06/13
2 of 4
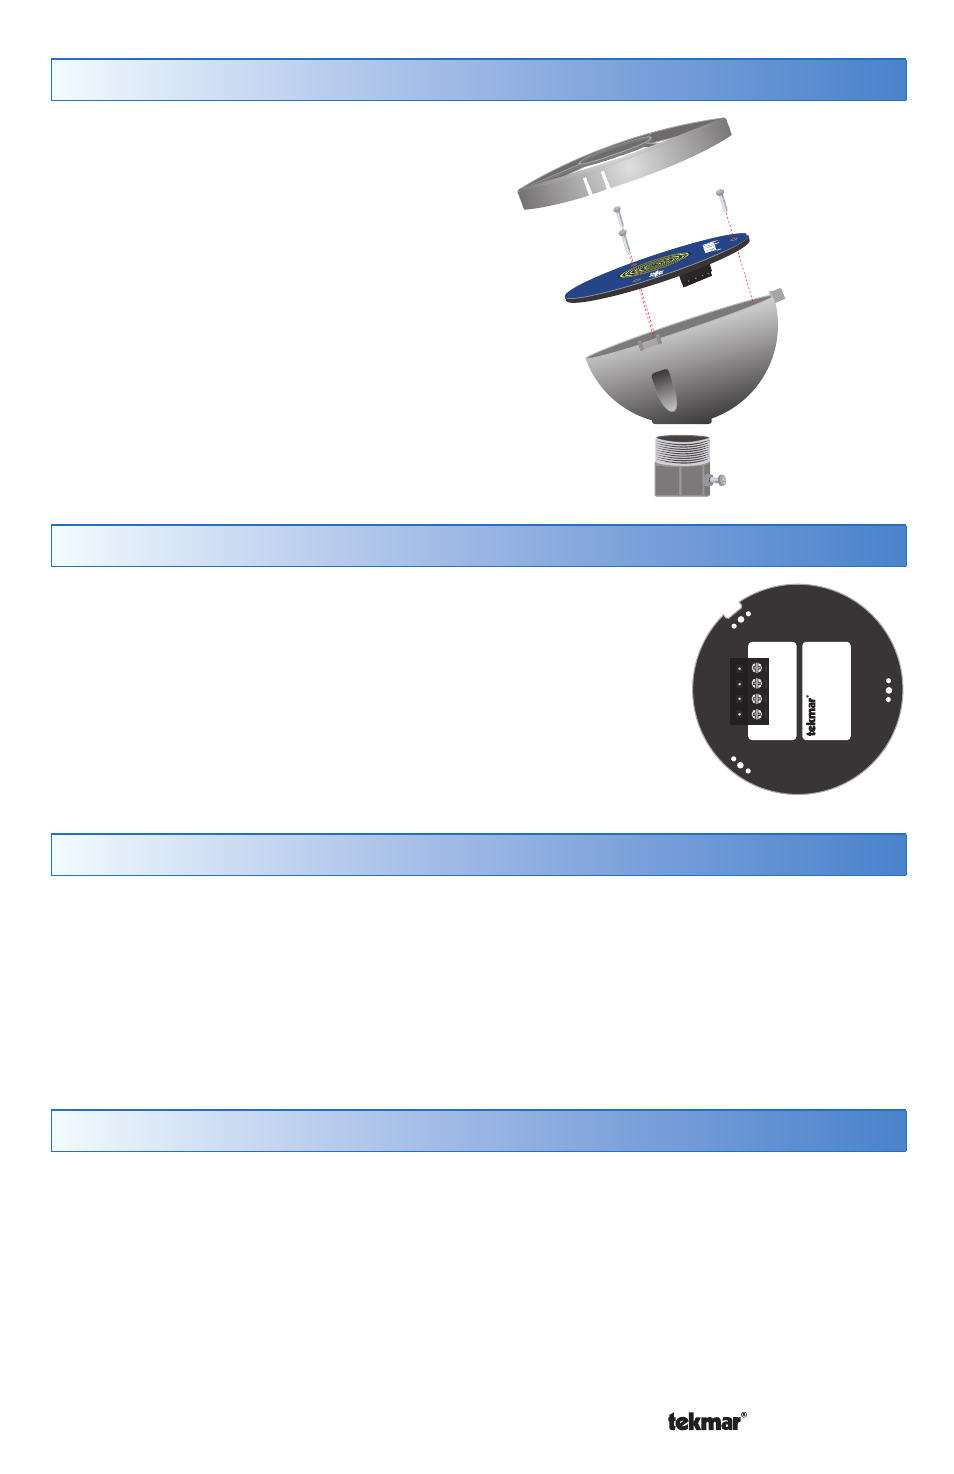
Step 2 - Disassembly
1. Remove the outer ring by pulling up on the
three catches.
2. Remove the three screws.
3. Remove the blue sensor disk from the
sensor enclosure.
Avoid scratching any part of the surface of
the blue sensor disk. Scratches will result
in corrosion not covered by warranty.
Outer Ring
M3065
Sensor Disk
Sensor
Enclosure
Conduit Adapter
(not included)
Step 3 - Wiring
Remove the wiring terminal block by pulling up from the blue
sensor disk. Connect the 4 conductor wire to the yellow (YEL),
blue (BLU), red (RED) and black (BLK) wiring terminations. If
the installed 4 conductor cable uses a different color code, then
make a note of the wire color versus the wiring terminal color
names. Push the wiring terminal plug onto the pins of the blue
sensor disk. At the Snow Melting Control location, connect the
corresponding wires to the yellow, blue, red and black wire
terminations.
YEL
BLU
RED
BLK
Sno
w Sensor 095
A
e
rial Mounting
Designed & Assembled in Canada
www
.tekmarContr
ols.com
Maintenance
The sensor is installed in a harsh environment. Accumulation of dirt on the surface of the
sensor may affect snow detection. The sensor should be checked on a periodic basis
and, when necessary, cleaned.
1. Remove the outer ring by pulling up on the three catches.
2. A cloth with warm soapy water can be used to clean any dirt.
3. Rinse with water.
4. Align the three notches of the outer ring with the sensor body and push down until
each of the three corners have snapped on tight.
Step 4 - Assembly
1. Align the blue sensor disk tekmar logo with the highest point of the sensor enclosure
body. The blue sensor disk has a notch that ensures the sensor is installed in the
correct position.
2. Insert the three screws into the holes and screw them until tight. Do not over
tighten.
3. Align the three notches of the outer ring with the sensor body and push down until
each of the three corners have snapped on tight.